
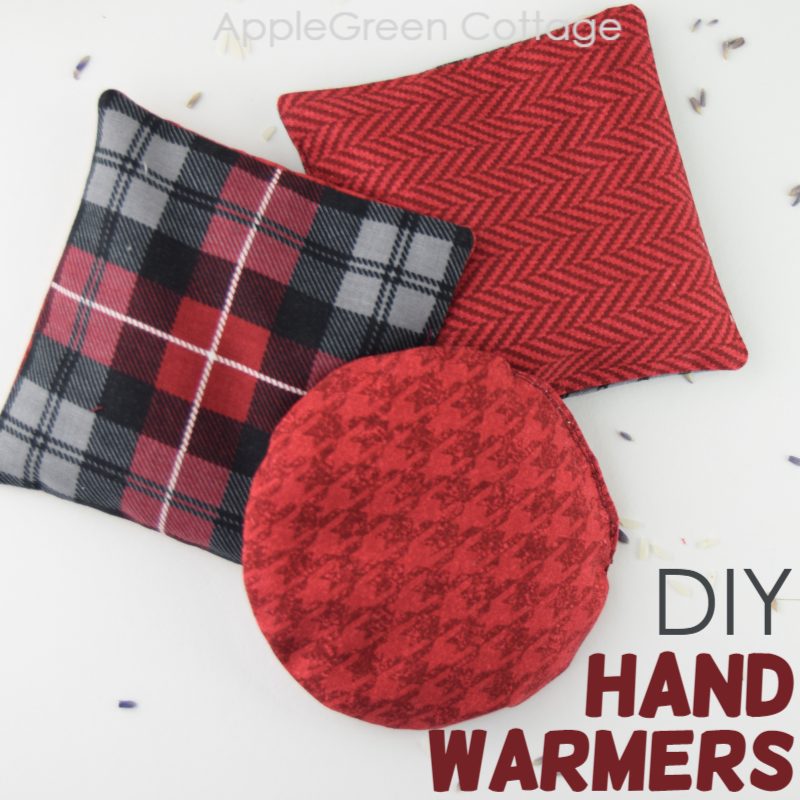
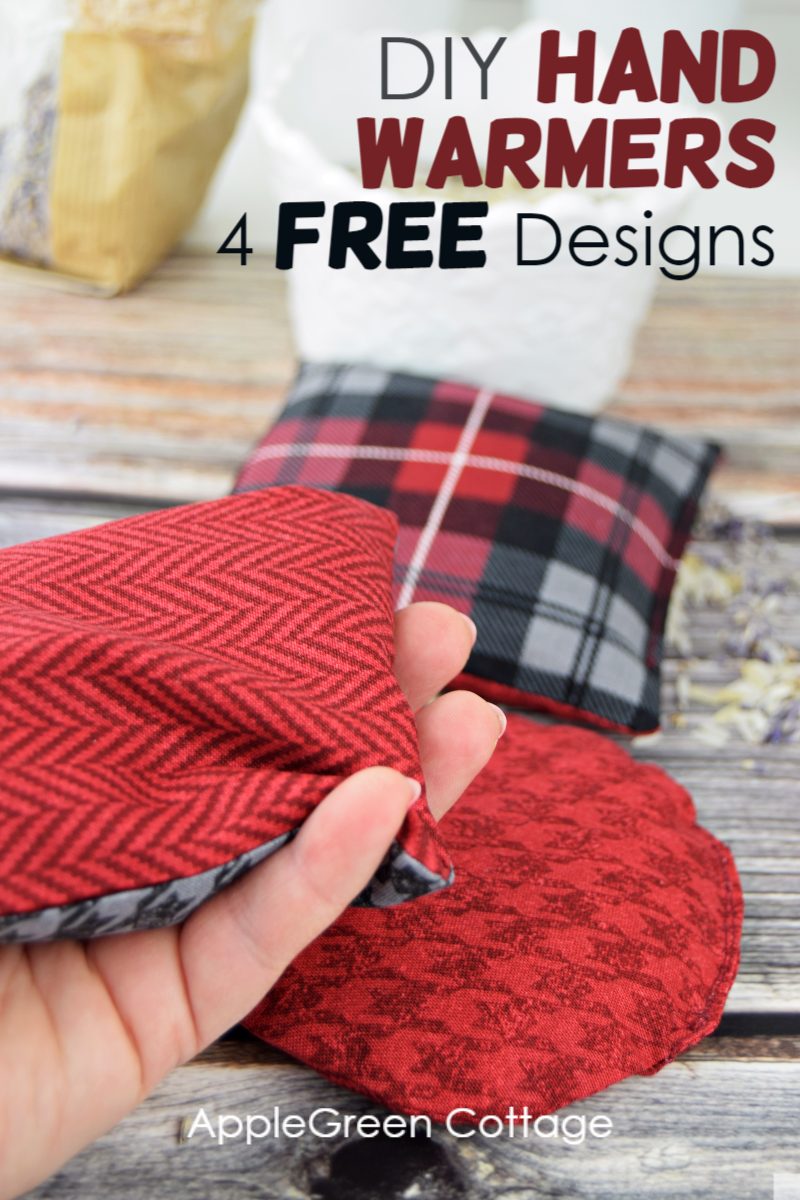
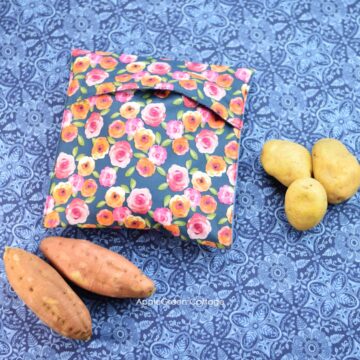
Make a pair of cozy diy hand warmers with rice using a free template with 4 designs, easy and quick. These homemade hand warmers are the perfect size to fit in your pocket.
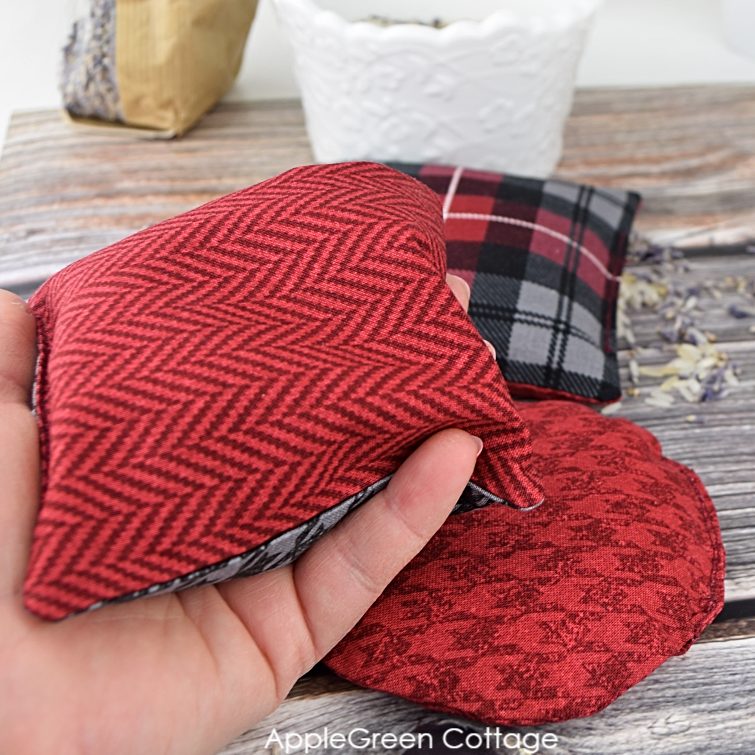
These microwavable, reusable hand warmers are easy to sew, and a relaxing gift idea. I heat them up for about 1 minute and they keep my hands toasty warm when I go out for a walk.
For more free heating packs and warming accessories, you'll want to check out this large heat pack for shoulders and upper back, or make this free neck gaiter pattern in 3 sizes from baby to adult. Also, you can make them as gifts - see all the great ideas in our free Sew EASY Gifts series:

Join the FREE 6-part email guide and make super easy diy GIFTS - each in 30 minutes or less! You'll love it!
Table Of Contents
***Disclaimer*** - AppleGreen Cottage is not responsible for issues that may arise from using your own hand warmers. Please make sure that ALL materials are made with 100% cotton including fabric, thread, and batting. Do not microwave for more than 1-minute intervals to avoid scorching of any kind. You are at your own risk when creating and using. Do not leave unattended when in use.
Diy Hand Warmers To Sew
Tied with a white satin ribbon and gift-wrapped, they will make a lovely gift.
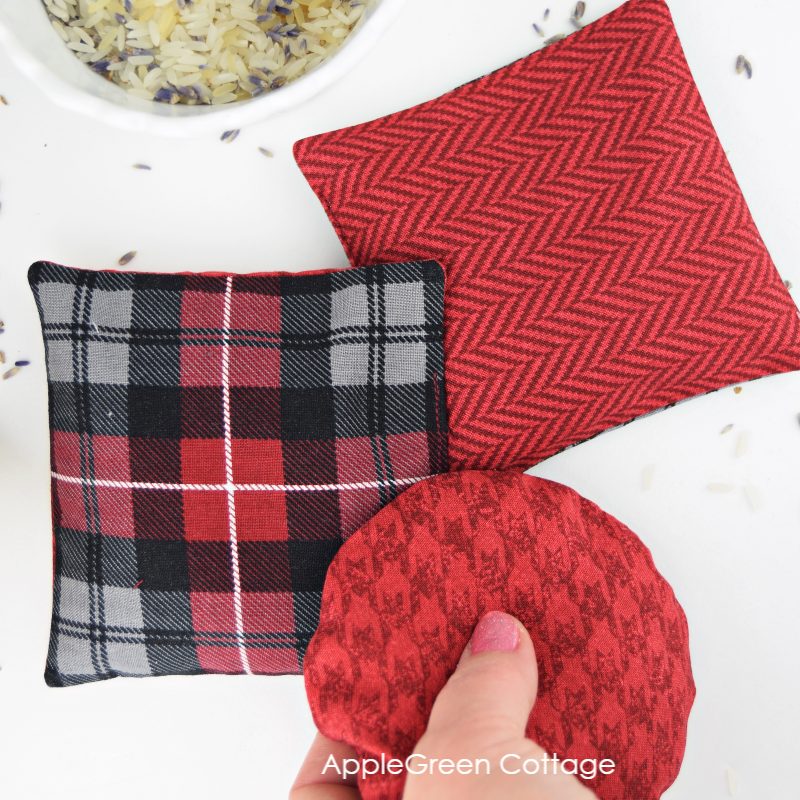
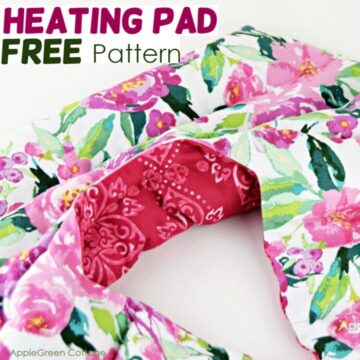
They came to life by coincidence, as I had some lavender rice left from this large diy microwave heat pad, and some beautiful scraps from sewing stockings (guess which of these!) Such a quick make!
Supplies
Shop my personal favorite sewing supplies on Amazon HERE.
To sew a pair of homemade hand warmers, you'll need these:
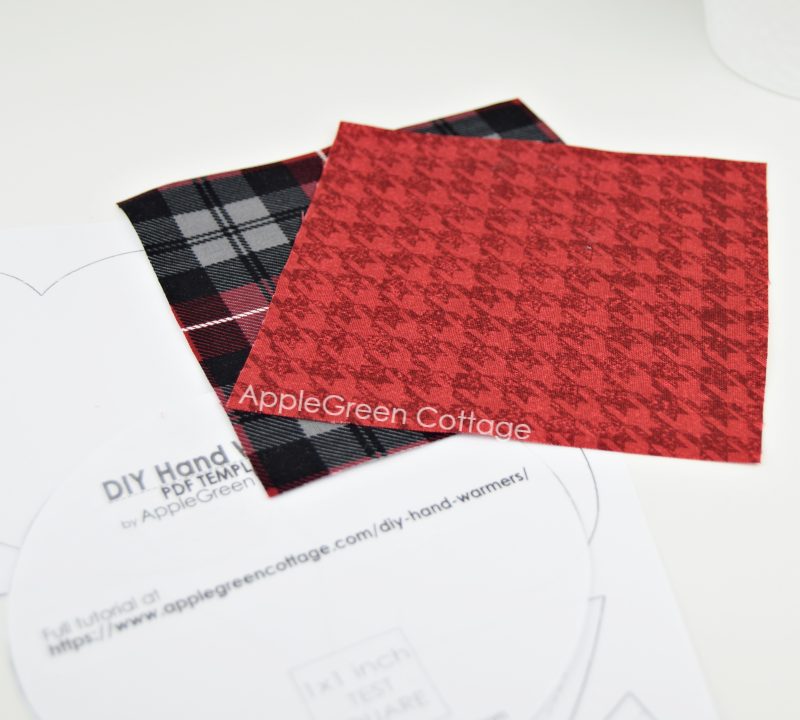
- 4 pieces of cotton, 5-inch scraps (I used scraps from this diy plaid holiday decor tutorial)
- a cup of dry, uncooked rice + feel free to mix in some dried lavender
- sewing machine, needle, cotton thread, pins, scissors
- if making the bird, you'll also need tiny scraps of thin, fusible interfacing
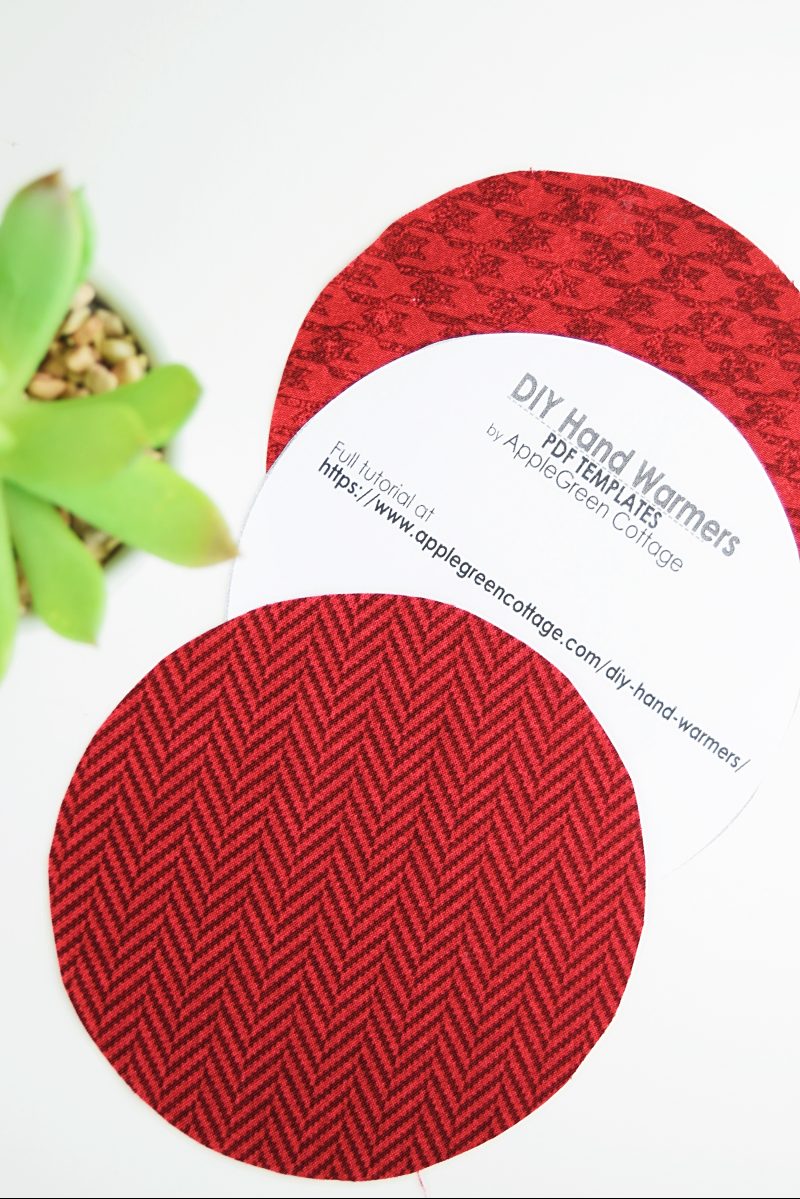
- optional: one of the 4 designs from the printable PDF template - scroll to the end of this tutorial for the link.
Bonus Tip: you can also sew your hand warmers with cotton flannel. In this case, check out these must-know tips for sewing flannel.
How To Make Reusable Hand Warmers Tutorial
Note, you'll have to prewash your fabric because these diy pocket hand warmers do not have a removable cover. You won't be able to wash them once sewn. The directions here show how to make one piece - you'll definitely want to make at least two.
I'm showing you the simplest, square version here. Directions are the same for all other designs except the bird-shaped hand warmers. (see additional directions below)
Optional Free Printable Hand Warmer template
Hand Warmer templates are a BONUS enclosed to the free rice heating pad pattern - get them all in one file by email when you join the list:
Print the template you need.
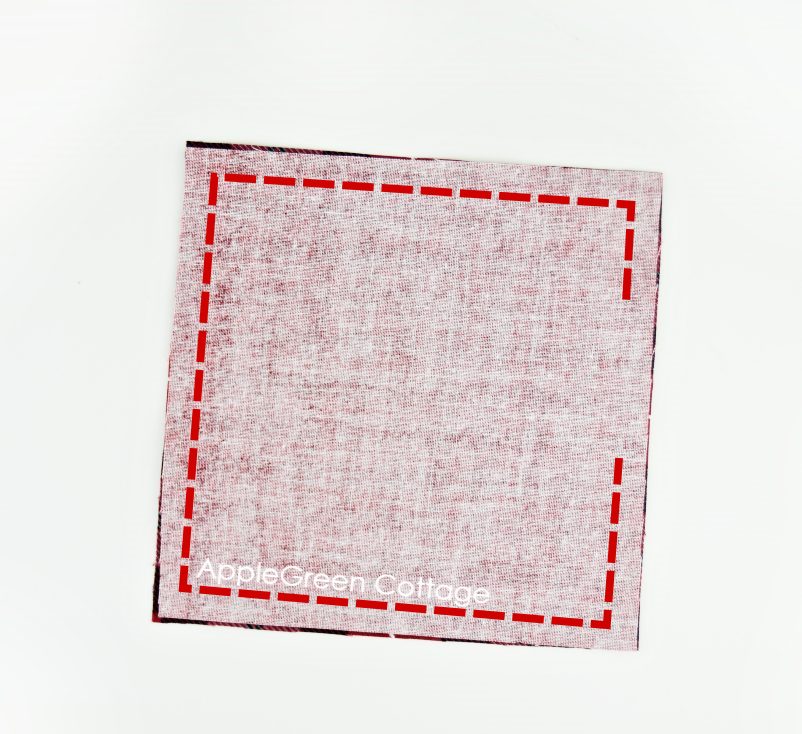
Step 1 - Cut the Pieces
Cut two 5" squares, circles, or hearts and birds from my template. Whichever you choose, you'll need two per hand warmer.
Note on the bird-shaped hand warmers: If using the bird template, cut the beak, eye, and wing applique in addition to the bird form. (Those cute birdy hand warmers deserve their own tutorial, don't they!) Here's how to make them into a cool turned edge applique if you like! Alternatively, you can also cut them on the dashed sewing line and stitch raw on the bird (quickest, too!)
Step 2 - Stitch the pocket
Place the two fabric pieces with right sides together and sew around, leaving 1 ½ inch (~ 4 cm) open for turning.
Step 3 - Turn
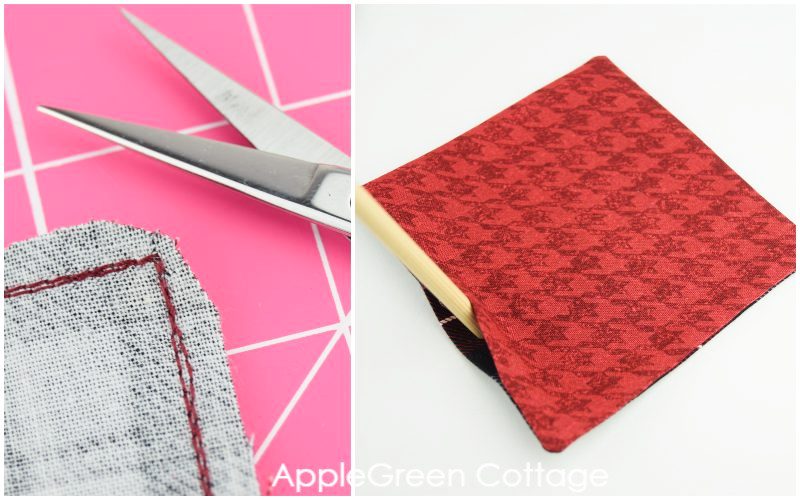
Then trim any excess bulk on the seam allowance and turn right side out.
Step 4 - Fill with rice
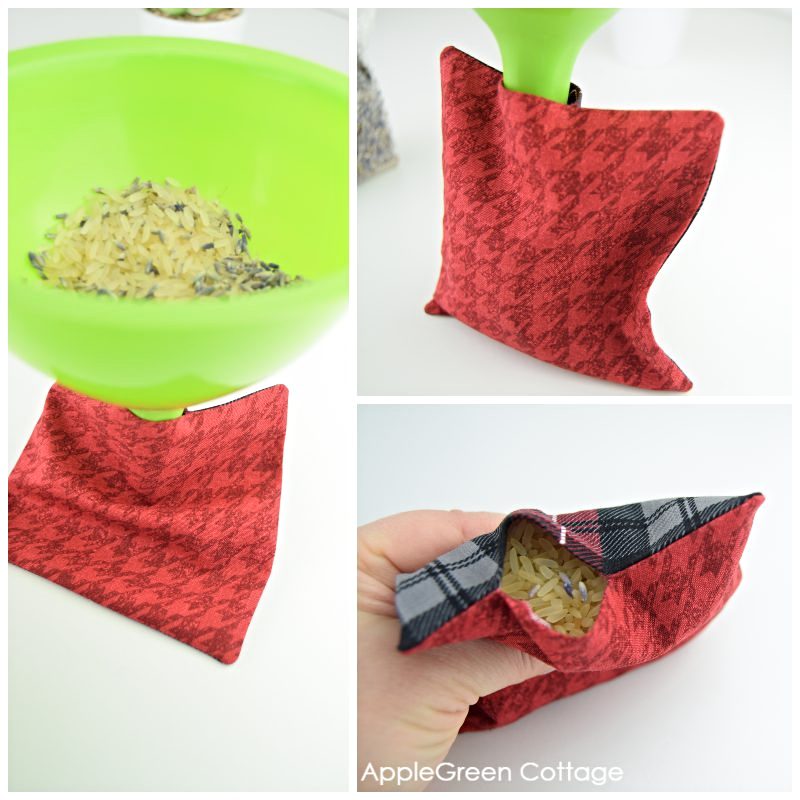
Fill the pouch up about ¾ of the way full with dry, uncooked rice. You can add lavender or other fillings. Using a funnel makes it super neat and prevents scattering rice around the room.
Step 5 - Pin and stitch closed
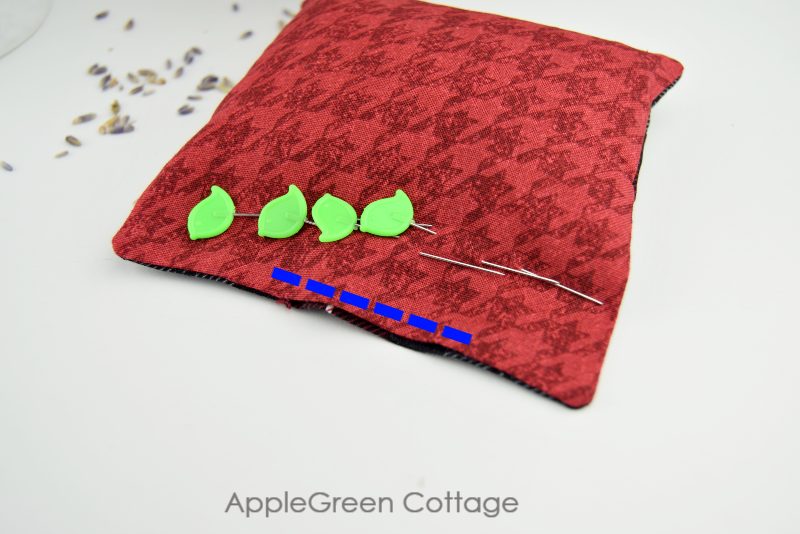
Pin the small opening to block rice out of your way and stitch your diy hand warmer close, keeping any rice away from your needle. Or you can hand-stitch it closed, it's quick too. You can use an invisible stitch.
Done! Now pop them in the microwave to heat them up, and your fingers will be warm and happy.
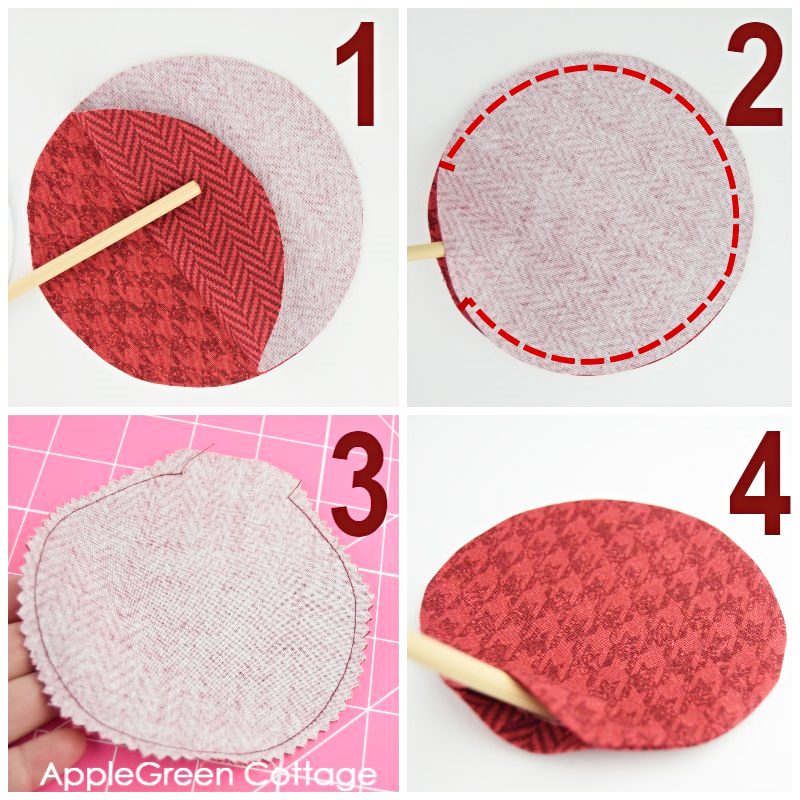
How to sew round-shaped hand warmers
In short, the process is the same, except for the trimming step. First, cut two circles from the template or just use a small saucer.
Now place the two fabric circles with right sides together, stitch and leave a hole to turn. What will be different is trimming the seam allowance, the easiest way to do so is using pinking shears. If you don't have them, cut notches around.
How to sew bird-shaped hand-warmers
The only difference is in adding applique before you start with Step 1 above, so let me show you a few details - too pretty not to try, and these birds make terrific stocking stuffers for kids, too!
Step 1 - Cut the applique pieces
Cut out all the applique pieces: 2 eyes, 2 wings, 2 beak bits.
Step 2 - The Beak
Stitch the 2 pieces with RST (right sides together) along the dashed 'v' line, then use a point turner to turn right side out. Press.
Baste it at the marked spot on the bird pattern, but make sure the tip of the beak is facing towards the center. So once you turn the bird right side out, the beak tip is facing out.
Step 3 - how to prepare the eyes and the wings
- Cut an extra piece of thin fusible interfacing for each eye and wing.
- Sew them together in pairs: right side of the fabric facing the right side of interfacing.
- Once you've done it NO pressing at all! Just trim the seam allowance, and then poke a hole into the middle of interfacing, not damaging the fabric.
- Carefully turn right side out through the hole in interfacing and roll between your fingers a bit to straighten the seam.
- Place the pieces on the main bird design as indicated on the template and press in place.
- Topstitch around. You've just learned a full turned applique, how cool's that!
- Place the 2 main pieces together, finally adding the beak between the 2 layers. The beak needs to be pointing towards the center of the bird stack.
Your bird pieces are ready for sewing, proceed with Steps 2-5 above.
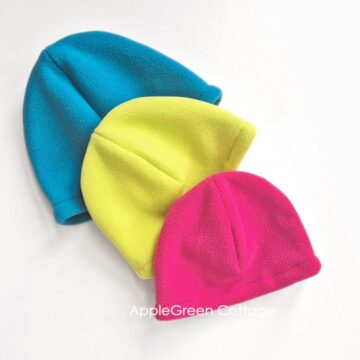
Make a Matching Winter Hat!
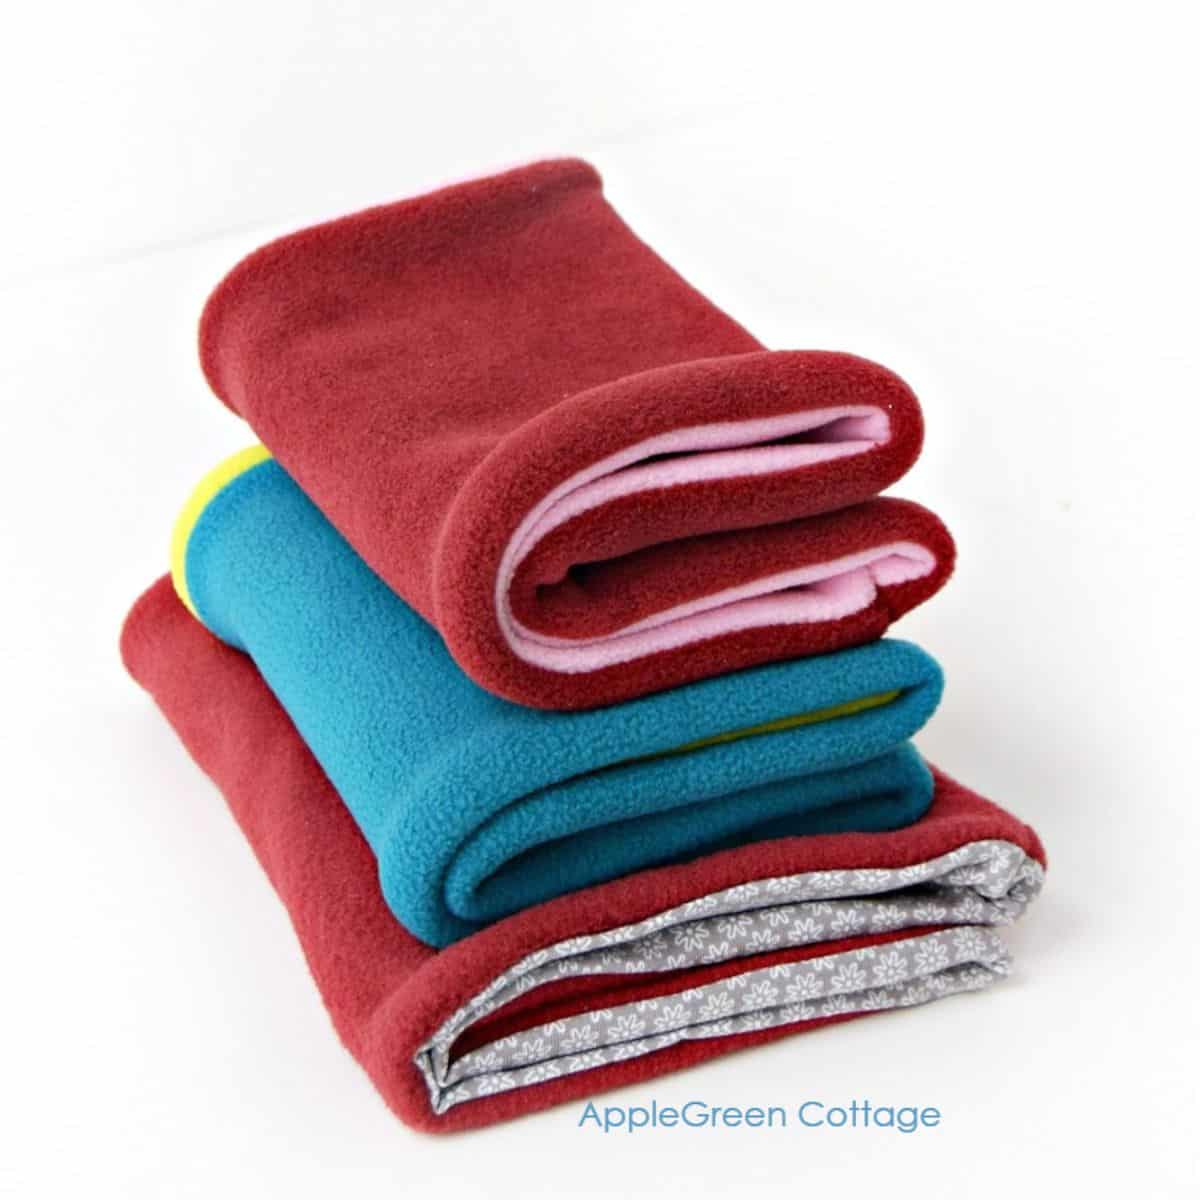
What is even better, these hand warmers will sew up SO quickly, and you might end up making them in a set with our popular free fleece beanie pattern:
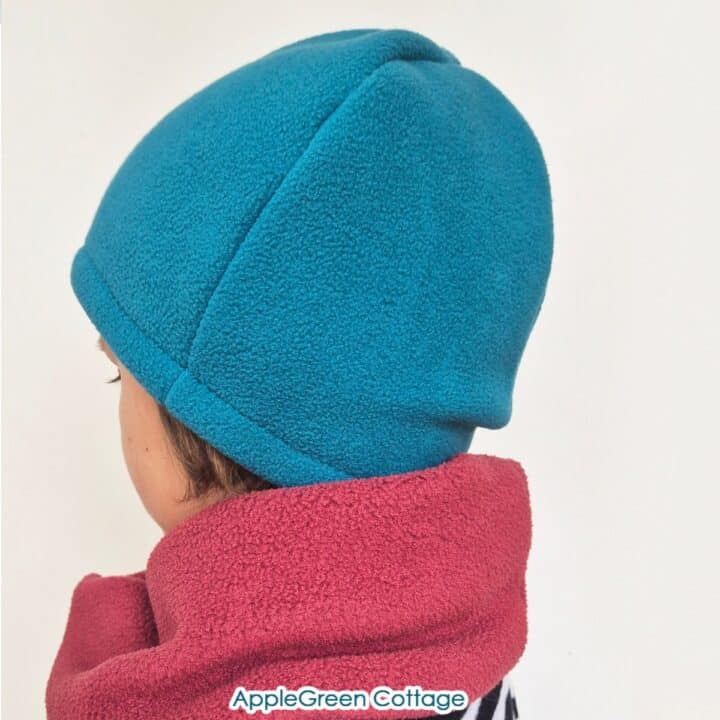
+1 Freebie: Fleece Hat
Make a set with our free fleece hat pattern:
More Tips
How to use hand warmers?
It's simple: heat them up for about 1 minute in the microwave. Then place the hand warmer in your pocket to keep your hands warm. This is why these are also called pocket warmers 🙂
What is the best fabric for hand warmers?
If you plan to heat your hand warmers in a microwave, always go for 100% cotton fabric. Whether quilting cotton or cotton flannel, both will work. Do not use anything non-cotton.
How do you heat a hand warmer without a microwave?
If you plan to reheat your hand warmers you an simply place them onto a warm radiator for half an hour, or place them on a baking sheet and put them in the oven on 200°F for 10 minutes or so. Do not leave unattended.
How long do diy hand warmers last?
If you wanted to know long homemade hand warmers stay warm, well it's about 20 minutes. Super convenient for short chores, or for the trip to school. A winter walk around the block to get some fresh air too, and that's what I have been using them for.
If you enjoyed this tutorial, share it, like it or tell your friends about it. Or save the project to Pinterest so you can use the tutorial any time you feel like:
Free Hand Warmer Templates
The diy hand warmers templates are a BONUS add-on, included into the heating pad pattern - get them BOTH together for FREE when you sign up for the free AGC weekly newsletter at this link:
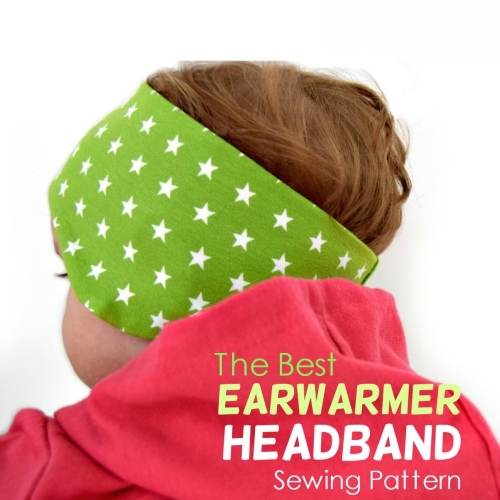
Or …check out the Earwarmer Headband pattern in 8 Sizes in our shop:

Ruth Conahan says
I have several large pieces of fleece material and would like to make the hand warmers. (I also make ear warmers with the fleece). I read that fleece may be made with some polyester material and should not be used to put the fabric in the microwave to heat the hand warmers. I would appreciate your advise/knowledge about this fabric use.
thank you!!
Dar says
Hello Ruth, no you cannot put polyester in the microwave,
Polyester is plastic, it will melt or catch on fire.
My advise is only cotton fabric.