
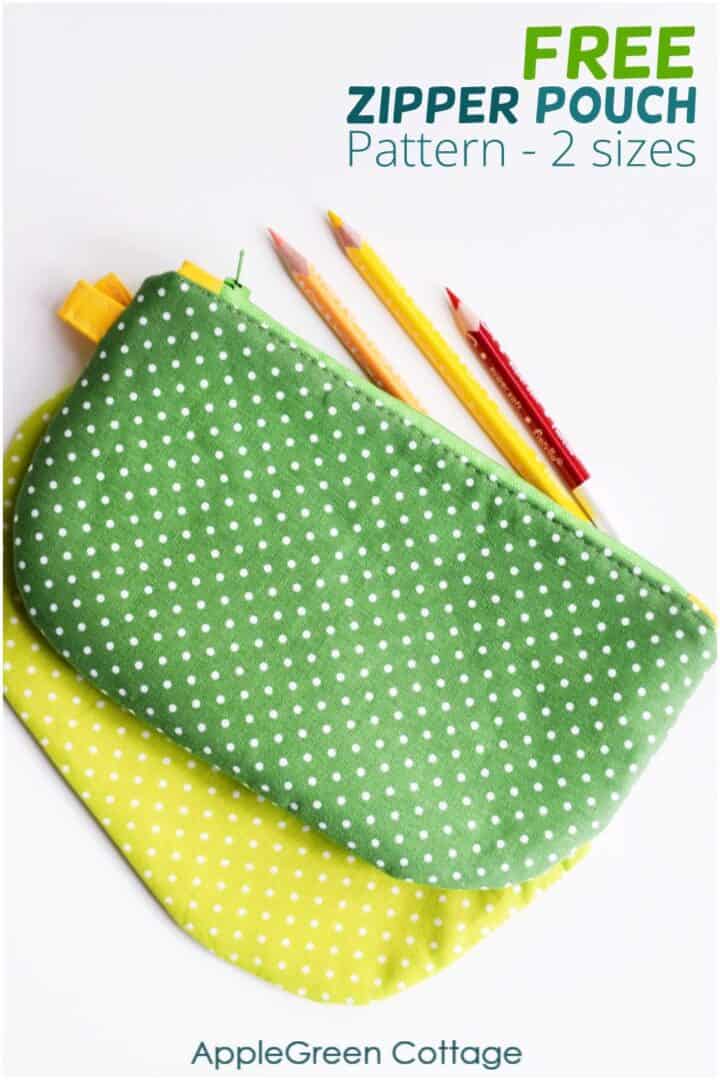
This zipper pouch tutorial will make a wonderful beginner sewing project, especially if you are new to sewing zippers. It comes with a free pdf zipper pouch pattern in 4 sizes. And just think of all the color combinations you can choose! Scroll down to get your free zipper pouch pattern.

Prefer an ad-free printer-friendly option of the whole tutorial+pattern? See the → optional PDF file in our shop.
Table Of Contents
PDF Zipper Pouch Pattern In 4 Sizes
You can't have enough zippered pouches. They are my favorite items to sew, and they make perfect holiday gifts. Follow this easy, step-by-step zipper pouch tutorial and sew one of these beauties yourself!
What I love about these zippered pouches is that they are so versatile. This lovely design in four sizes can be used for storing anything, from pencils to makeup, little trinkets, or yummy treats.

The little lined pouch I sewed last time is easy to make, so I thought you'd like to try one too: here's your chance to tailor one totally to your likes - grab your favorite fabrics and make one! You can choose the size, the color, anything! But just in case you don't want to second-guess your dimension choices, I'm also giving you a free template to use. Four, actually.
4 Finished Sizes
- ORIGINAL small: 8" wide, 4 ½" tall (20cm x 11cm)
- ORIGINAL wide: 9" wide, 4 ½" tall (22.5cm x 11cm)
- TALL: 8" wide, 6 ½" tall (20cm x 11cm), and
- TALL wide: 9" wide, 6 ½" tall (22.5cm x 16cm)
It's good to have options, right? I'll show you other sizes soon, but as I'm working with a new (cuteee!!) fabric collection that hasn't hit the stores yet I'll have to wait a little bit till the showcase. Cant' wait!!!! - edit: here's the lovely quilted zipper pouch pattern
Supplies
Before you start following the zipper pouch tutorial, gather these supplies:
- a nylon coil zipper - no shorter than the width of the fabric pieces (i.e. 9"/23 cm or 10"/25 cm zipper length)
- in total, a fat eighth for the smallest size, and a fat quarter for the largest 'tall' size - use fabric scraps!
- two 2" (5cm) squares for the zipper
- one little rectangle 1 ½ by 2" (4x5cm) for an optional side tab
- fusible fleece, light-to-midweight interfacing
- thread, pins or sewing clips, sewing machine
- iron, scissors, or rotary cutter plus cutting mat (I use this one by Olfa)
PDF Zipper Pouch Pattern
The seam allowance for this project is ⅜" (1cm).
There are 4 sizes, today we are making what is called the ORIGINAL small size - the smallest of all 4 options.
Step 1 - Get the FREE Pattern
Get the template from the shop here - it's absolutely FREE! Print and start cutting and sewing right now.
I've created a template that you can download for free. To download the FREE ROUND-Bottom Pouch TEMPLATE, click the button below. You'll be taken to the shop - scroll to ROUND BOTTOM Zipper Pouch Pattern, it's $0!
Get the free pattern HERE. It's $0 in the shop, no code is needed. Optional, as an alternative:
OR do you want a printable copy of the WHOLE tutorial? Scroll to the bottom of this tutorial for more details!
Step 2 - Cut Fabric
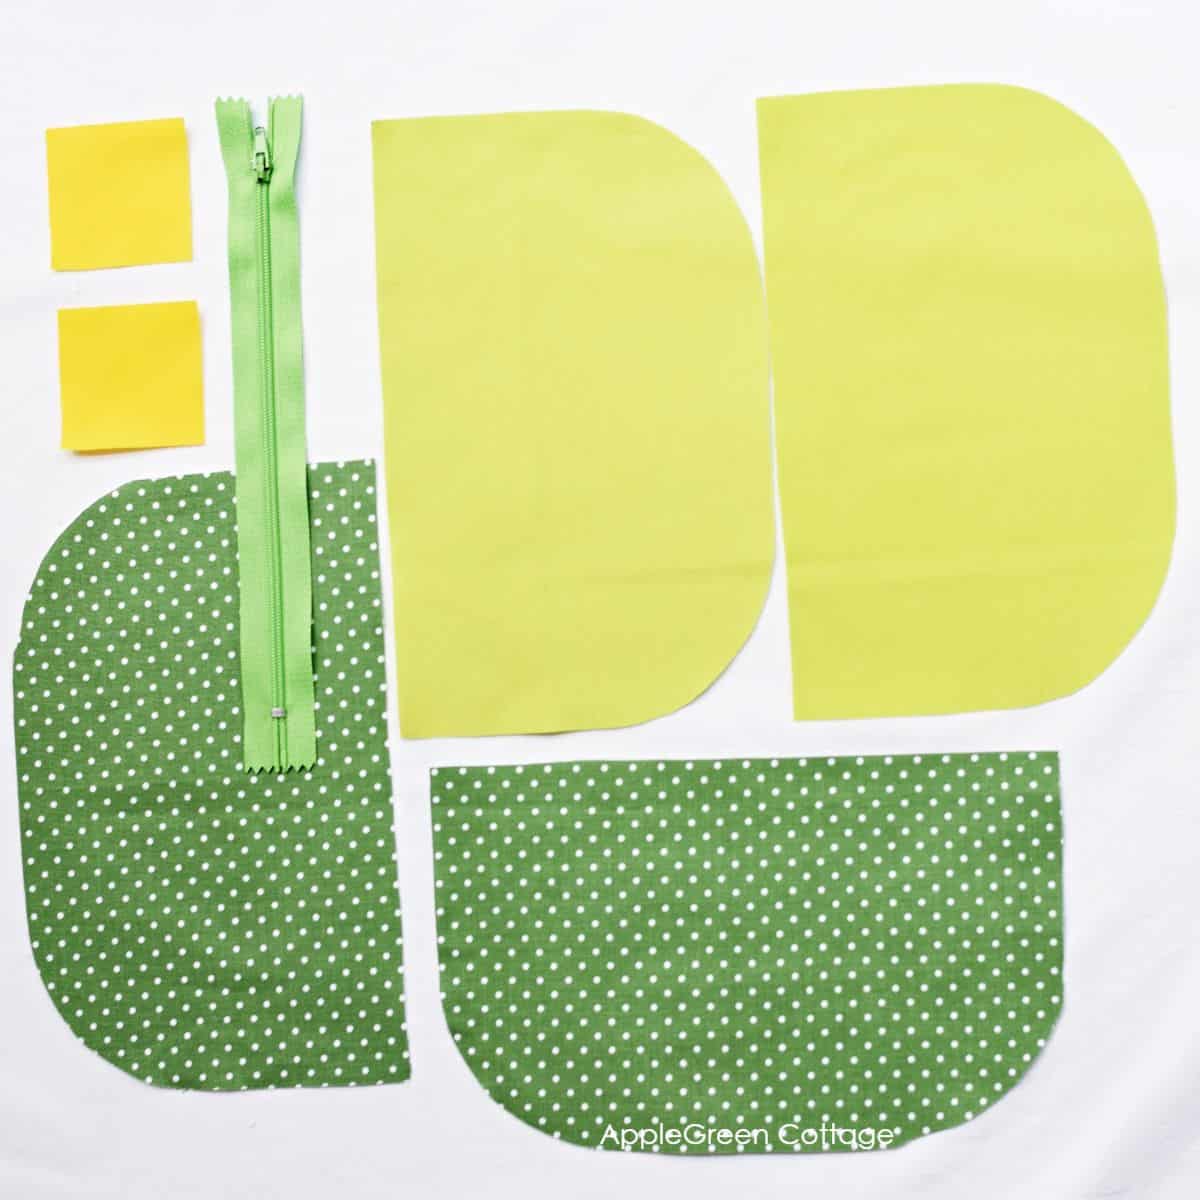
Use the free template to cut
- 4 pieces of fabric: 2 for the Outer, 2 for Lining
- two 2" (5 cm) squares for the zipper
- one little rectangle 1 ½ by 2" (4x5 cm) for an optional side tab (not pictured)
Also, cut 2 pieces from fusible fleece for Outer (cut them slightly smaller to reduce bulk) and 2 pieces from light-to-midweight interfacing for Lining.
Step 3 - Fuse Interfacing And Fusible Fleece
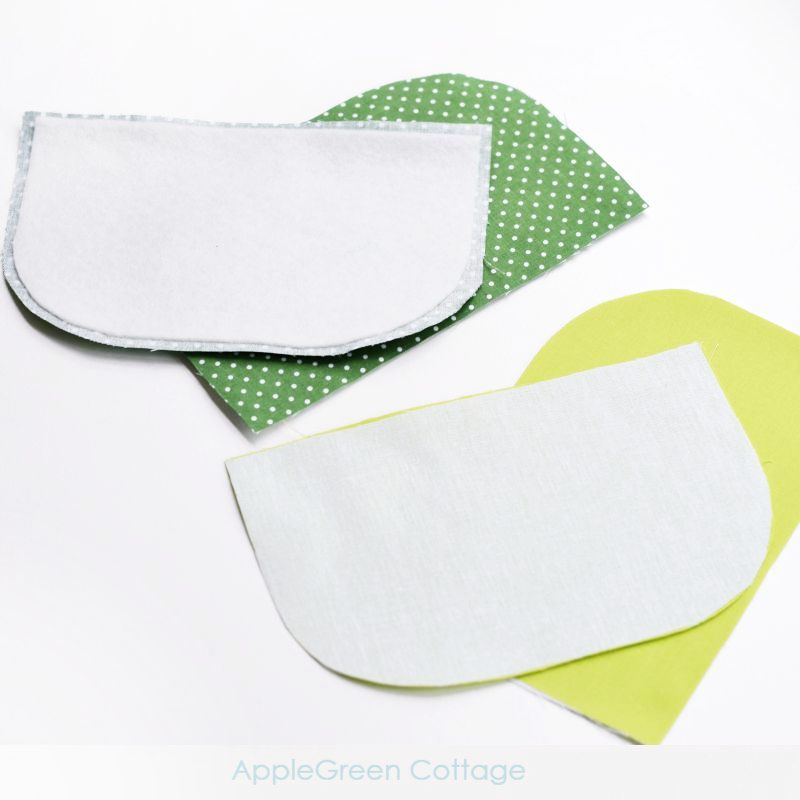
Iron fusible fleece to the back of the two Outer pieces, and thinner interfacing to the Lining pieces. See this interfacing tutorial if you've never worked with fusible fleece or interfacing yet, or start faster here:
TIP: if you're a fan of quilting, you can even quilt the outer layers of the pouch, here's a popular quilted pouch tutorial you can use - all with these same free pouch templates.
Step 4 - Prepare Zipper And Add Zipper Tabs
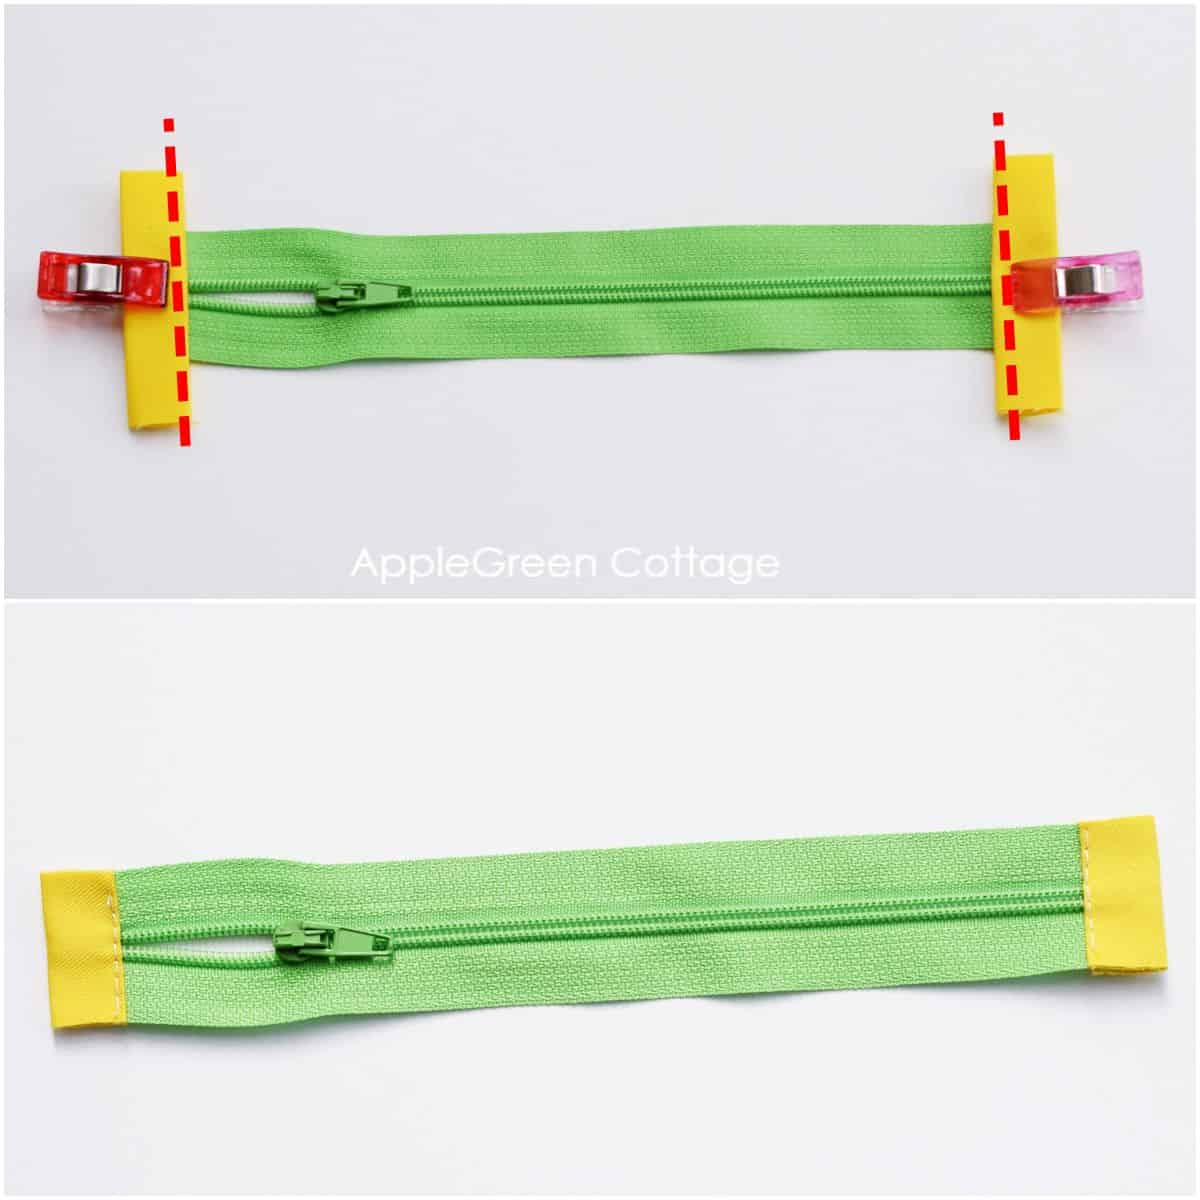
Zipper tabs will make your zipper look neat, prevent pinched zipper ends, and make your sewing easier. First, shorten your zipper to 7 ½" (19 cm) length by snipping off the metal stoppers on each side.
NOTE: if making the 'wide' sized pouch, cut the zipper tape to 8 ½" (21.5 cm)
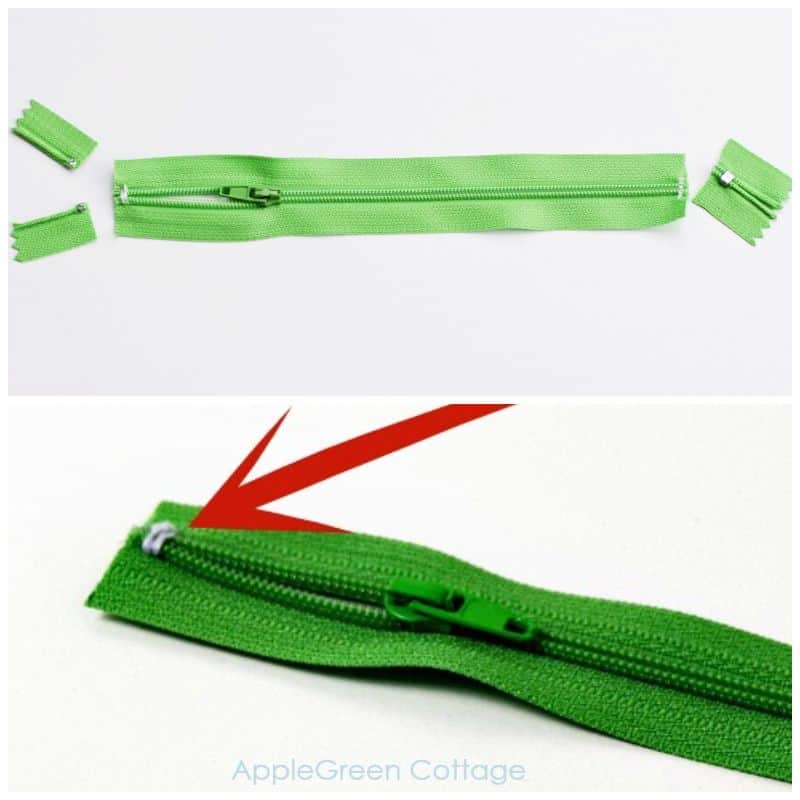
Make a few stitches on each side of the zipper where you snipped off the excess zipper to create temporary zipper stops. (⅛" or 3 mm away from the end)
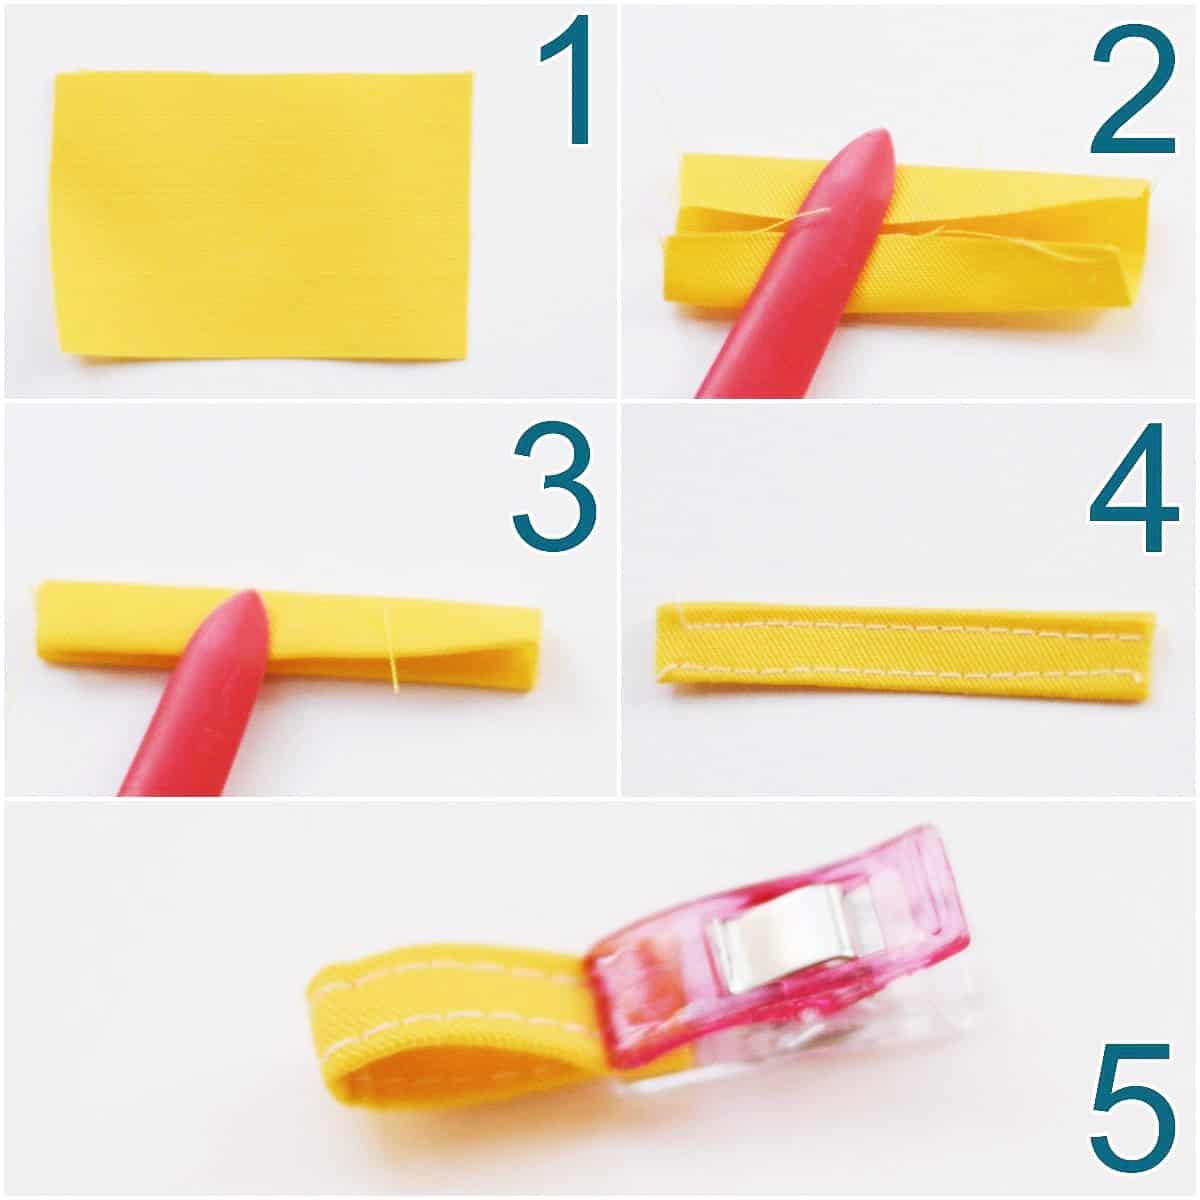
Now create zipper tabs:
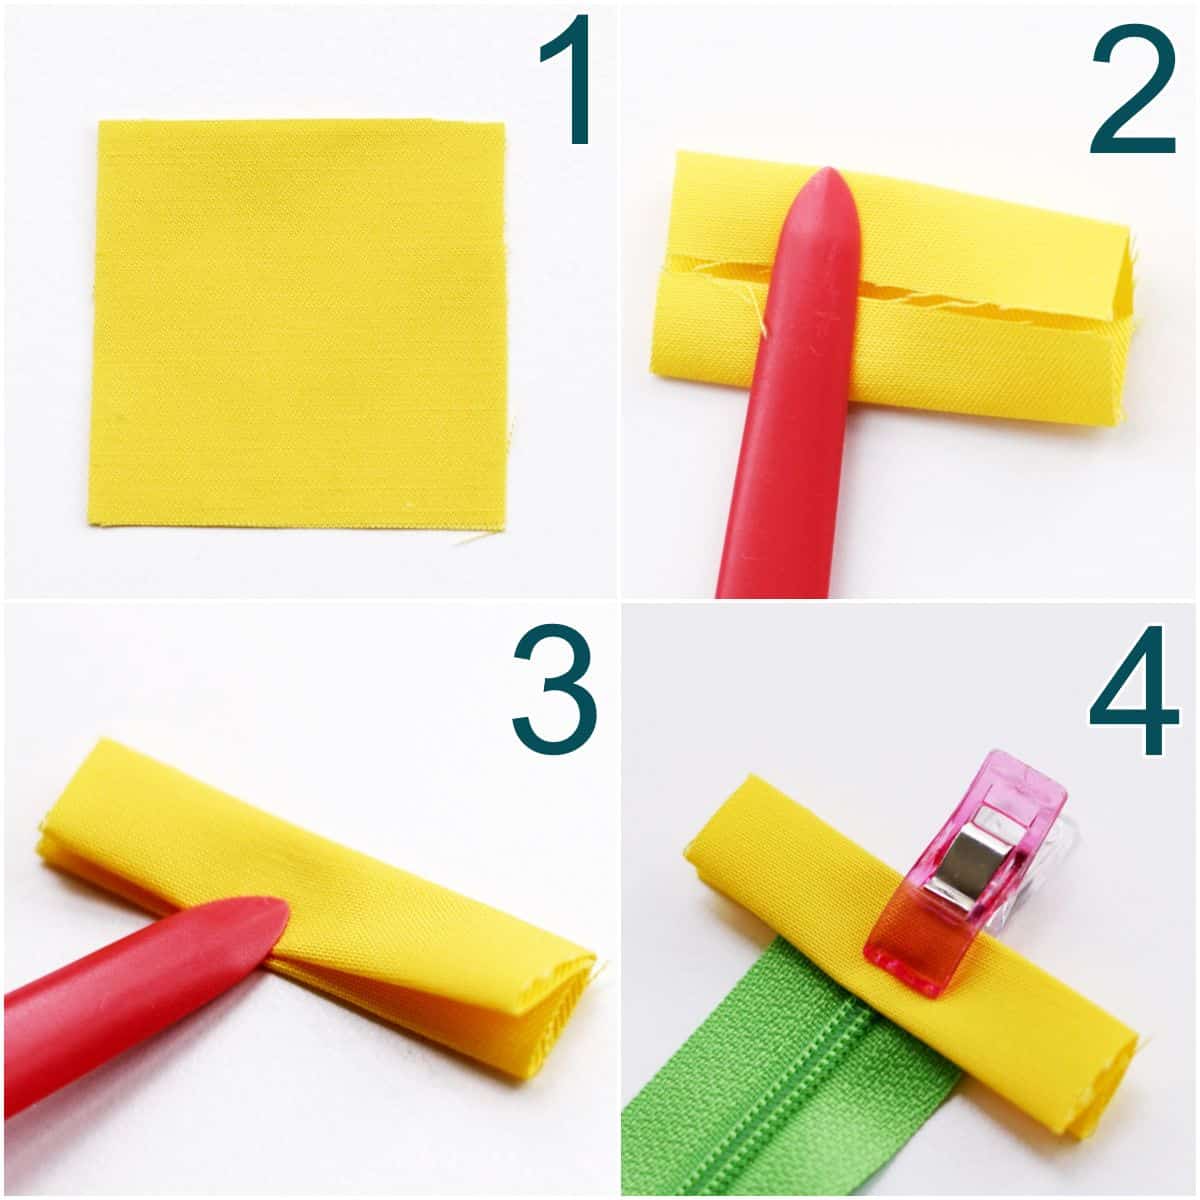
- Place your 2" x 2" (5 x 5 cm) piece wrong-side-up.
- Fold one edge to the center crease and do the same with the opposite edge.
- Fold again and press.
- Slide on one zipper end.
- Topstitch over the tab close to the exposed part of the zipper, catching both the upper layer of the tab as well as the bottom layer:
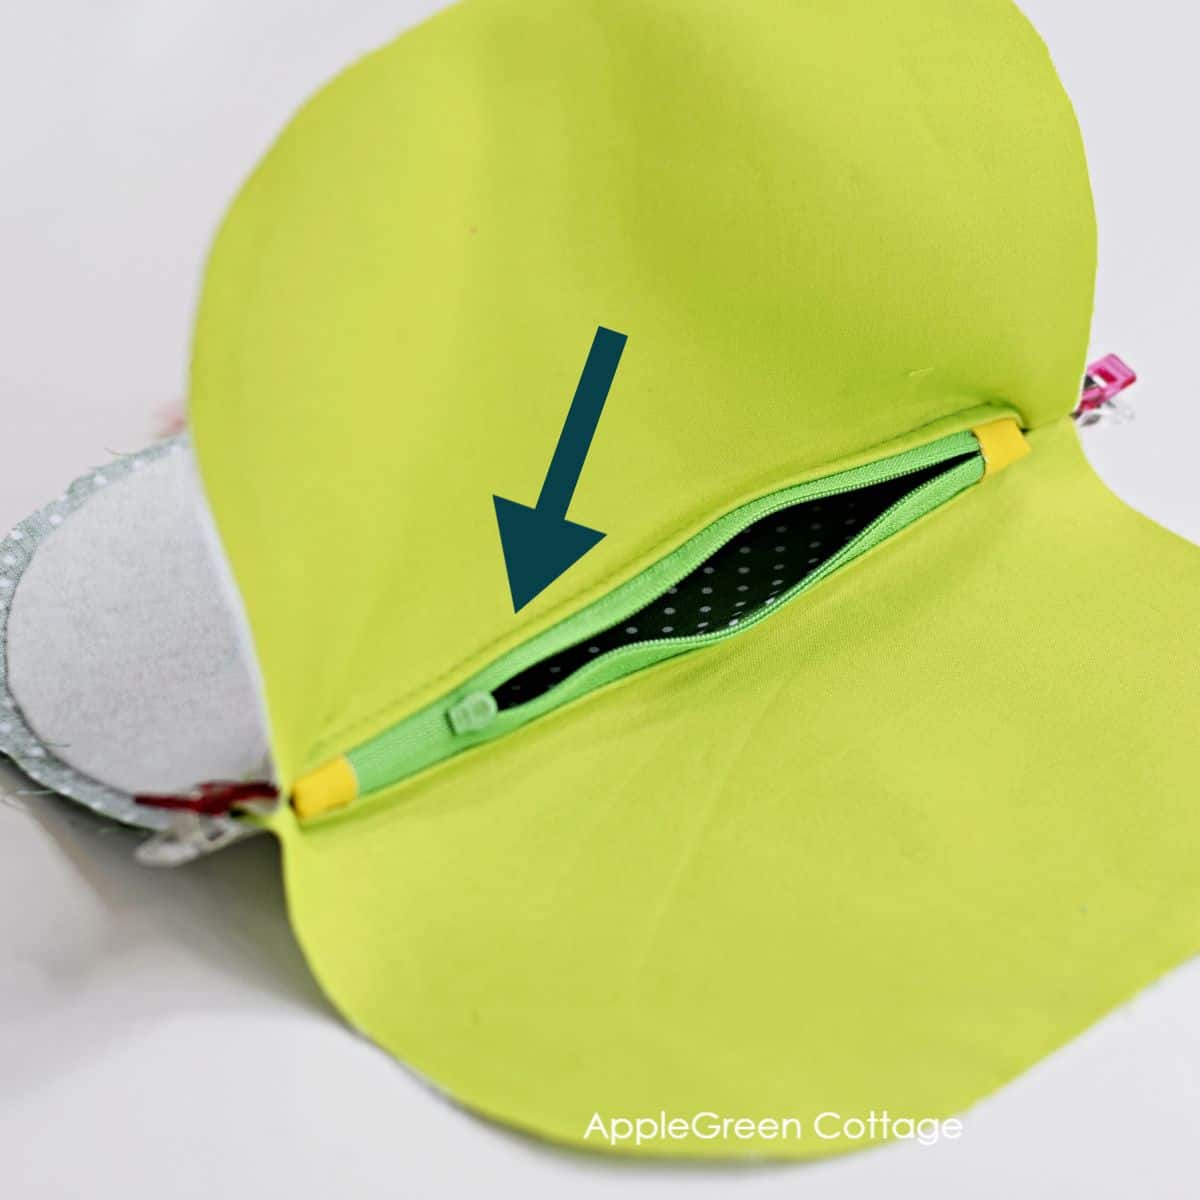
Repeat with the other tab and the other zipper end. Once sewn, snip off the excess tab material, so you get a nice and even looking zipper.
Step 5 - Attach the Zipper
Lay down the Outer piece (face-up), then the zipper (face-down, with the closed zipper pull on your left) and finally the Lining piece (face-down!) as seen in the photo below:

Sew through all three layers. Use the zipper foot if you like, I didn't.
BONUS HINT, if you are using regular foot: when sewing, you'll get to the zipper pull sooner or later. When you do, stop sewing and lift up the foot, keeping the needle down. Slide the zipper pull to an already sewn area. Return foot down into the sewing position and finish the seam.
Now let's attach the other zipper edge: place the other Outer piece on your table with the right side up. Cover it with the sewn piece with Outer facing down, align with the zipper tape edge. Then place the Lining piece facing down, aligned as well. Sew through all three layers.
Double-check to see if the two Outer pieces are facing right sides together. Are they? Good, go on! Now sew the stack together, just like you did the first time (sewing through all 3 layers).
Step 6- Topstitch Along the Zipper
Next, we'll topstitch the fabric along the zipper to prevent getting it caught by zipper teeth. Some say this is optional, but I ALWAYS do that. It makes the pouch so much prettier! This is how:

Press all the fabric away from the zipper and topstitch along the zipper at ⅛" (3 mm) away on both sides. Make sure to start and stop at the zipper tab - do not topstitch all the way from one end of Outer fabric to the other.
NOTE: see the photo above for the start and stop points.
Step 7 - Add the Optional Side Tab
Make and insert a side pull if you like. Here are the folding steps for the pull:
- Fold the piece lengthwise in half, press, and unfold.
- Then fold the upper edge to the center crease and do the same with the lower edge.
- Fold again along the original center and press,
- Topstitch along the long edges.
- Fold in half to make a loop, then attach on just the Outer fabric piece as seen below:

With the loop facing inwards, attach the SIDE TAB to the left side of the pouch - OUTER LAYER ONLY - shift it down by ½" or 1.3 cm from the bottom edge of the zipper.
BONUS HINT #3: here and there, I make these pulls in bulk from scrap fabric. They are handy for many projects, and having them on hand will make the sewing process faster. They can be used on towels (adding them for easy hanging, you can even make color-coded towel loops!), loops on homemade baby toys or even on beanie hats like this one, but with knits.
And if you do make a pull, why not add an easy-to-make wristlet strap? Go to the wristlet strap tutorial HERE. Beginner friendly, easy and quick (with a professional look!)
Step 8 - Open the Zipper
Now unzip the zipper at least half of the way.
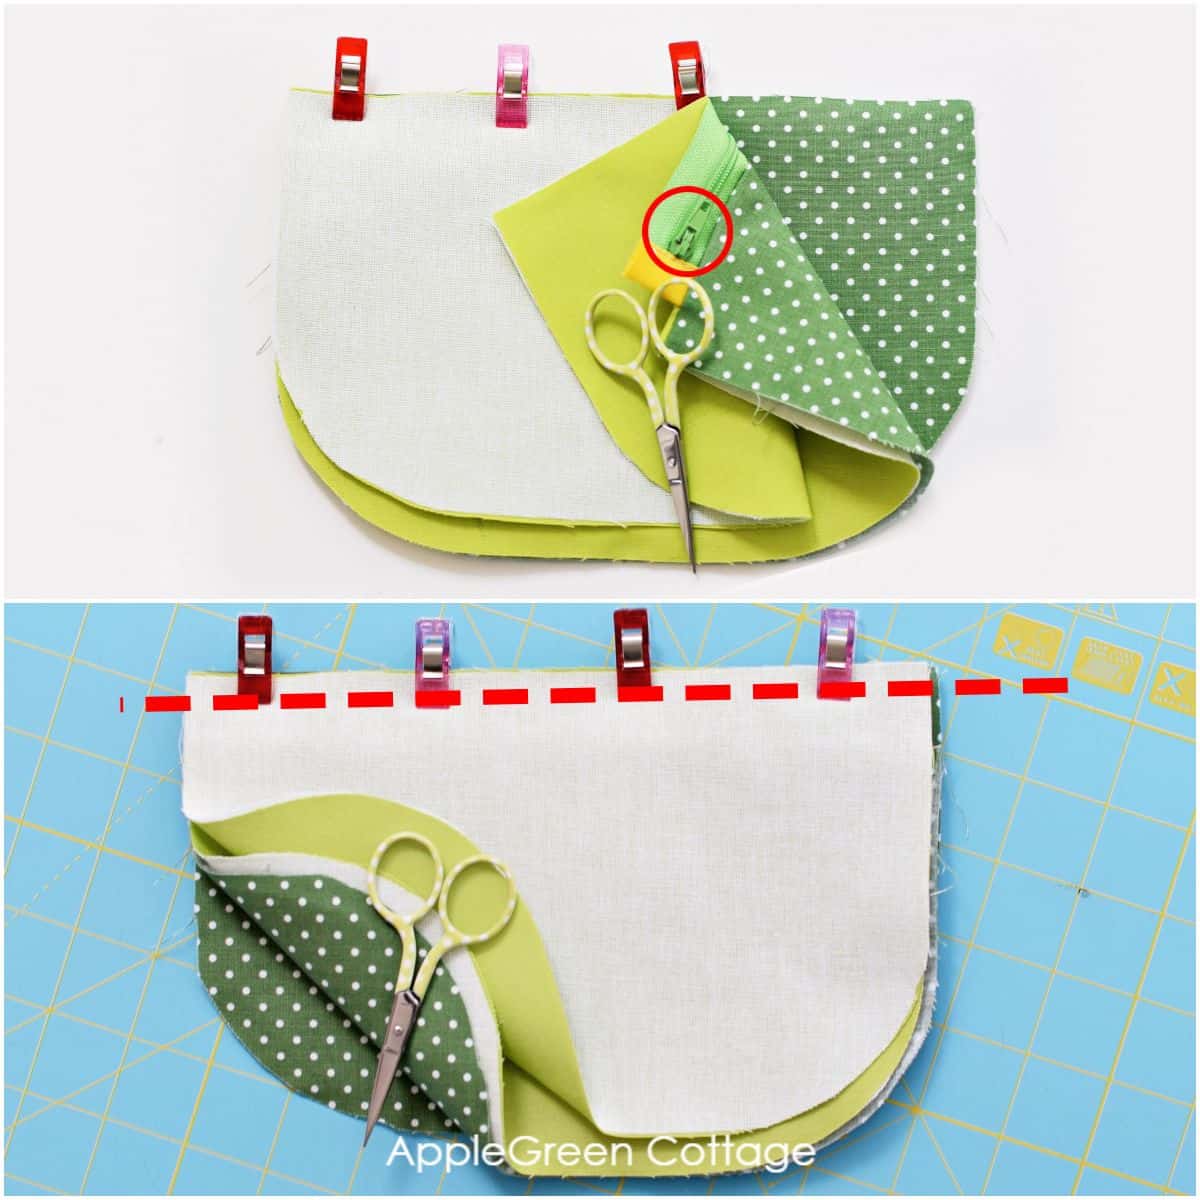
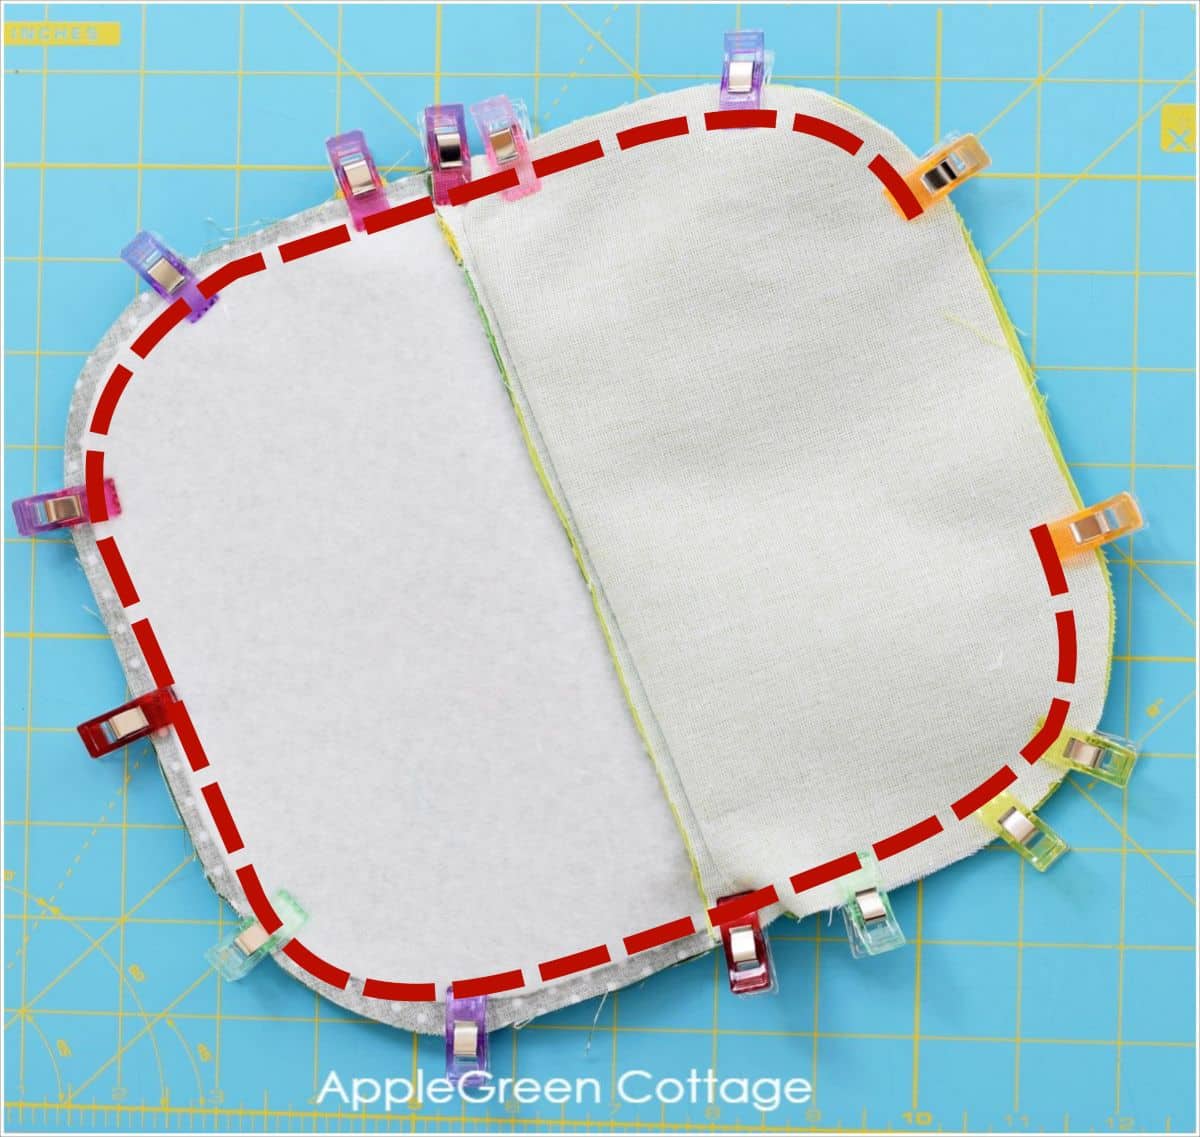
Step 9 - Sew The Sides And The Bottom Of The Zipper Pouch
Pull the Outer fabric pieces together, right sides facing. Pull the Lining pieces together, right sides facing, too. Make sure to align the edges, especially at the spots where Lining and Outer meet:

HELPFUL TIP: To make the zip ends lay relatively flat, well I usually pinch and push them between the lining, and smash a clip over them until I start sewing. Not totally flat, but at least they don't move around 🙂
Now stitch around, starting at the lining bottom. Go around and stop at the lining bottom again, leaving a few inches open for turning.
Trim the seam allowance to avoid a bulky finish - take care not to snip into any stitches:

Step 10 - Turn And Stitch The Opening Closed
Now, turn the pouch right side out and press:

Last thing to be done: hand-stitch or machine-stitch the opening closed. If you close the hole by hand-stitching, use this invisible stitch tutorial.
Voilà! Here it is, your brand new zipper pouch!
Stay Organized in Style!
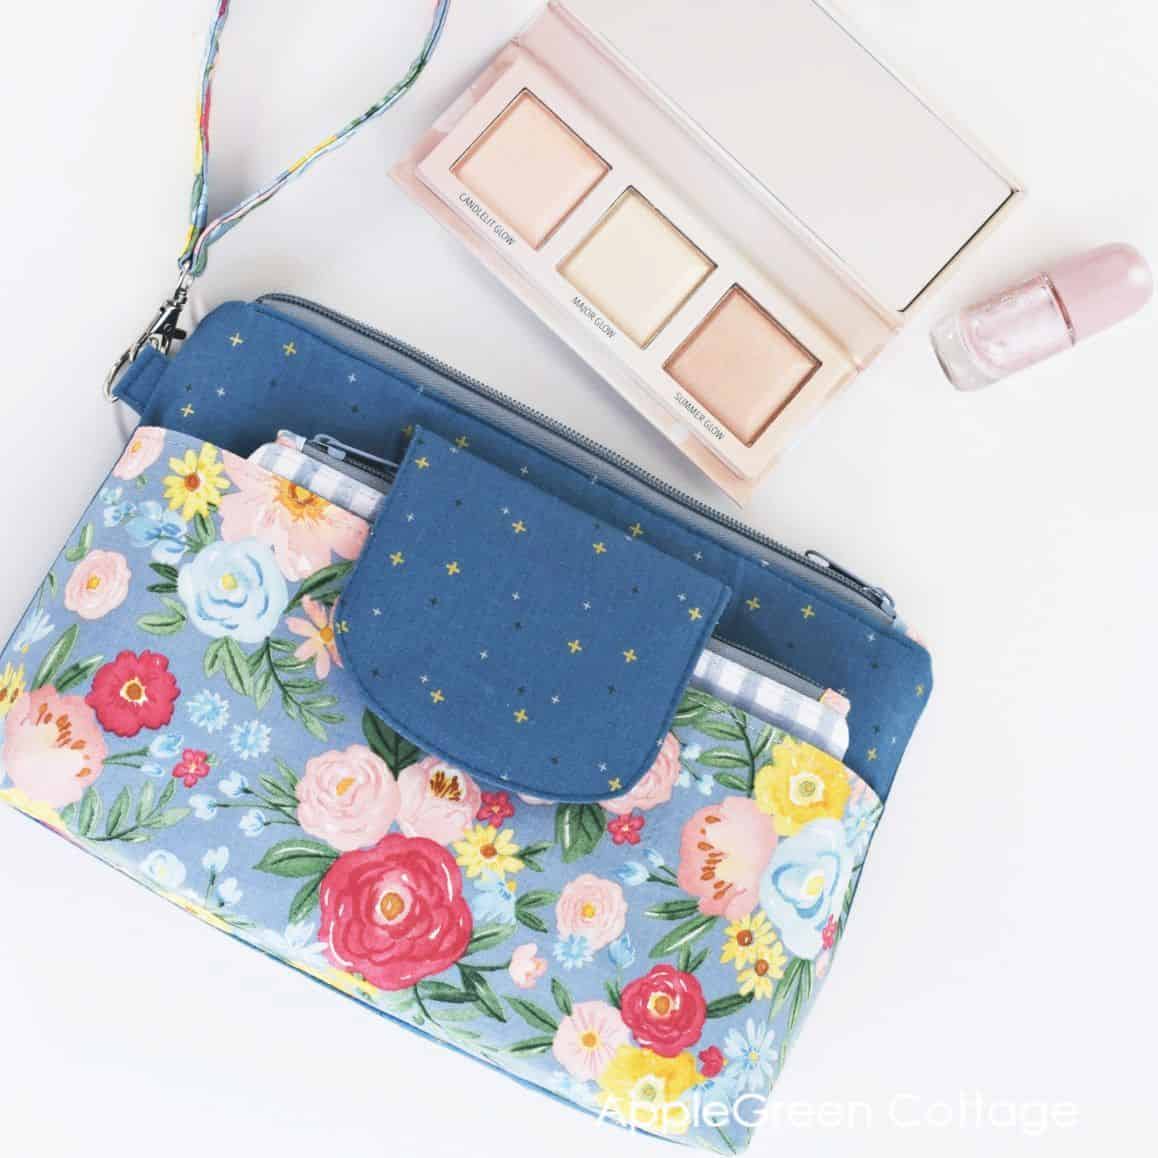
Keep your essentials neat and tidy with the SILA Duo Pouch.
Now when you've finished your first cute zipper pouch, you can sew a few more at any time! They make a great gift, that's for sure. Also, a perfect match to a homemade sleep mask like this one.

Do you recognize the pouch in the photo? It's the ORIGINAL small-size pouch, the one I made available at AppleGreen Cottage in 2015 with my first polka dot zipper pouch tutorial. If you've been following this blog like, forever, you'll recognize this image:
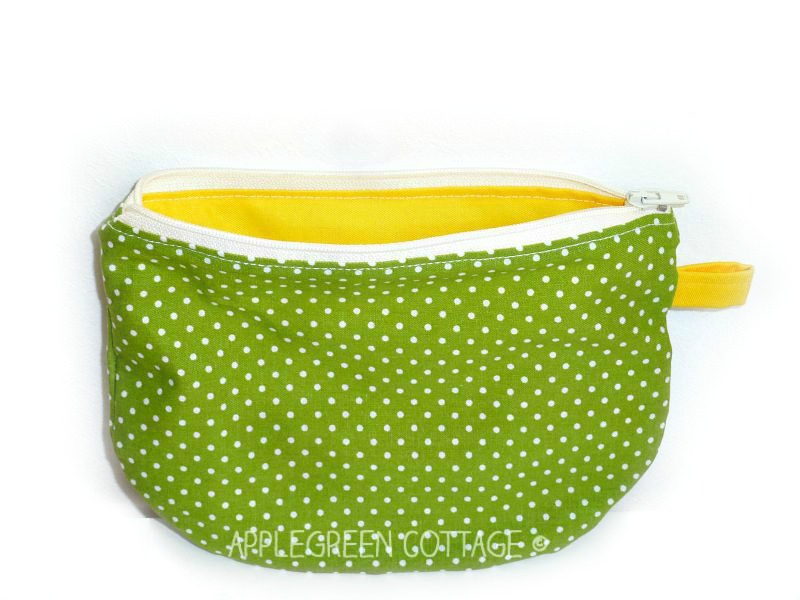
Yeah. Not really proud of those pinched zipper ends and non-ironed fabric. Today's version with the tabbed zip ends is much better I think.
In 2015 I finally drafted a first template after sewing a lot of zipper pouches like the one in the photo. I used what I believe to be the most versatile size. Initially, it was a simple non-printable image published here at AppleGreen Cottage blog, then a one-sized pdf zipper pouch template, for years. And today, tadaa! I hope you liked this zipper pouch tutorial.
How To Extend The Length of this Zipper Pouch Pattern
Need an even wider pouch for extra-long pencils? No problem: just measure the longest colored pencils against the template and you'll see if you need to add an inch to the template. Feel free to adjust the pattern as you see fit. Just make sure the zipper is at least the same length as the fabric pieces.
Want a printable copy of the whole tutorial+pattern?
Prefer a full, ad-free and printer-optimized Printable Tutorial with both instructions AND pattern included? ↓↓

This tutorial is also part of Printable Tutorials BUNDLE
100 PDF tutorials now, and growing!
WANT MORE FREE TUTORIALS AND PATTERNS?
Get email updates and never miss out on new patterns, printables, and tutorials:

Or …check out the Mia Clutch pattern in our shop. One of my quickest and easiest pouch patterns, and it has a nice little folding hack you'll love!
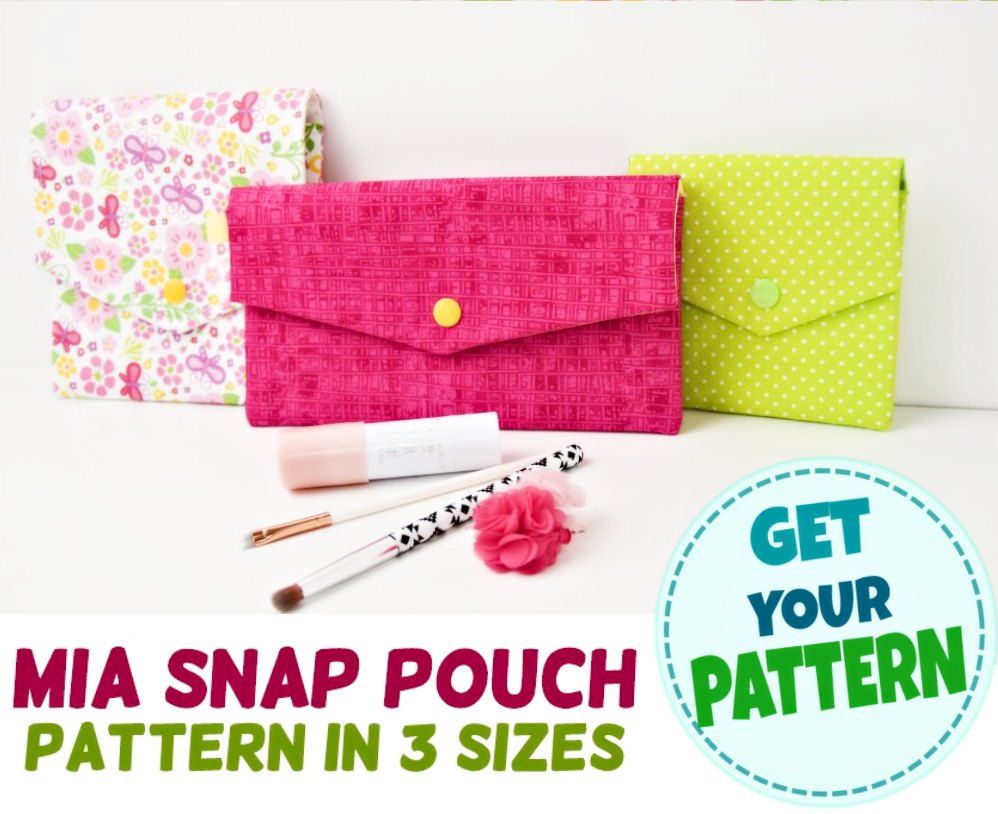
Beginner-friendly, no zippers at all.
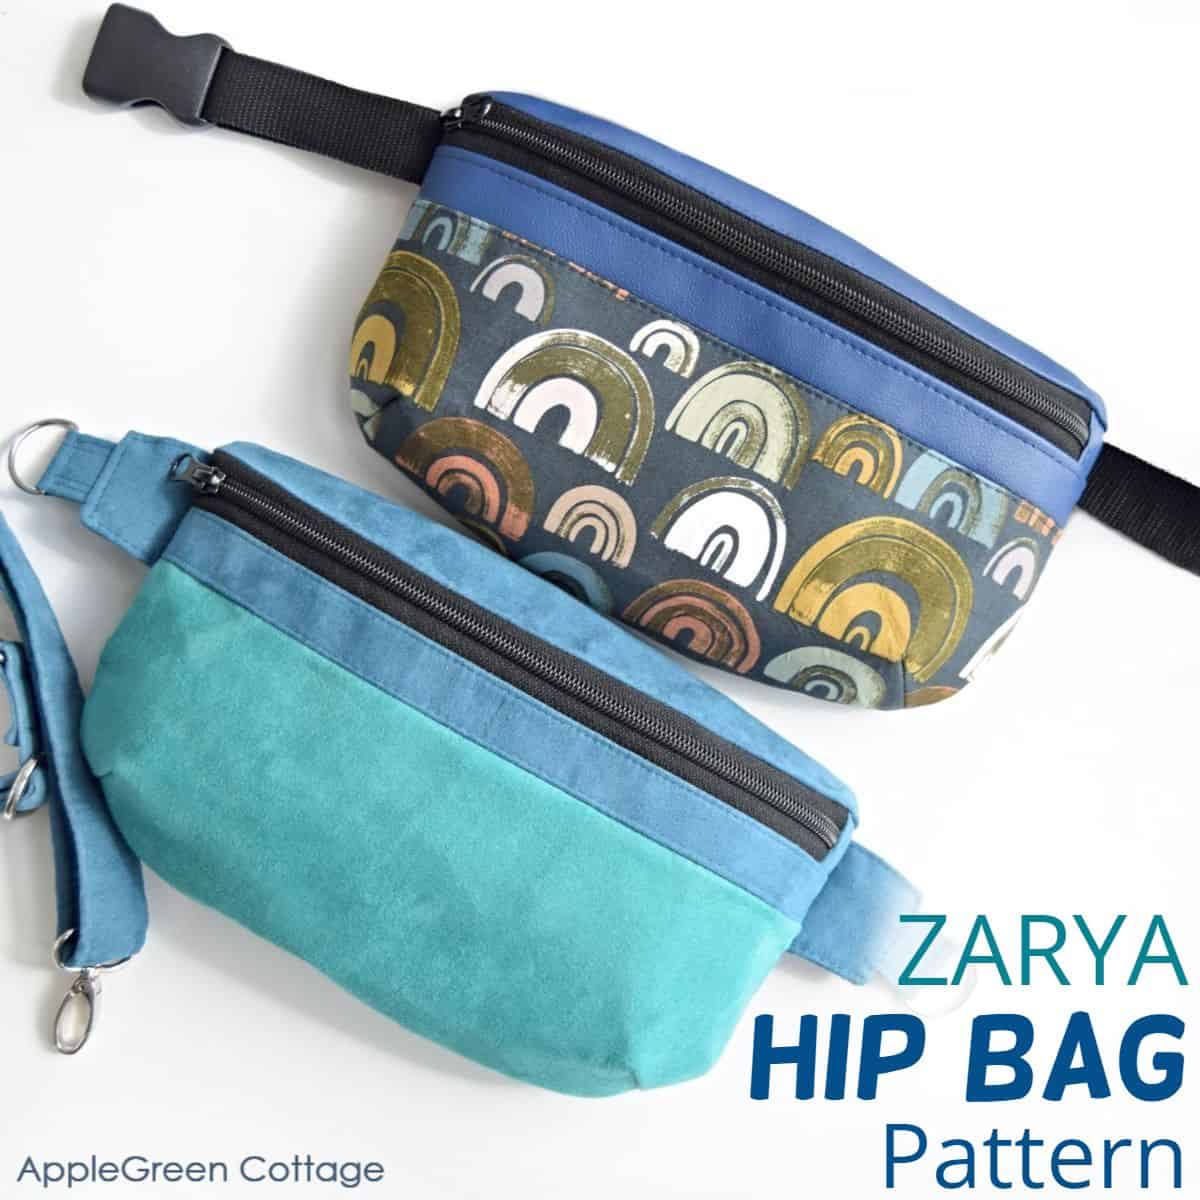
Check out the trending ZARYA Hip Bag pattern in our shop - perfect for carrying all your essentials - hands-free!


MaryLou McDonald says
I love this pattern. It's so versatile. I've made wristlet purses with it, even put a long strap on one for a crossbody bag. Thanks again AppleGreen Cottage and Damjana.
Lynda says
Why is the zip shorter than the fabric? Is it just to remove seam bulk?
Damjana says
Yes, you're right. There is a bit of space between the side seam and the bulk of the zipper, making the project easier for beginners, too. I love the clean look, too.
Dani says
If I had found your tutorial before I started making zipper pouches, I wouldn't have made so many mistakes. Your tutorials are great because they very detailed, with lots of useful and clear photos that show every step, not just assume that the sewist knows how to do it. Thanks for all your work
Damjana says
Dani hi,
I'm glad you like AppleGreen Cottage tutorials. Thanks!
Eden Stewart says
Is the interfacing for the liner a must? If I exclude the liner interfacing will it effect the function of the bag?
Damjana says
Eden hi, a good question. No, it is not necessary to interface the pouch lining. However it does give your pouch that professional finish. I hope this helps,
Ellisen says
Thank you for the excellent Zipper Pouch pattern + tut! I appreciate your talents.
Damjana says
Ellisen hi, thank you!
Anonymous says
Very clear and detailed tutoral with perfect and nice pictures! Thanks 🙂
Fabi says
This is really great8
Finally a tutorial that i understand.
It seems so easy to make.
I saved it and i'm going to try to make this as soon as i have a little bit more time.
Nice for all kinds of presents.
Thnx for sharing!
Damjana at AppleGreen Cottage says
Fabi,I'm glad you like the tutorial. Here's to many new zipper pouches! I'm planning to make some more for presents, too! And it's high time I make one to keep for myself, too :))Have a great day,
Becky says
I love this pouch & want to make one. But I want to print the pattern & cannot find a print version. Even my browser does not offer a print option. Can u offer a PDF version.
Damjana at AppleGreen Cottage says
Becky, thanks for reaching out! It looks like many of my readers would want a printable pdf version, so I find it only fair to help out. It's not official yet but I'm telling you the good news (anyway, not many people have time to read comments, do they?): I'm making one. Please let me know your email address, I'll make sure to send you a link when the pdf printable is online! Have a great day,
JOY says
I'm always looking for ways to finish off the ends of the zippers. Thank-you for showing that detail.
Kathy says
Hi Damjana,This is a great tutorial. I will try to make one. Thank for share !
rebekah@naturallyblessedmama.com says
I love those little pouches!! They are so adorable!! They would be great as stocking-stuffers.
Damjana at AppleGreen Cottage says
Rebekah, great idea! Now I just need to find some cute red Christmas themed fabric to go with 🙂
Nina says
I love the fabric that you used for these little pouches! Cute, cute, cute. I think I'll make up a bunch so that I can give them to my little granddaughters!
Damjana at AppleGreen Cottage says
Nina,I'm so happy to hear that!
Deedra B. Lutes says
I just wanted to thank you for your fabulous tutorial, the detail made it so simple I think I can finish my quota by tomorrow. I altered the idea a little for a wet bag pattern for diapers, I can not thank you enough for sharing.
Damjana at AppleGreen Cottage says
Deedra, I'm SO happy to hear that!
Pam @Threading My Way says
As always, a clear and easy to follow tutorial, Damjana and a sweet little zippered pouch. A girl can never have too many!
Heart says
I like this tutorial. It's very clear and simple. A good sewing activity for a beginner like me!
Damjana at AppleGreen Cottage says
Thanks! I'm glad you find it useful and hope you'll make many cute zipper pouches - send me a photo if you do, I'll be happy to post it here! Have a great day, Damjana
Krista R says
I've never sewn a zipper in anything they intimidated me! This is such a simple tutorial! Thanks!
Damjana at AppleGreen Cottage says
Krista,thanks for your comment, I'm so happy my tutorial encouraged you - and this might really be the easiest way to to start working with zippers in sewing projects. Happy sewing! Damjana