
A long time ago, I wanted to make my first bucket hat, for my (then) toddler.
But it looked so hard to sew a simple bucket hat!
So I started looking for sewing shortcuts. And messed with those poor bucket hat pieces until I found an easier way to sew it. A lot easier, actually. So I made this tutorial - it's beginner-friendly.
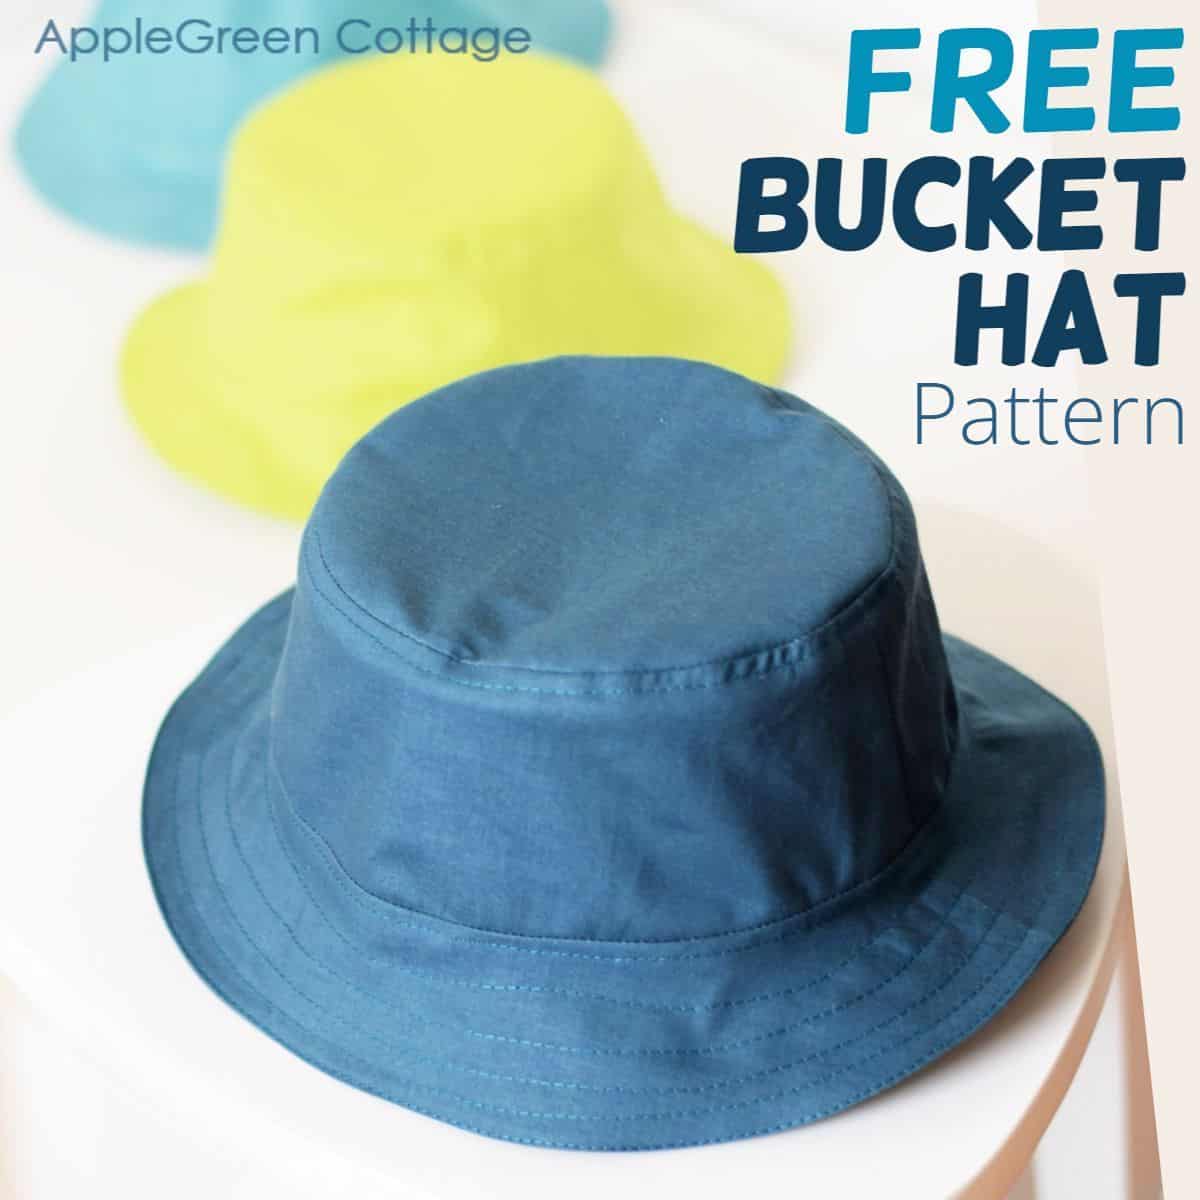
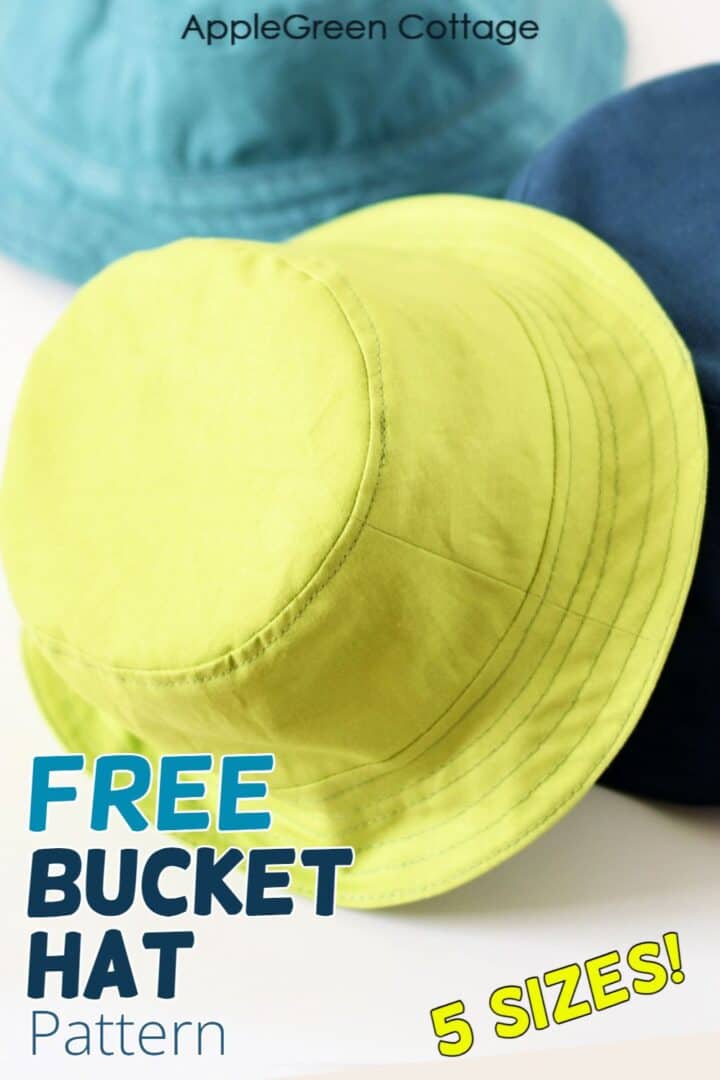
Fast forward years of testing (and my kids outgrowing the smallest sizes) - and here's my new bucket hat pattern. It comes in 5 sizes and it's free.
And it gets even better: this is a reversible bucket hat - no raw seams exposed. Yay! Thousands have sewn up this pattern so far, join in!
Prefer an ad-free printer-friendly option of the whole tutorial+pattern? See the → optional PDF file in our shop.

This tutorial is also part of Printable Tutorials BUNDLE
90+ PDF tutorials now, and growing!
Table Of Contents
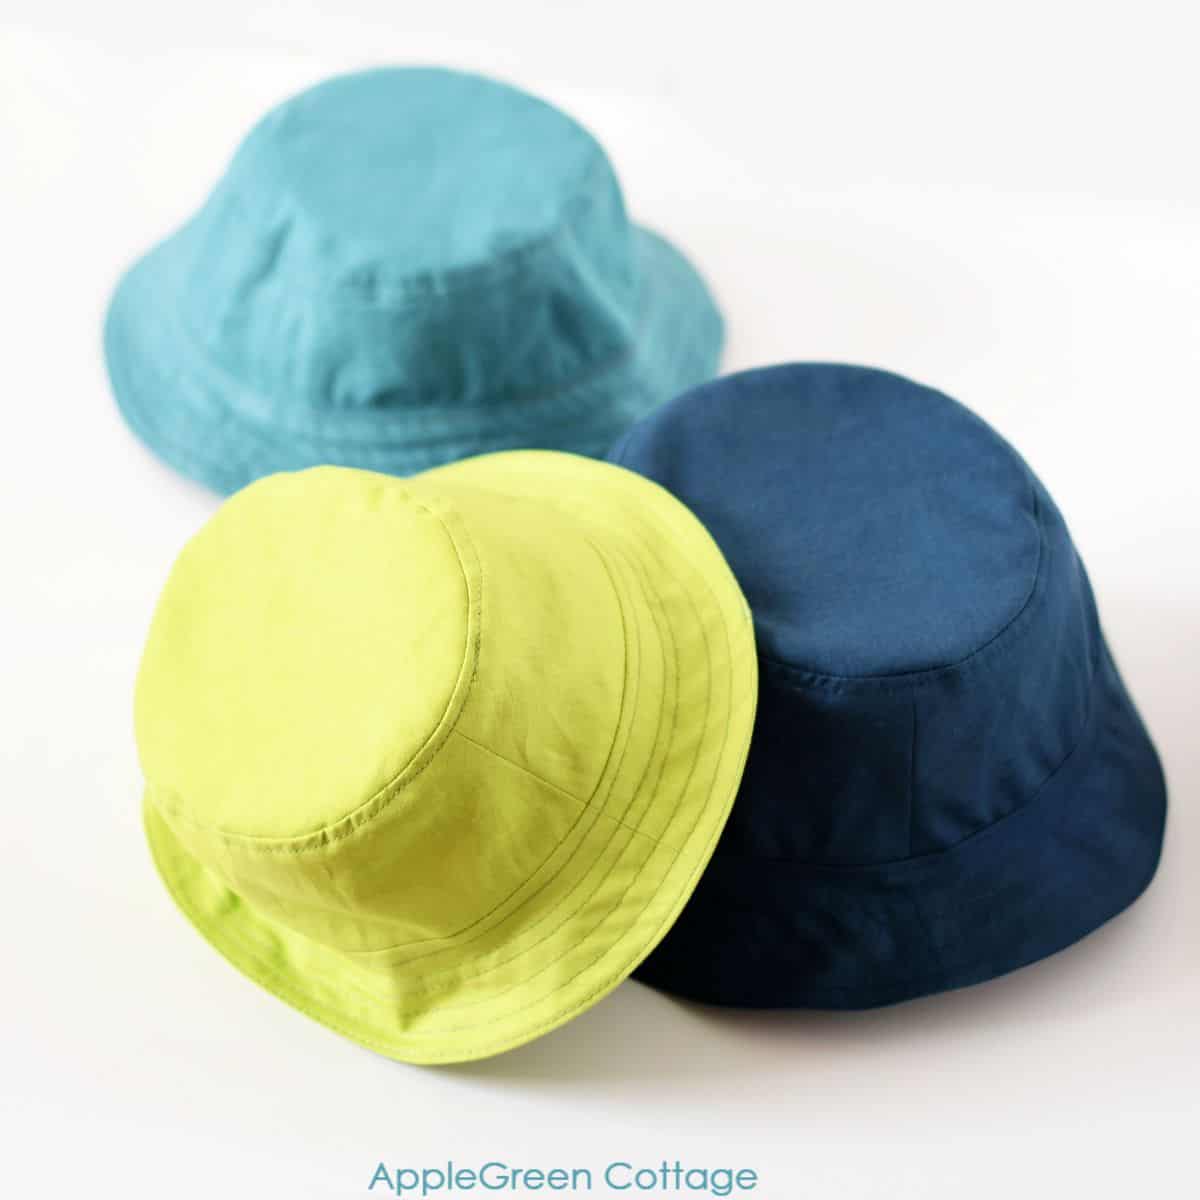
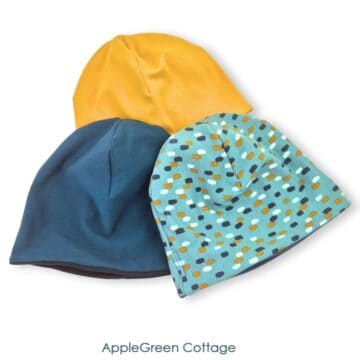
Whether you're headed to the beach, working in the garden, or just going outside in the warmer months - this reversible hat is a must-have.
How To Make A Bucket Hat - Tutorial
I want to help you make your own bucket hat in the size you need, the color you want, and the fabric you choose. Are you with me? Read on, below is an easy bucket hat tutorial with a free printable bucket hat pattern waiting for you - in 5 sizes!
Why everybody loves this hat
Here's why I love this free pattern for bucket hat - and why you might too:
- It fits perfectly. (5 free sizes to choose from!)
- It doesn't keep falling off. (Some hats do.)
- The brim is just the perfect size for keeping the face from direct sun. (Some hat brims are too big, and too floppy.)
- Comfortable and cute! (And you get to choose your fav fabrics!)
- The hat sewing pattern is FREE - and it comes in 5 sizes from baby to adult
And, readers say this might be the best step-by-step tutorial on how to make a hat. (Seriously. Daily, I get emails from people that are NEW to sewing, saying it was way easier than they expected.) - Meaning YOU can sew it too!
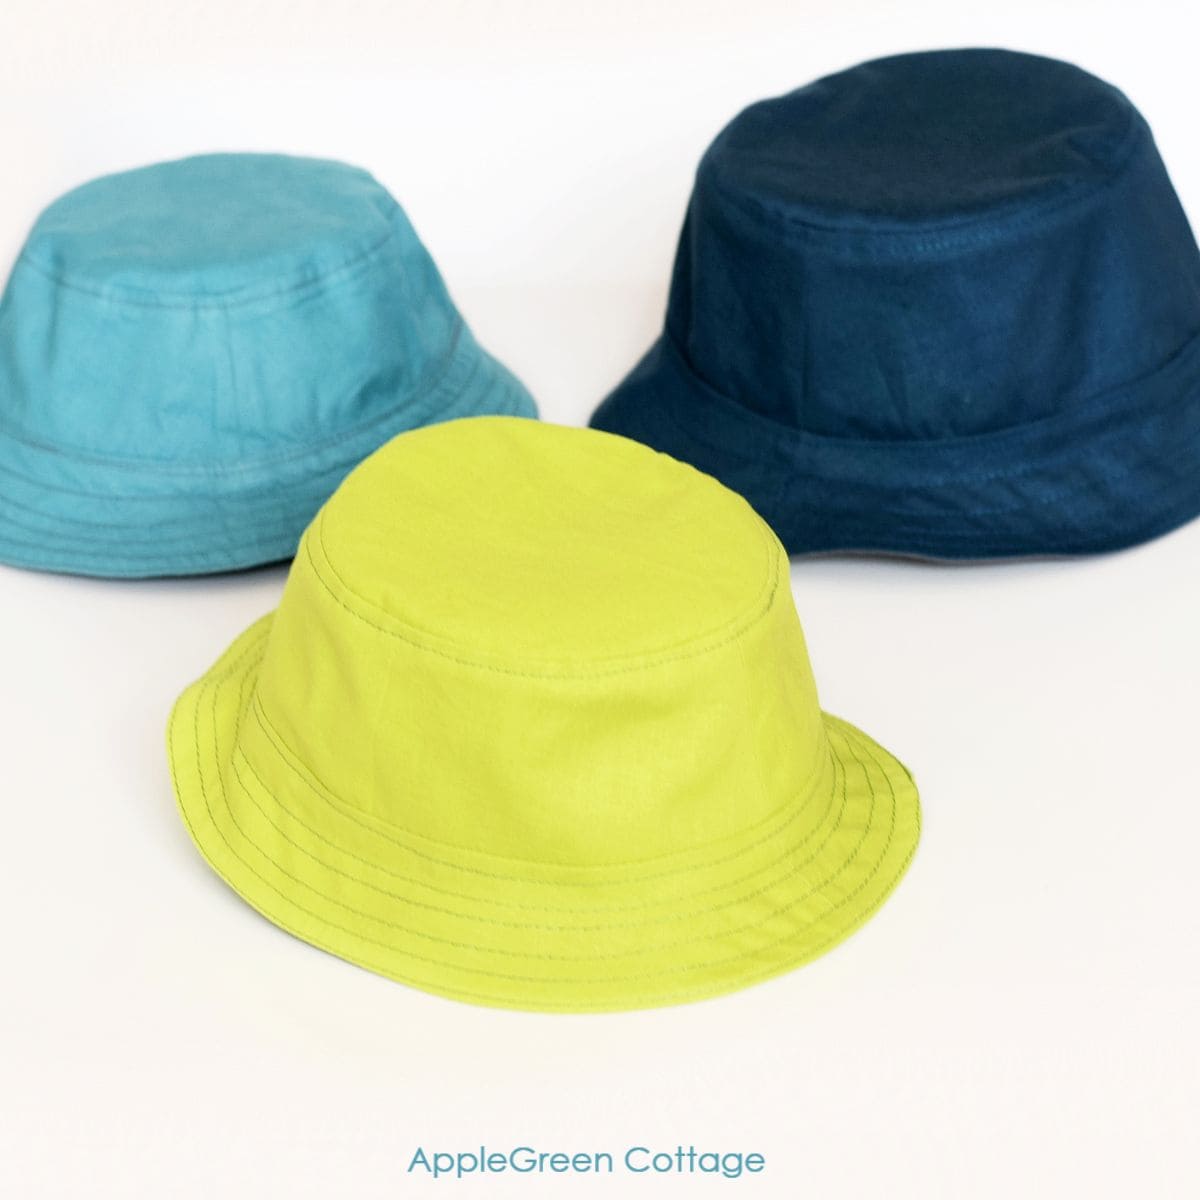
And here it comes ... another cute hat photo. I'll be bold and say this might be the best free bucket hat sewing pattern out there. After all, it's been tested and tweaked for years, by a person who's pretty picky about store-bought stuff haha!
By now, thousands of people have made this hat, and it's my most popular out of more than 300 other free sewing tutorials - check them all out!
Finished Sizes
- Baby bucket hat pattern (Size XS) - 17"-18" circumference
- Kids bucket hat pattern (Size S) - 19"-20" circumference
- Teenager bucket hat pattern (Size M) - 21"-22" circumference
- Adult bucket hat pattern (Size L) - 23"-24" circumference
- Adult xtra-large bucket hat pattern (Size XL) - 24"-25" circumference
These reversible bucket hat sizes are a bit on the smaller side. In doubt, choose a larger size. It's better not to go too small as the hat will always shrink a little after a few washes. Also, it should be comfortable. And see sizing tips at the end of this diy hat tutorial.
This bucket hat tutorial is EASIER to sew.
First, I need to admit that a classic bucket hat project might not be easy to sew, especially not for beginners.
But I'll show you how I used a shortcut, to make the project way easier. It's a different construction process, differing from the industry-standard procedure in sewing a bucket hat.
The result will be the same - but sewing will be way easier. Are you with me?
Supplies
Gather these supplies before you start sewing the bucket hat:
- free pattern
- ½ yard of Outer fabric
- ½ yard of Lining fabric
- matching thread
- pins or sewing clips, sewing machine
- iron, scissors, or rotary cutter plus cutting mat (I use this one by Olfa)
Shop my personal favorite sewing supplies on Amazon HERE.
Bucket Hat Sewing Instructions + Free Pattern
The seam allowance for this project is ⅜" inch (1cm). This free pattern for bucket hat comes in 5 sizes, so you'll first need to decide on the size you want to sew.
Step 1 - Get the FREE Bucket Hat Sewing Pattern
Join our mailing list and get the pattern emailed to you:
Prefer an ad-free printer-friendly option of the whole tutorial+pattern? See the → optional PDF file in our shop.
How To Print this PDF file
For best results, download the PDF to a desktop or laptop, open it in Adobe Reader, and print at 100% size. (I recommend not printing directly from a browser window or from mobile, it could cause issues.)
Step 2 - Cut and Mark the Fabric Pieces
After you've decided on the hat size, use the paper pattern (see note above) to cut out these pieces from fabric:
| Pattern piece name | Cut from Outer Fabric: | Cut from LiningFabric: |
|---|---|---|
| CROWN piece | 1 piece | 1 piece |
| SIDE piece | 2 pieces | 2 pieces |
| BRIM piece | 2 pieces | 2 pieces |
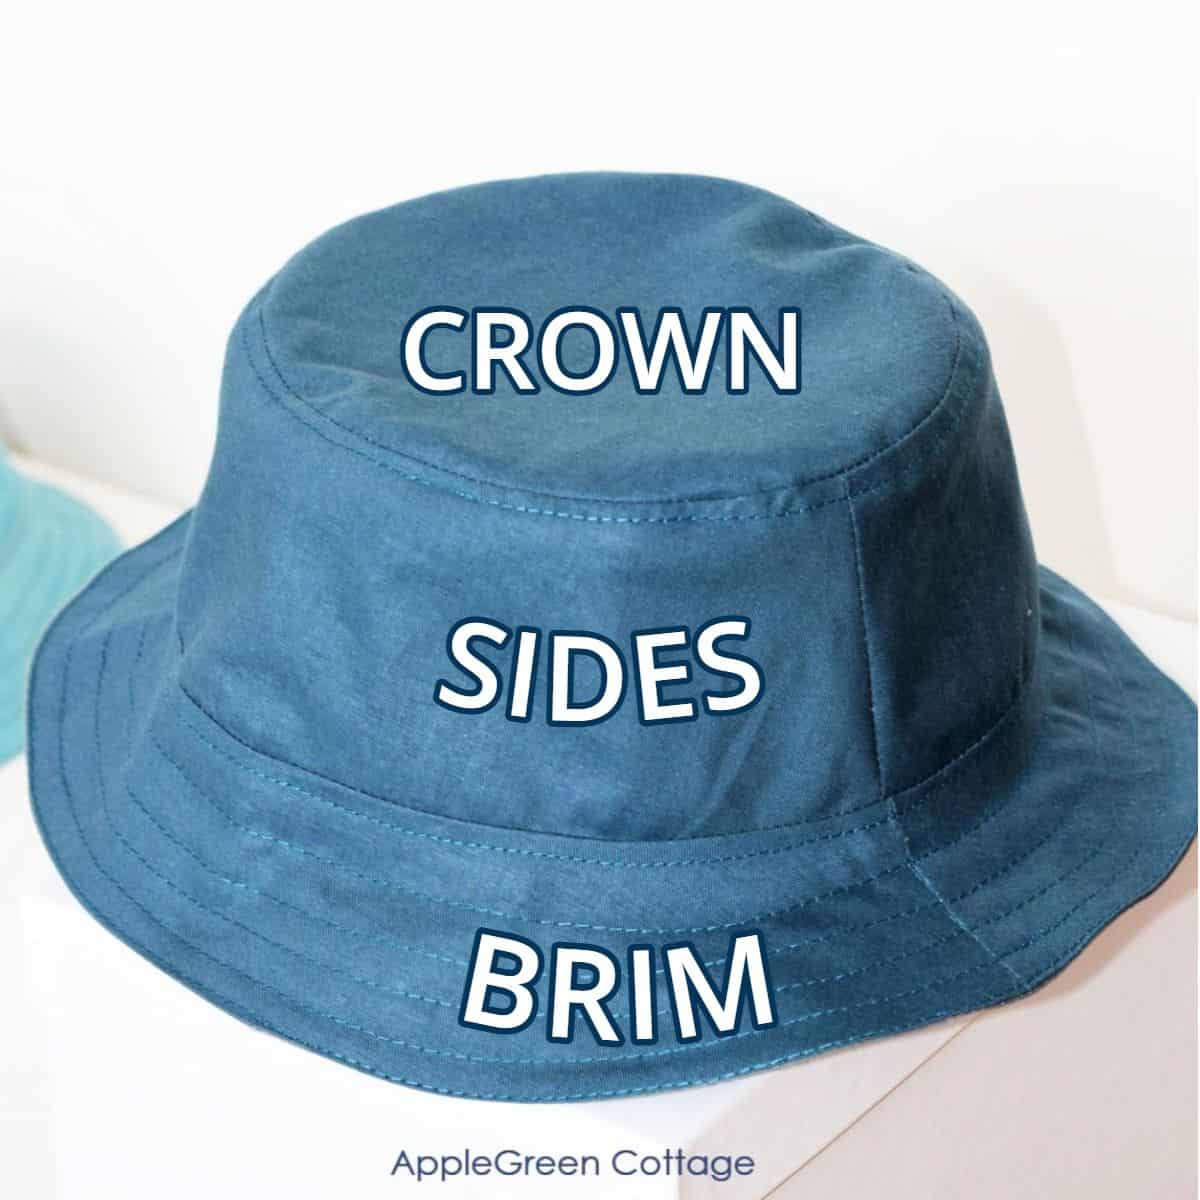
And here's a little image to help you visualize the pattern layout. Here's what the parts of the hat are called in this tutorial:
And this is the way to place your pattern on the fabric when cutting:
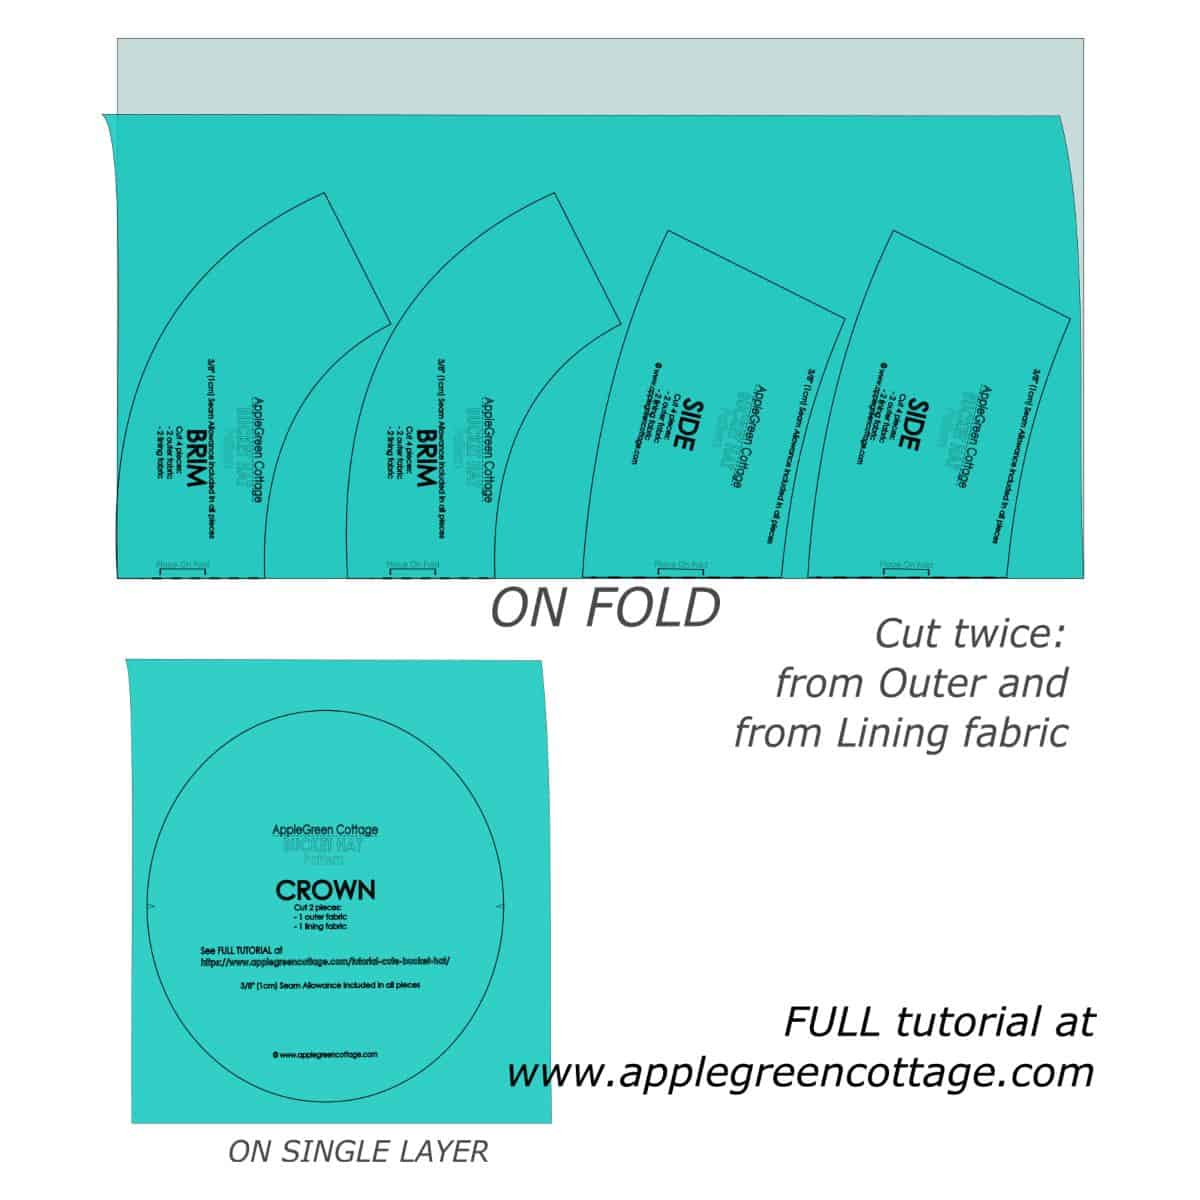
You'll end up with two identical sets of pieces, one from Outer and one from Lining fabric.

Make sure to mark the pieces - make tiny notches in the center of all Sides and Brims and transfer the markings from the Crown pattern piece. This will make your sewing so much easier later on:
- On the Crown, cut or mark 4 small notches where indicated.
- While the Side and Brim pieces are still folded in half, cut small notches at the top and bottom of the fold.
Step 3 - Stitch the Sides and the Brim pieces
Pair all the Brim and the Side pieces, placing each pair with the right sides together and pin.
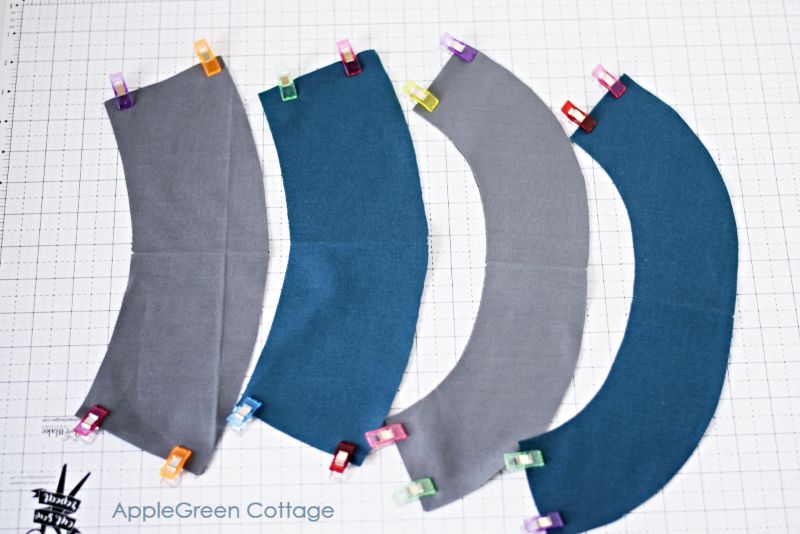
With the right sides together, sew all the short edges together, using a ⅜" or 1 cm seam allowance. You get 4 circular (slightly oval, actually) bands, two full brims and two full sides:

Press all seam allowances open.
Step 4 - Join the Crown piece and the Sides of the bucket hat
Now, let's make one color first: the Outer. Take the 'Sides' circular band and the round Crown piece.
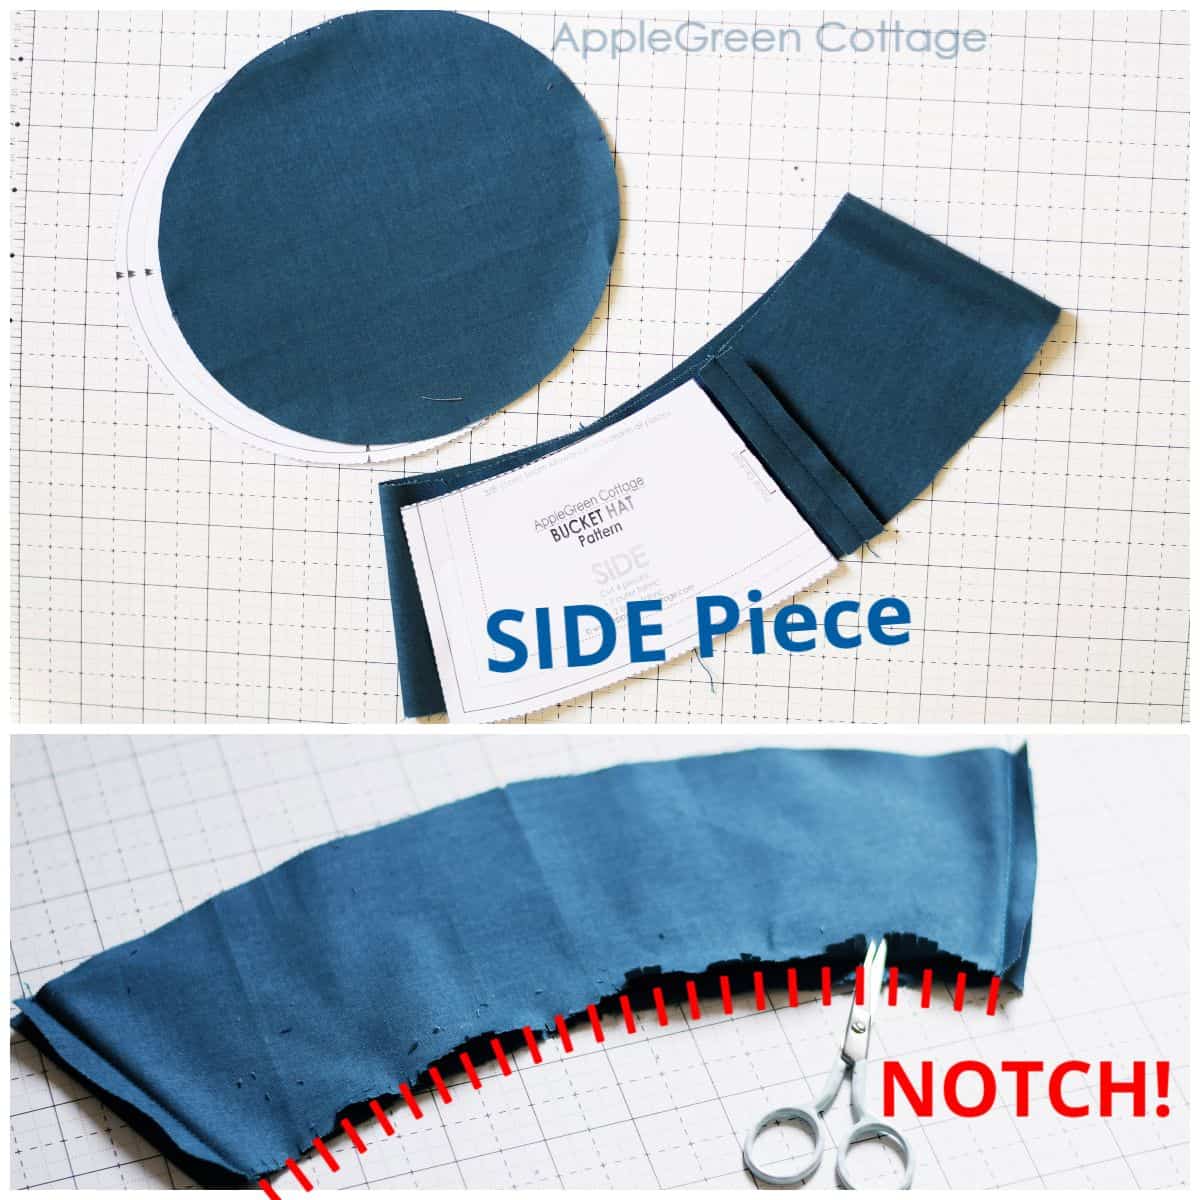
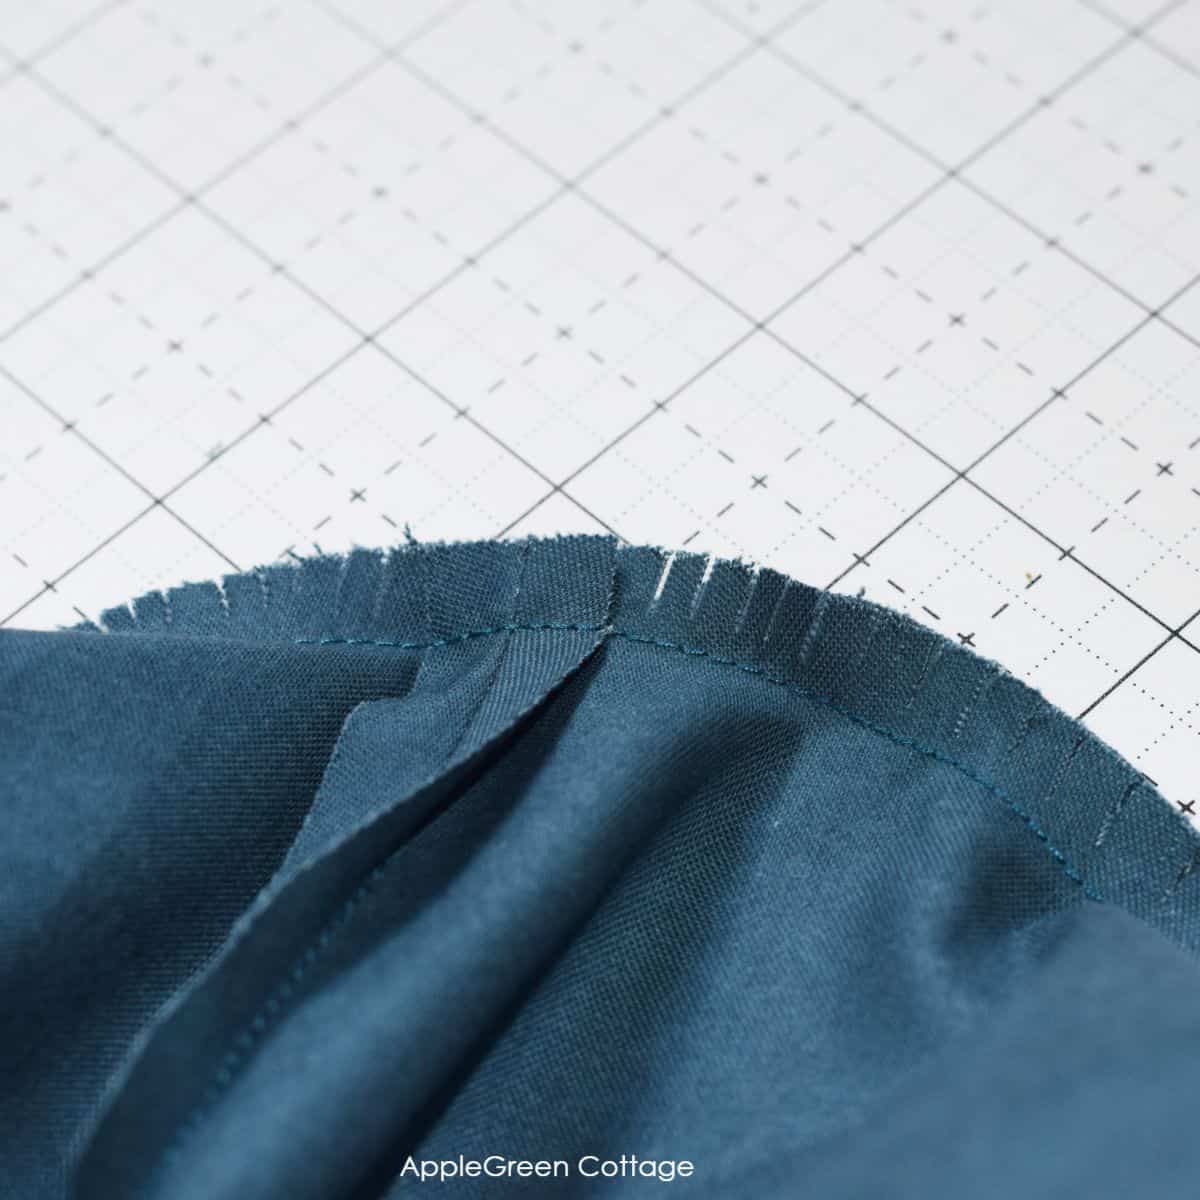
Cut tiny notches, slits into the fabric on the shorter raw edge of the Sides piece to make the pieces match. I clipped tiny notches approximately ¼" (½ cm) into the seam allowance. Take your time. Then pin or clip the two pieces together:
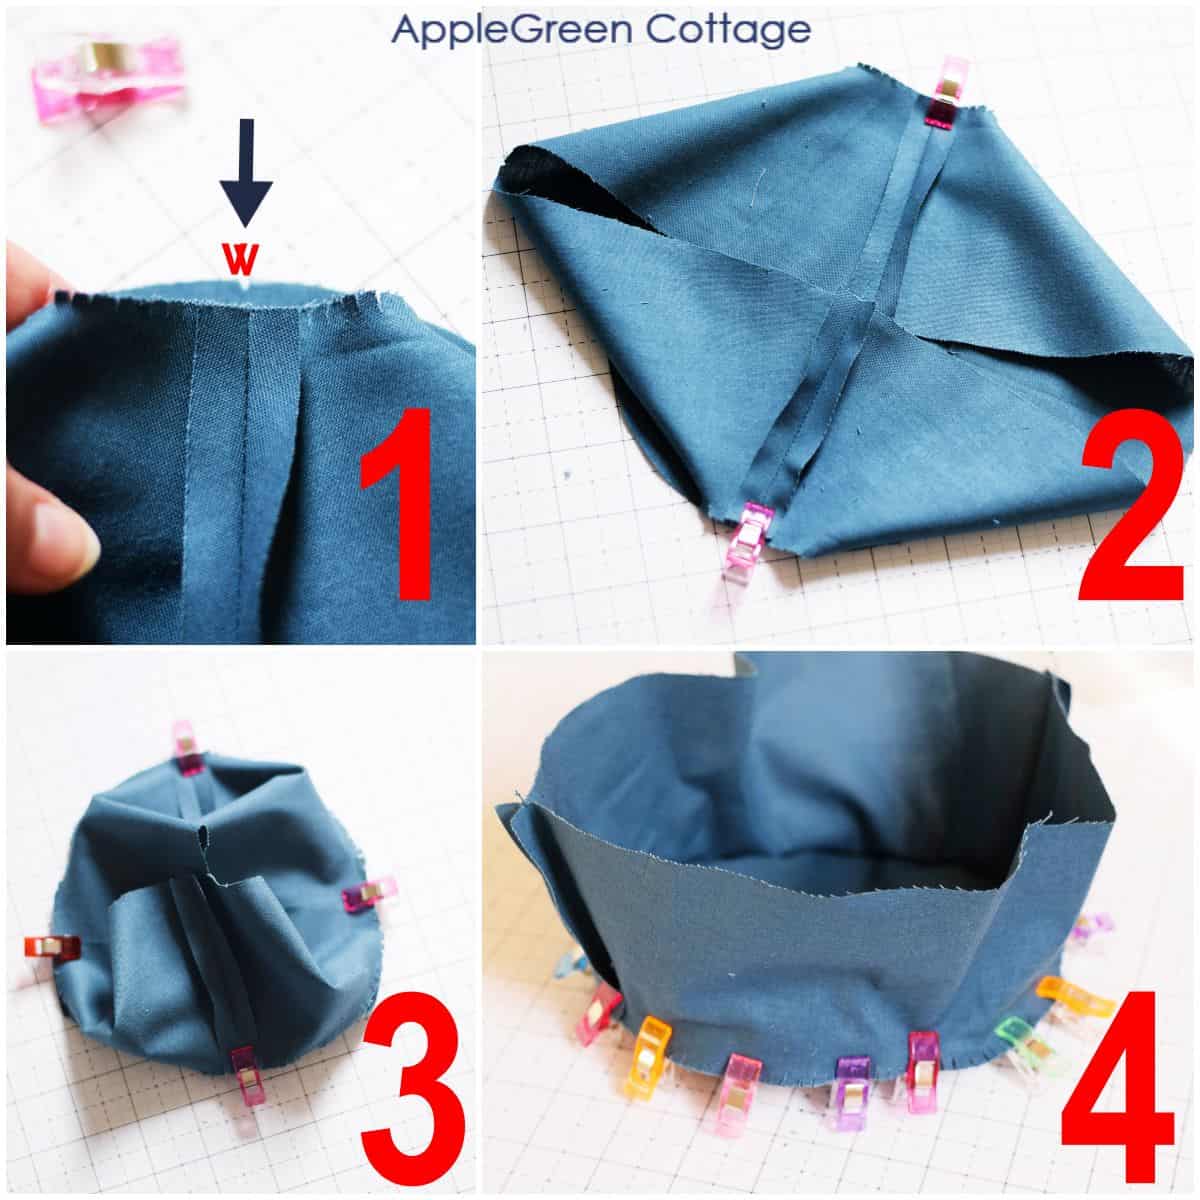
- Identify the front and the back 'double-notch' on the round Crown piece (it's slightly oval actually)
- Start by clipping/pinning the front and the back of the crown to the Sides piece, with the right sides together.
- Match the remaining two notches and
- add clips or pins all around. Use a lot of clips or pins.
IMPORTANT: the double-notch mark ('W' mark) on the oval Crown piece means the FRONT and the BACK of the hat. Align the double-notch ('W' mark) with the seams on the Sides piece.
And here's another photo for those who prefer pins:

From here on, it just gets easier: just sew all the way around, using a ⅜" or 1 cm seam allowance:
Step 5 - Topstitch Around the Crown
Then press the seam allowance towards the Sides and top stitch around for a nicer look. Feel free to use whatever distance from the seam you prefer - anything between ⅛" and ¼" (3-8 mm) should work just fine.
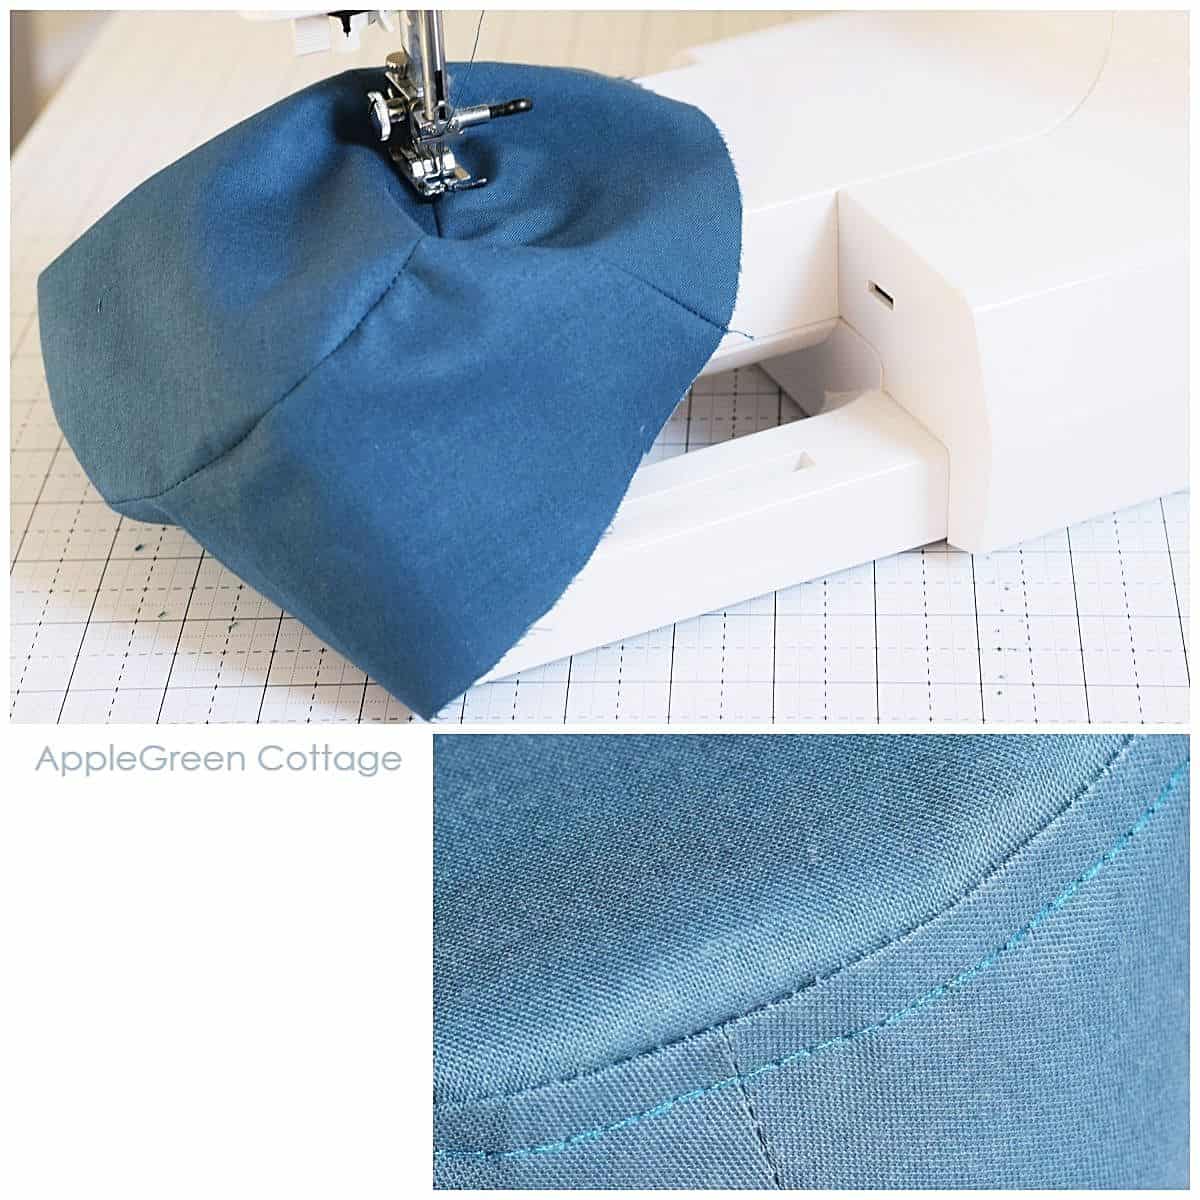
The top of the hat will look so professionally made!
Step 6 - Attach the Brim
Take the Brim piece and pin it to the cap with the fabric right sides together. Again, match the notch markings. Also, it will help you a lot if you cut tiny slits into the narrower part of the Brim piece - just like you did above with the Crown piece.
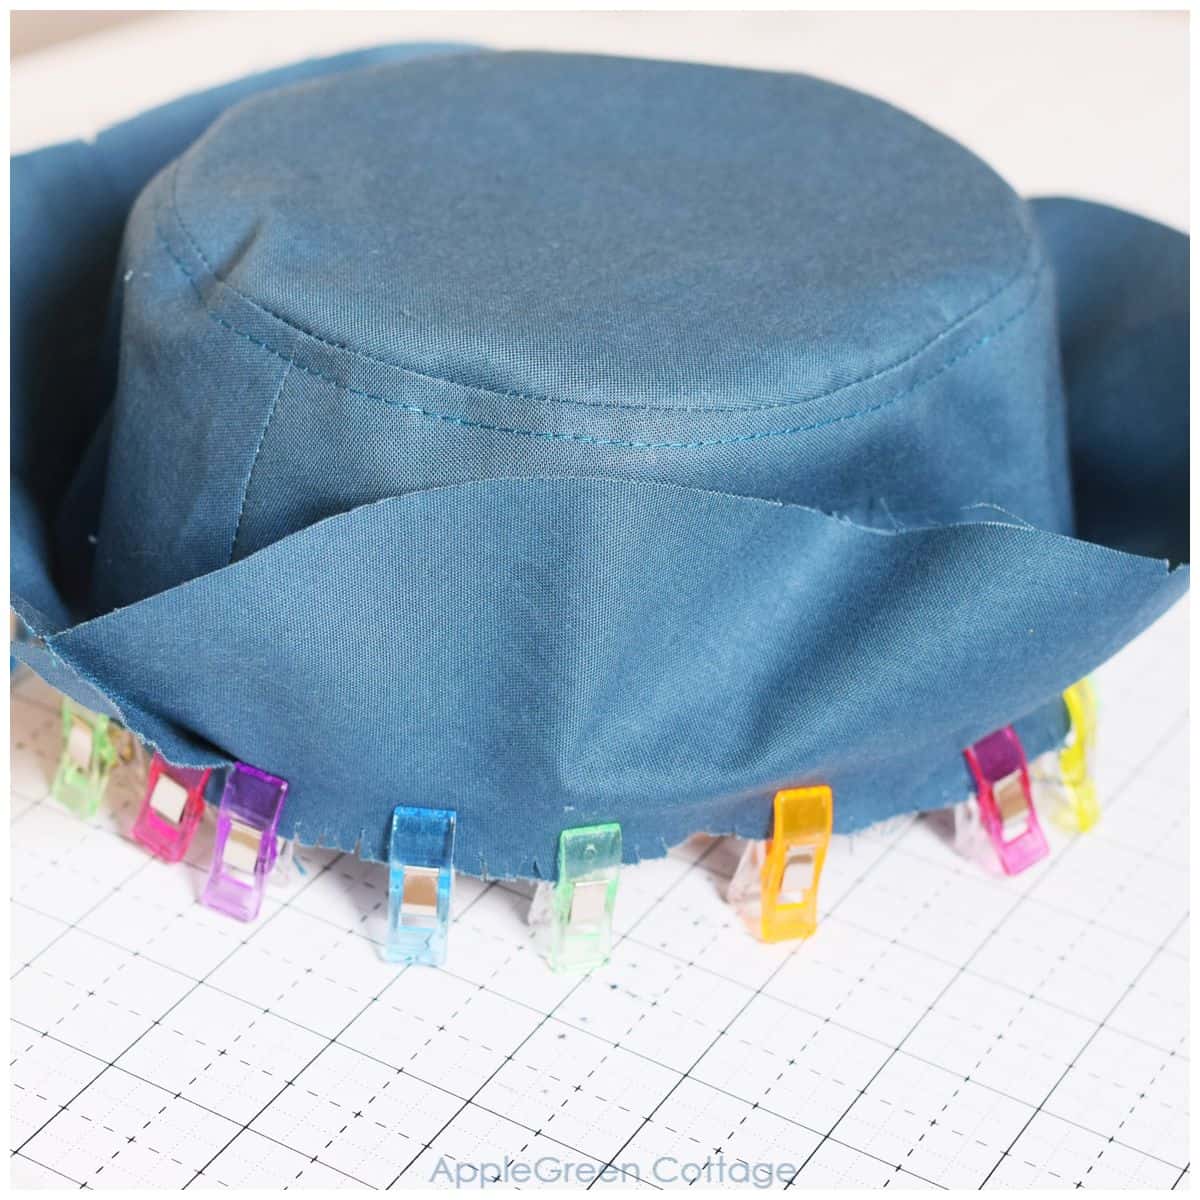
Then sew around using a ⅜" or 1 cm seam allowance:
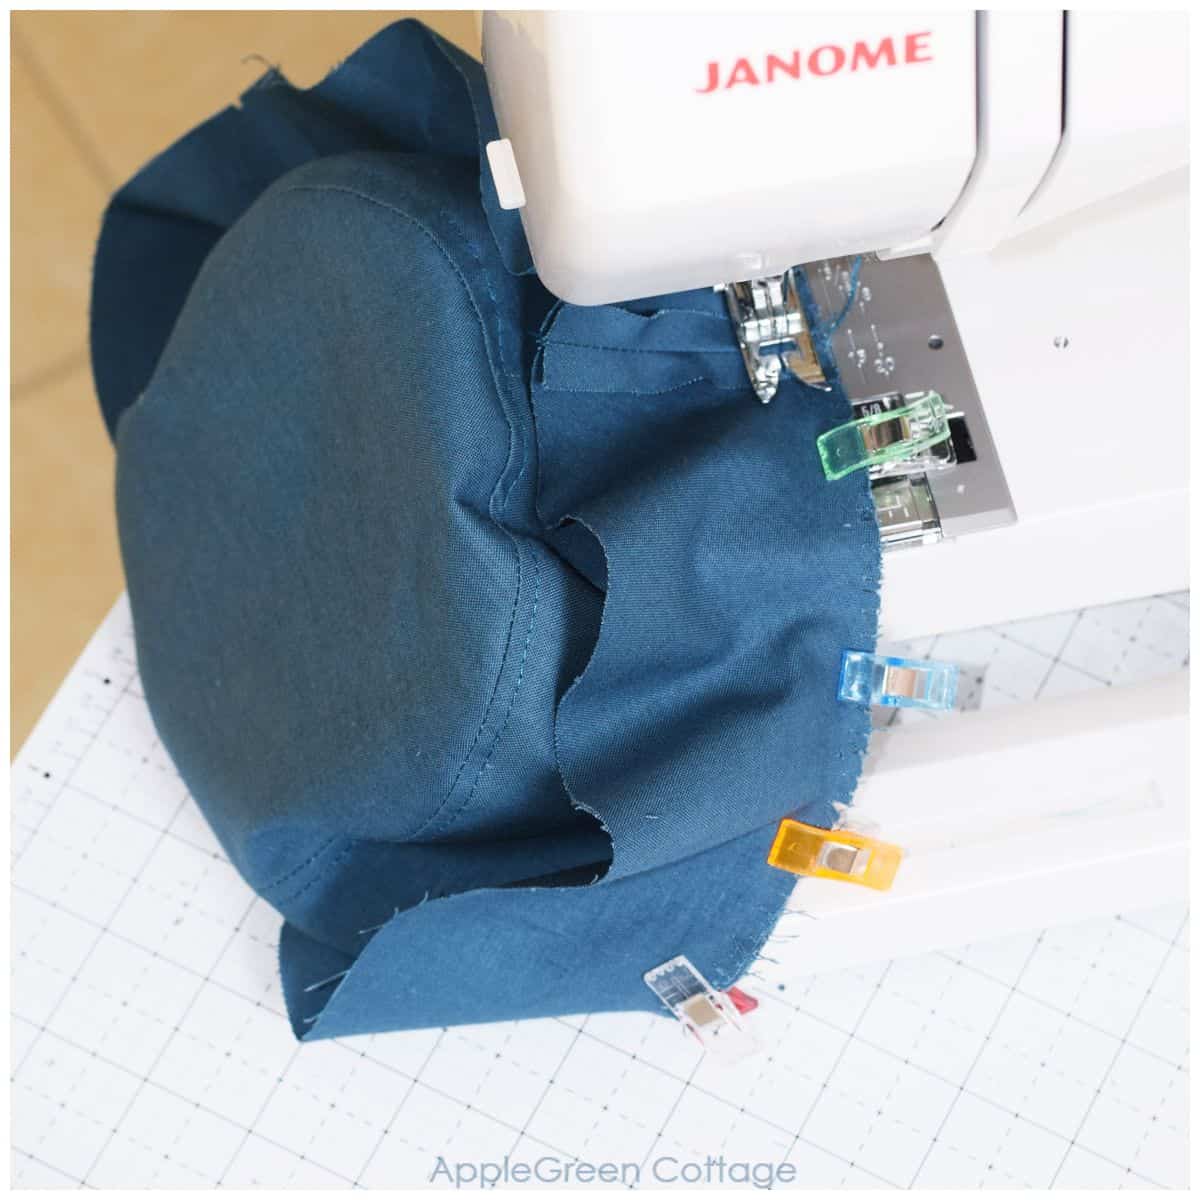
Step 7 - Topstitch Around the Brim
To make the seam look prettier, press the seam allowance towards the brim and topstitch the Brim, like you did in Step 5:

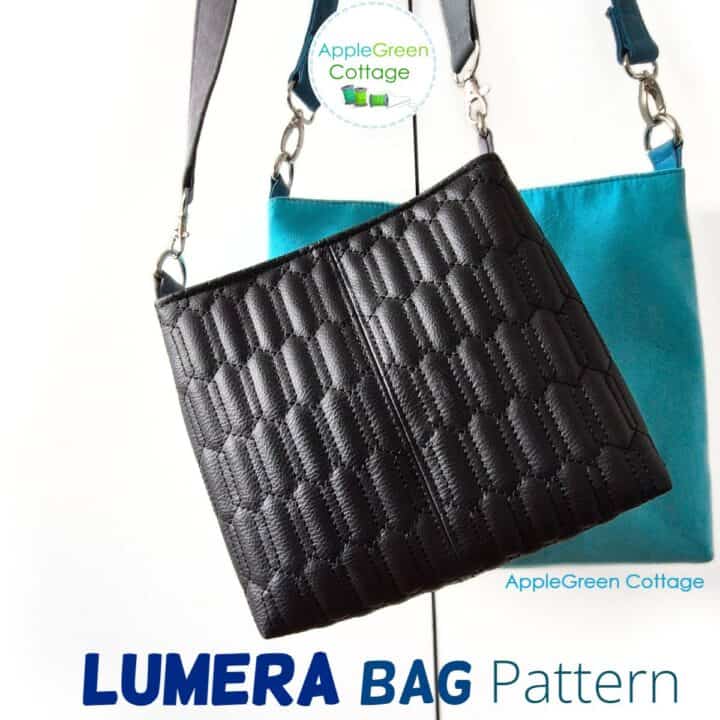
Sew this EASY Bag!
Step 8 - Assemble The Lining
Repeat the steps with the Lining fabric pieces, and you've got yourself these two identical parts of your soon-to-be bucket hat:

Step 9 - Join Outer And Lining
Put the two 'hats' together with the right sides facing each other, with the side seams on the brim aligned. Sew the brims (i.e. the largest circle) together, using a ⅜" or 1 cm seam allowance and make sure to leave a 3" or 7.5 cm opening. You'll need it to turn the hat right-side-out.

Trim the seam allowance using pinking shears.
Related Ideas:


Step 10 - Turn Right Side Out
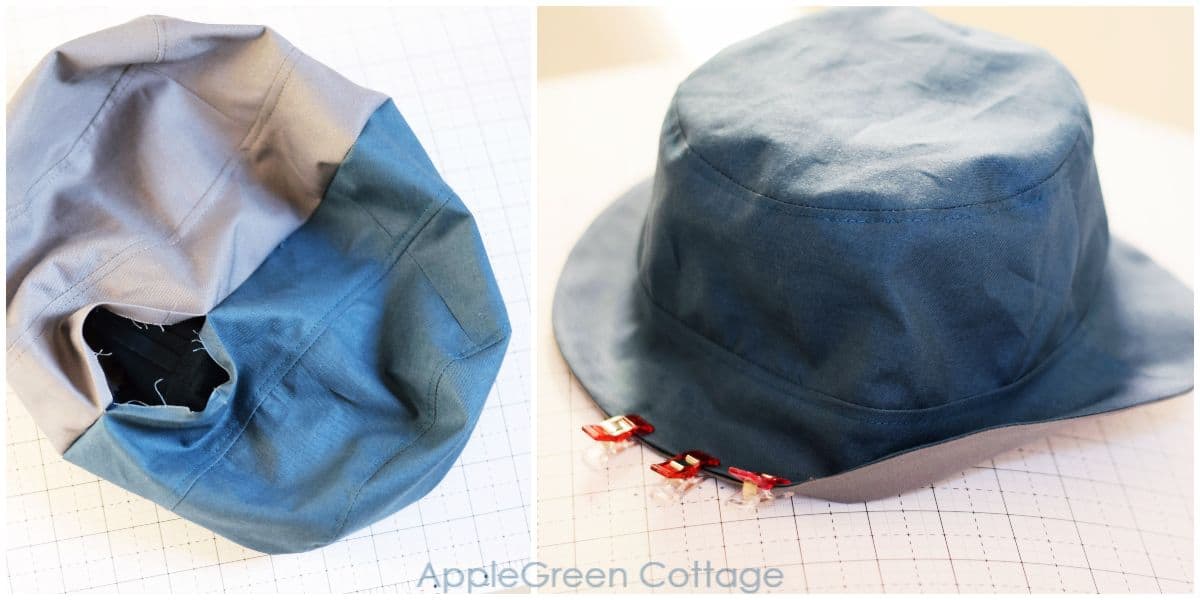
Now turn it right side out through the opening and you've basically made it!
Press the brim so you get an even outer edge. Sew the opening closed or proceed with the next, finishing step.
Step 11 - Finishing touches: Topstitching the Brim
Now, the only thing left to do is to topstitch the brim for stability. See the lines all the way around the edges of the brim on the completed hat? Sew circles around the brim to add stability to the brim.

I used the edge of my machine sewing foot to eyeball the distance between the seam lines, but I never demand perfection from myself. 5 or 6 rows will give enough stability to the brim - even if sewn with quilting cotton, like all these in the tutorial. You can mark them using a fabric pen, spaced ½" or ⅜" apart.
But honestly, I never have the patience to mark. Hence the wiggly seams. I simply call them a 'feature'. LOL

Good job, you've made it through! And if you liked this easy bucket hat sewing project, share it in your favorite Facebook group - or join ours to show when you sew one up!
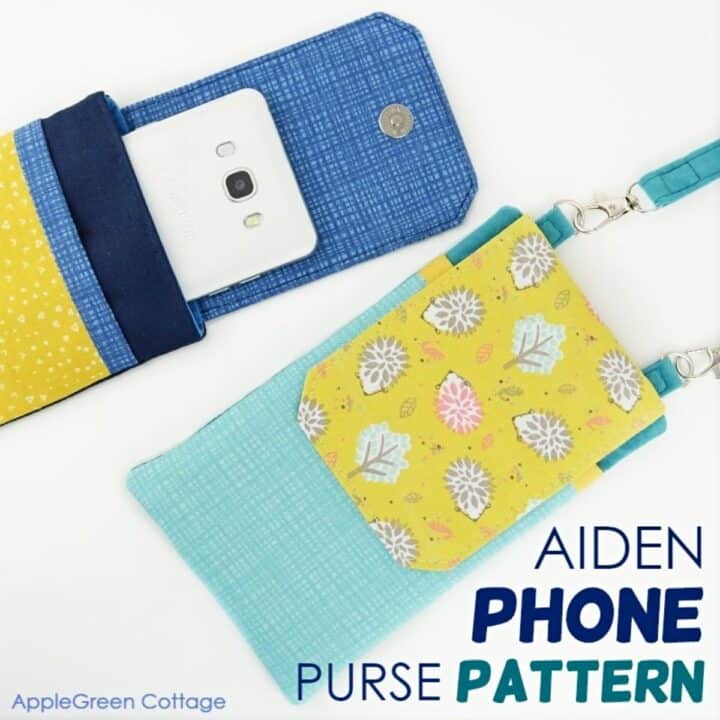
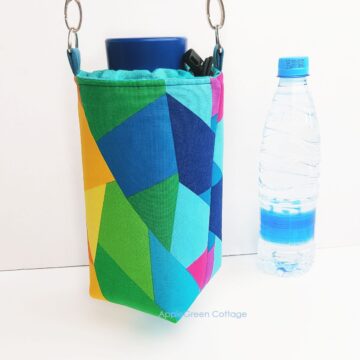
AIDEN Phone Bag
With this pouch, you'll never lose your phone again!
Bonus tips for sewing a bucket hat
I want to help you make the best diy bucket hat, and a little help goes a long way!! Here I'm answering the most frequent questions people ask me about sewing this hat:
How much fabric is needed for a bucket hat?
I decided to put down ½ yard per print in the supplies section, making it a total of 1 yard.
But you can get away with way less fabric if you rearrange and turn pattern pieces for the most economical use of the fabric, with the least leftover possible.
This way, you could even squeeze two hats out of a yard/meter of fabric! But be cautious, as the different cutting could cause the fabric pieces to shrink in different directions once washed. It could distort your bucket hat form. And this is why it's good to use a bit more fabric to ensure the same direction, 'grainline'.
Here's a bonus tip for topstitching the brim: choose a thread matching the fabric color for topstitching. I used teal thread for the outer layer and grey in the bobbin. This way, any uneven curves will be hardly noticeable - or better yet, not at all.
My favorite: densely woven cotton - be it canvas, twill, or simply quilting cotton. And denim is amazing for bucket hats! As it's a double-layer hat, you'll get enough stability without the use of any interfacing.
Oh, you're asking how do I line this bucket hat? Good news, I don't need to! As it's a double-layer hat, you'll get enough stability without the use of interfacing.
You can of course choose to use some light- or medium-weight interfacing if you either used very lightweight fabric or want a firm bucket hat. In this case, I'd fuse interfacing to one layer only, not both Outer and Lining.
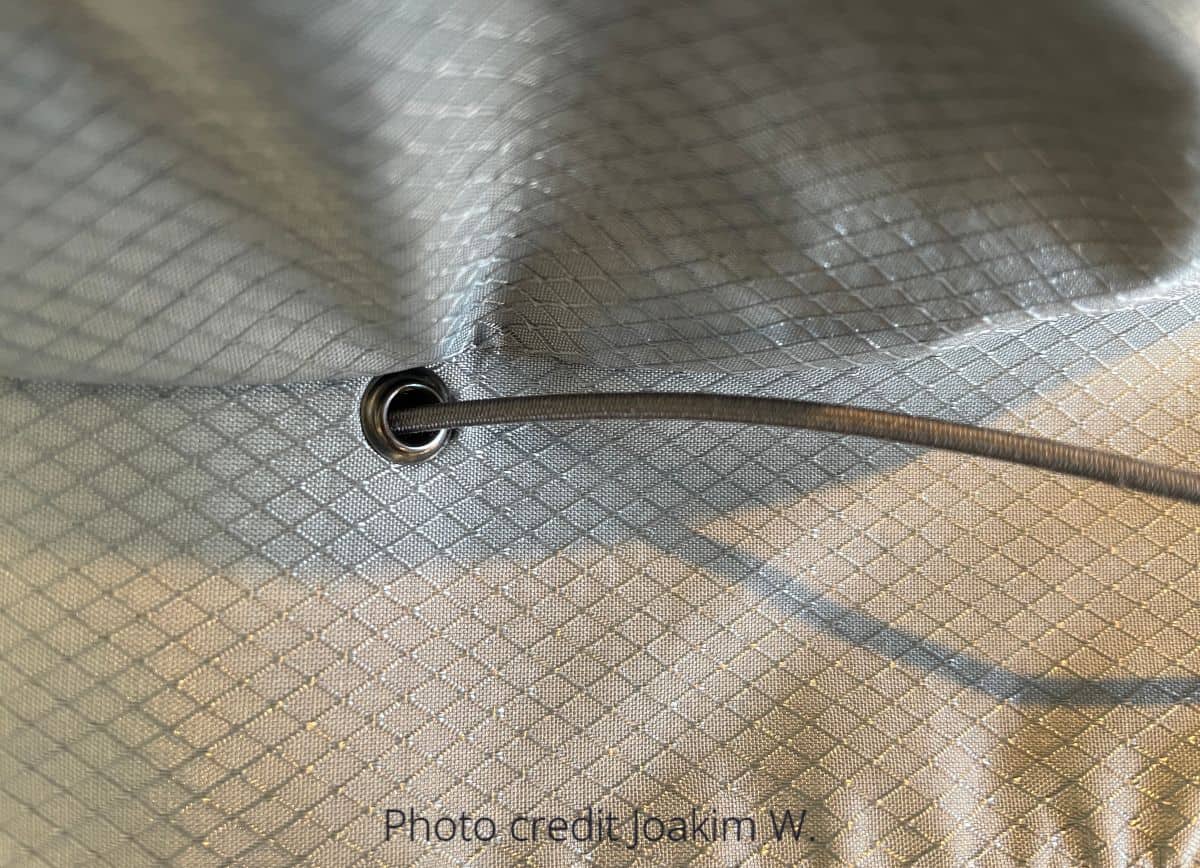
How To Add a Chin Strap To your bucket Hat
For those of you who were asking about creating a simple chin strap for your (already finished) bucket hat: Joakim W. has sent me an email with photos - with his permission, I'm adding them here, so you can use his clever idea for creating a chin strap too:
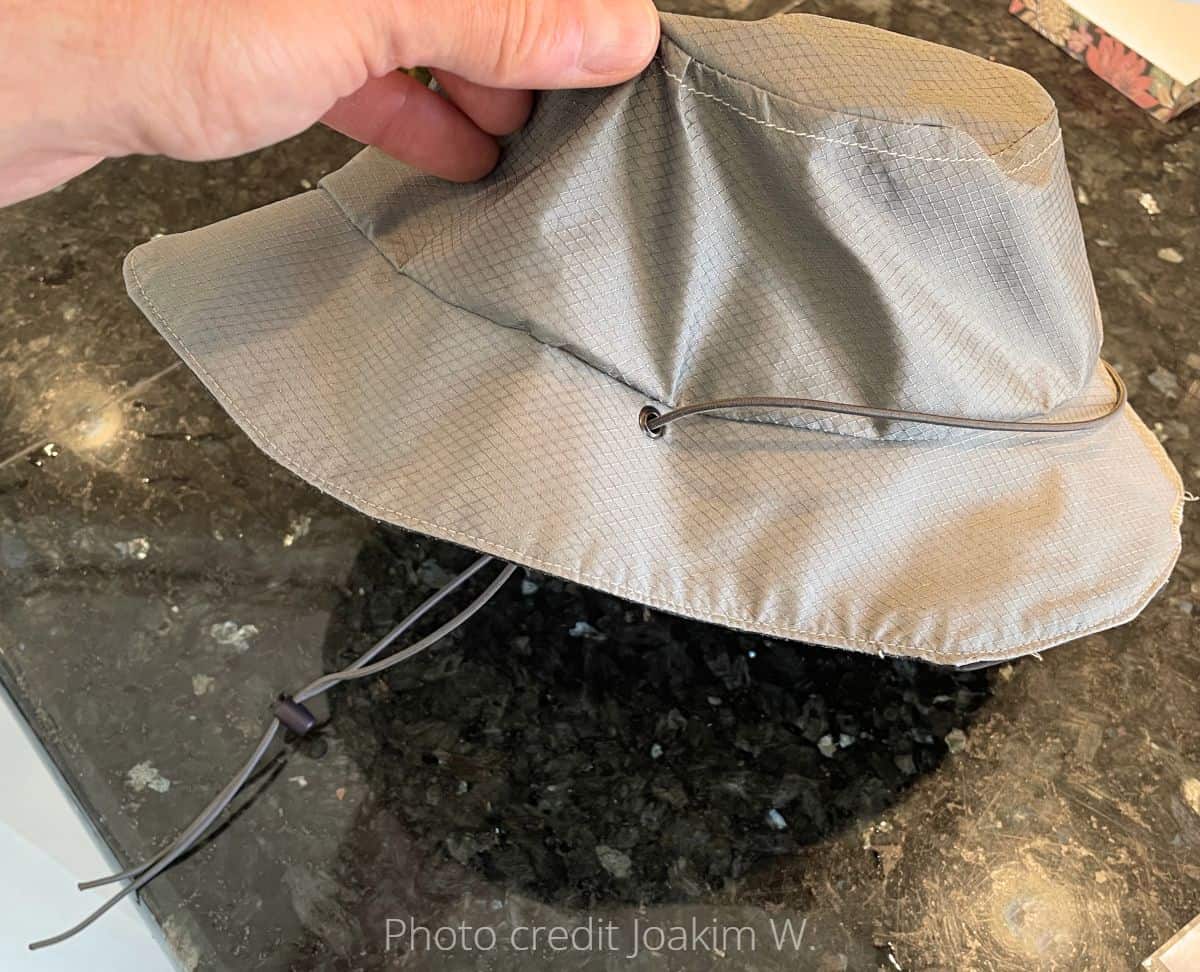
You'll need:
- an elastic cord (I'd say go with ¾ yard/metre and cut off any excess when finished)
- a cord stopper, and
- two grommets (feel free to use my grommet installation tutorial)
"Message: Hi,
I just want to say how pleased I am with the Bucket Hat. I made a slight addition, since I live in a part of Sweden with many windy days. I used my hat in the swedish mountains on a 5 day hike/run in sun, wind and rain. The added elastic cord under the chin was an absolute must in the hard winds in the mountain, worked great! Feel free to share the photos, or add to the Bucket Hat sewing pattern."
Joakim thank you so much for sharing the idea!
How To Make a Ponytail Bucket Hat?
Quite a few readers have asked me how to make a bucket hat with a ponytail hole at the back, to keep those long hair off the neck in the hot summer sun.
A diy bucket hat with a ponytail hole is a great idea, and I have an easy diy addition to this tutorial on my mind already! I've put it on my to-do list. However, if you'll be attempting this with AppleGreen Cottage bucket hat pattern, please note that the ponytail hole needs to be located at one of the VERTICAL seams of the Sides piece. Which - makes it even easier! ![]() I'm itching to try this option! I'll be making a tutorial for a discreet slit at the back of the hat on my pattern. Get ready for a bucket hat featuring a clever little ponytail slit to keep hot hair off your kids' little necks!
I'm itching to try this option! I'll be making a tutorial for a discreet slit at the back of the hat on my pattern. Get ready for a bucket hat featuring a clever little ponytail slit to keep hot hair off your kids' little necks!
How Tight Should A Bucket Hat Be?
Bucket hats should first and foremost be comfortable. If your hat sits too tight, you may feel some tension, and that's too small. Also, it depends on thick your hair is: think a bucket hat on a shaved head versus a hat on a head with thick, voluminous curly hair! That's good to consider - along with measuring your head circumference before you start sewing.
Also, natural fibers in hats can cause gradual shrinking over time. Cotton will shrink, especially after several washes. This is why I've designed this bucket hat pattern a bit larger than usual. I've made my portion of too-small hats, and now, I'd rather make it a bit larger and toss it into the washer (and, if needed, even dryer!!) to get it to the 'final' size.
And one last thing I learned (many times!) about a child's head: it grows fast, so make sure to sew one hat more - in the next size for your kid. This way, you'll have their next favorite summer hat ready for when they outgrow their current hat.
My finished bucket hat is too small/ too large!
Please note that this pattern has been thoroughly tested for years (and used) before I made it free as a gift to everyone visiting AppleGreen Cottage. 2 reasons why the sizing on your sewn bucket hat could be off:
1 - Select the right pattern size by first measuring the head circumference of the person who'll wear it. If you are unsure what size would fit you, go for the larger of the two you are considering.
2 - Please bear in mind that the hat should be comfortable. If you want a tight fit, go for a smaller size, but it's better not to go too small as the hat will always shrink a little after a few washes.
3 - Use the exact seam allowance as indicated on the pattern pieces. Please note that since thousands of people have been using this pattern, I've come to realize that sometimes, one could easily forget to follow the exact seam allowance listed in the pattern:
- when you increase the seam allowance by just a little, it would result in a small bucket hat,
- or equally, when using a bit smaller seam allowance, you get a large bucket hat. Or at least larger hat than expected.
How Do You Wear a Bucket Hat?
It's all in the brim 🙂 You can either keep the brim turned somewhat down, or you can turn your brim up in the front to reveal more of your face - that would result in a more casual bucket hat look. You can dress it up by pairing it with an elevated outfit, or you can match a bucket hat with your casual clothing (THIS!). Have fun!
Now go, make one pretty bucket hat for yourself, and then for all your loved ones. Super popular with kids, especially if mixed with their favorite prints. (Dinos, anyone?) Also, it makes a perfect men's bucket hat too.
Now you can start making your own stylish diy hat collection - I want to see all the cute bucket hats you make! No time to sew now? Save this diy bucket hat pattern and tutorial for later, so you can get your own pdf file any time.
Want a printable copy of the whole tutorial?
Prefer a full, ad-free and printer-optimized Printable Tutorial with both instructions AND pattern included? ↓↓
This tutorial is also part of Printable Tutorials BUNDLE
90+ PDF tutorials now, and growing!


Krisrin says
When we cut out the fabric pieces…are they folded right sides together, or doesn’t it matter.?
Damjana Jakos says
A great question! You're right, it doesn't matter. Either way, you'll end up with full sized pieces once you unfold them. Enjoy,
KEISHA D HILT says
Hello,
I have made two so far and this pattern is great and the instructions are easy to follow.
Veronica Pavia says
Regarding seams in front and back, couldn't the side and brim patterns be simply altered by overlapping one set of seams in the paper pattern, creating a single curved pattern piece for each instead of two? This would result in a single sewn seam in the fabric for the sides and brim, which could be placed in the back. Perhaps interfacing would be required to give the hat some structure without the second seam, but I think the hat would look better without a center front seam. I'm going to try this out to see how it works.
Damjana Jakos says
Veronica hi, that’s a great idea – and yes, I think that could work really well. I’d love to hear how your version turns out!
Karine Double Vé says
I made it as my first hat and I absolutely loved making it!
But I do not understand why the seams are at the front and back of the hat instead of the sides? When using a patterned fabric, it looks kind of weird? Is there a way to make the seams on the side?
Damjana Jakos says
Karine thanks so much for asking — and I'm so happy you loved sewing this pattern! The seams are at the front and back by design – that’s what gives the hat its shape and fit, and moving them would mean redrafting the pattern.
This seam placement also works well for a ponytail-slit variation, if you ever want to add one. Warmly,