
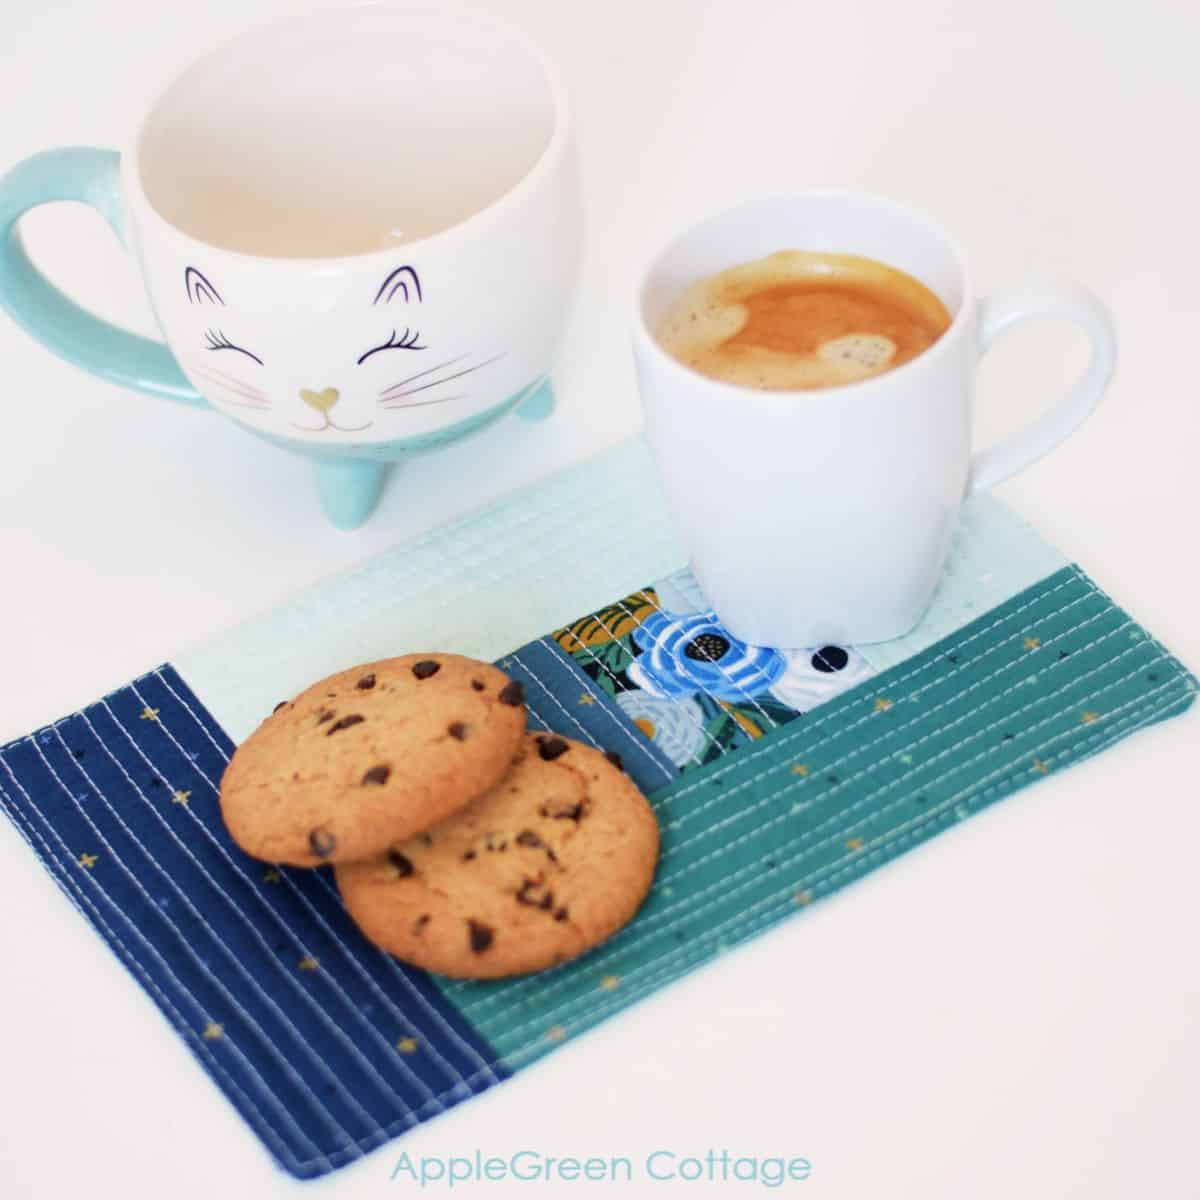
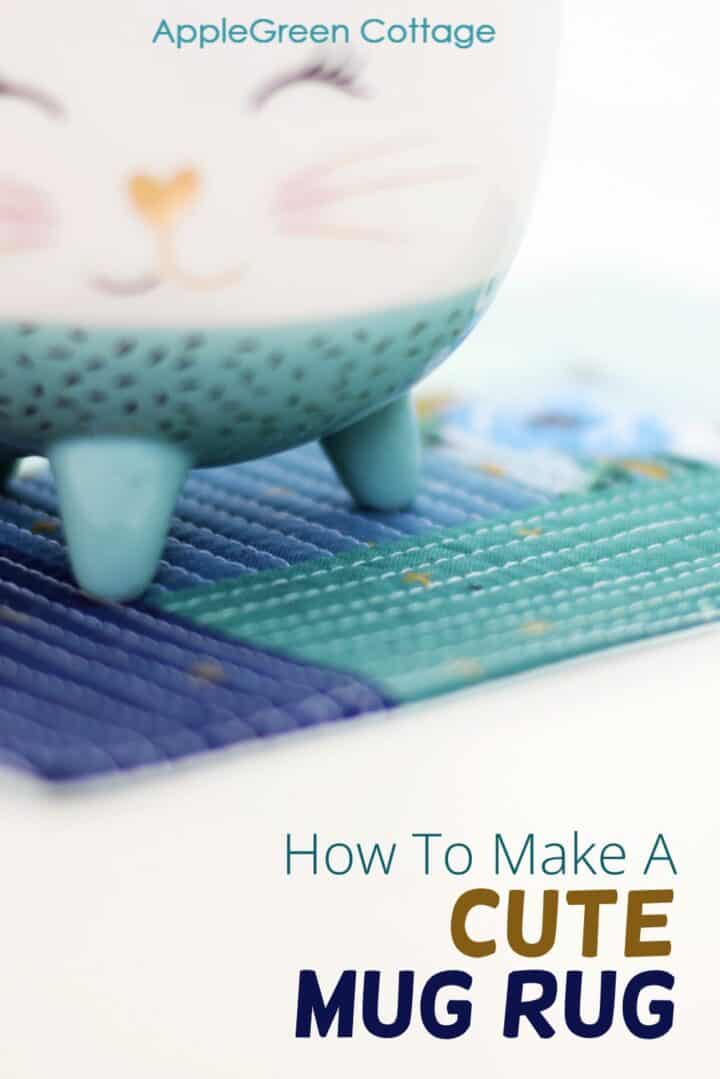
Are you looking to make an adorable mug rug? Ok, this one might become your absolute favorite - especially if you're after a quick, easy, and cute sewing project. Here's why:
Beginner-friendly, one single block, no precision needed. And no binding. Yep. This easy quilt as you go mug rug tutorial is a must see - it will show you how to make a mug rug without binding!
And every new mug rug means more precious coffee time for me! You too? Let's sew one - there's a VIDEO tutorial too!
Do you want an ad-free, printable copy of this online tutorial? Get it in our shop. Or get the whole →BUNDLE!

Ok, this one is my favorite. You cannot but love it - both the process and your first ever mug rug. And you can use it later to make an easy quilted table runner!
Never made a quilt as you go block before? See my master post about quilting as you go for even more useful tips to get you started.
Also, try our new, popular SewPretty HOME series:

Join the FREE 7-part email course and make 6 beautiful items for your home! You'll love it!
What is quilting as you go?
This is the technique we'll use to sew our today's quilt as you go mug rug. Literally, quilting as you go technique is a quilting technique when you quilt each piece of fabric simultaneously with piecing the quilt. In practice, you'd select the fabric piece to go into your quilt, stitch it on - and quilt it right here and now. Then move on to the next bit, and quilt it. This way, your quilt block is turning into a quilt as you go.
Supplies
You'll need
- 11" by 8" quilt batting the size you want your semi-finished qayg panel - choose a few inches more than you actually need!
- same size 'temporary' backing - a utility cloth or muslin
- 9 ½" by 6 ½" 'pretty' backing piece (this one will show on the finished mug rug)
- scrap fabric - the quilting cotton pieces that will form the actual front of the mug rug.
NEW: scroll down to see the dimensions of all the pieces I used to make this quilt-as-you-go block.
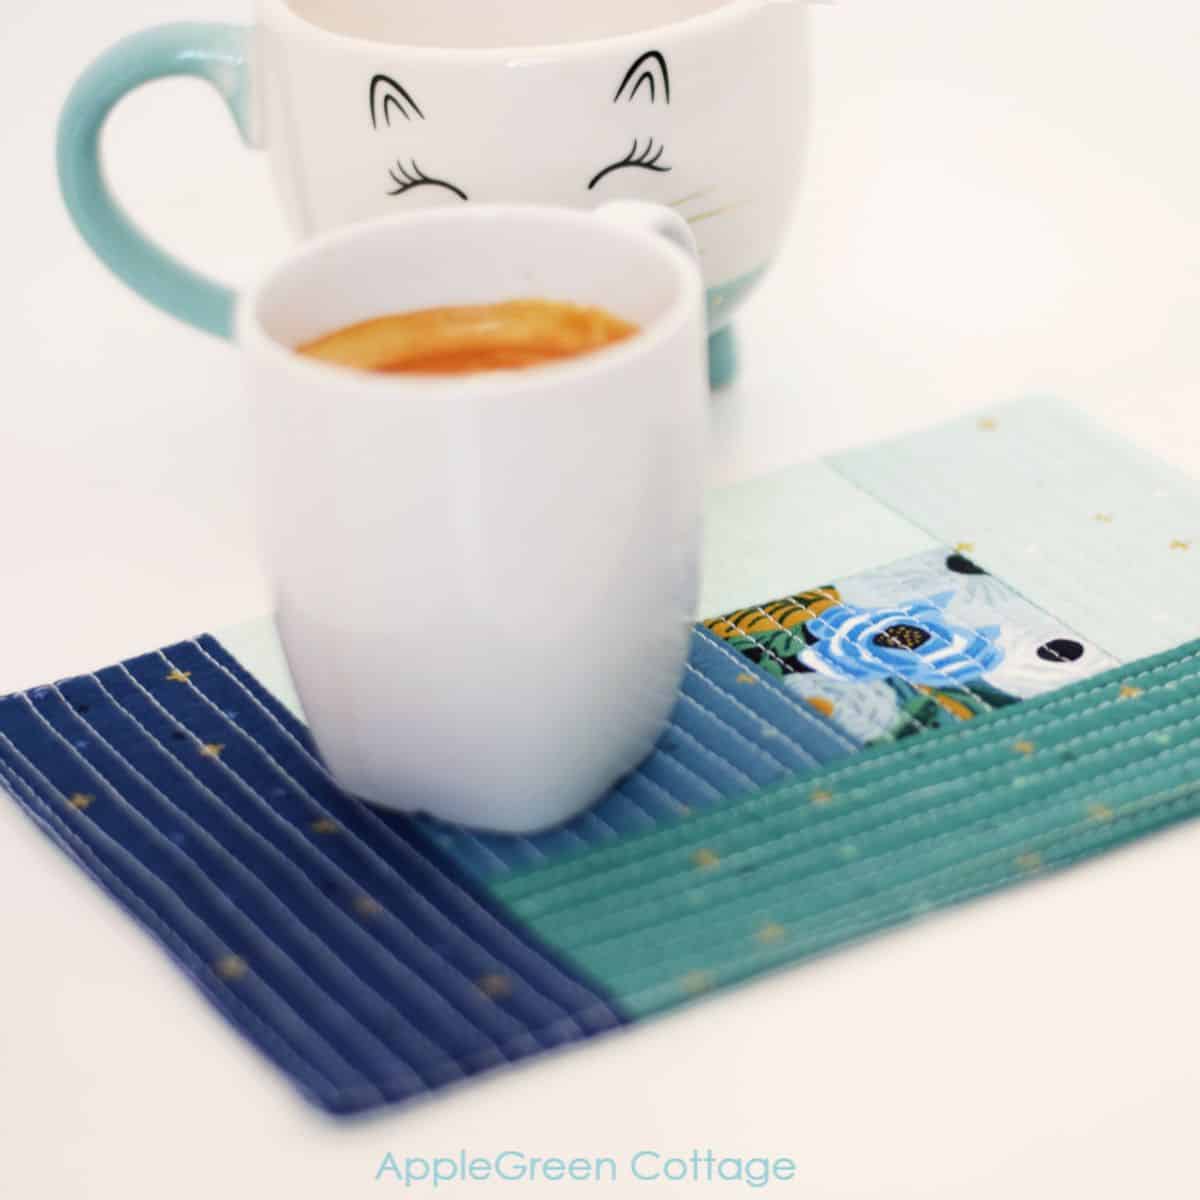
Finished Size
The finished size of this quilt-as-you-go mug rug will be 9" by 6", so I need the raw block to finish at 9 ½" by 6 ½" when squared up. This is why I opted for a batting size of 11" by 8".
Good to have tools:
- walking foot, strongly recommended, for any quilting project
- rotary cutter
- quilting ruler,
- self-healing cutting mat (I have 5 of them, all these by Olfa)
- a portable diy ironing board - my tutorial! - so you don't need to get up every single time!
Mug Rug Sewing Video
First, a video tutorial, check it out.
Now grab the cutting directions below and see the steps in photos too:
How to make a mug rug without binding - Tutorial
Let's start, I'll show you every little step:
Step 1 - Join Batting and Utility Cloth

Place the utility cloth on a flat surface. No puckers, press it flat first. Then place the batting over it, it should be approximately the same size, or just a tad smaller. I use a basting spray (one like Odif 505) to keep the two layers together.
You'll need the third, smaller, 'pretty backing' piece at the end of this mug rug tutorial.
Step 2 - Select and Cut Top Fabric
Choose the colorway and prints for the top layer of your qayg mug rug. This step is fairly subjective:
- select the top fabric pieces in colorways that will work best for your project.
- choose the focal point: a central piece, it might be tiny floral fabric scrap, or a large, bold colorful piece. This will be the focus of your mug rug.
- you'll then mix and match the center by adding pieces around it.
Cutting Dimensions
Here's a list of pieces I used for this exact quilt block. These are the minimum dimensions of all the pieces I used. Please note that you CAN use larger pieces, especially on the outer edges. The listed ones are minimum sizes:
| Block No | Min measurements (width x height) - can be larger! |
|---|---|
| #1 (floral) | 2 ½" by 2 ½" |
| #2 | 3 ½" by 2 ½" |
| #3 | 5 ½" by 3" |
| #4 | 3" by 5" |
| #5 | 8" by 3" |
| #6 | 3" by 8" |
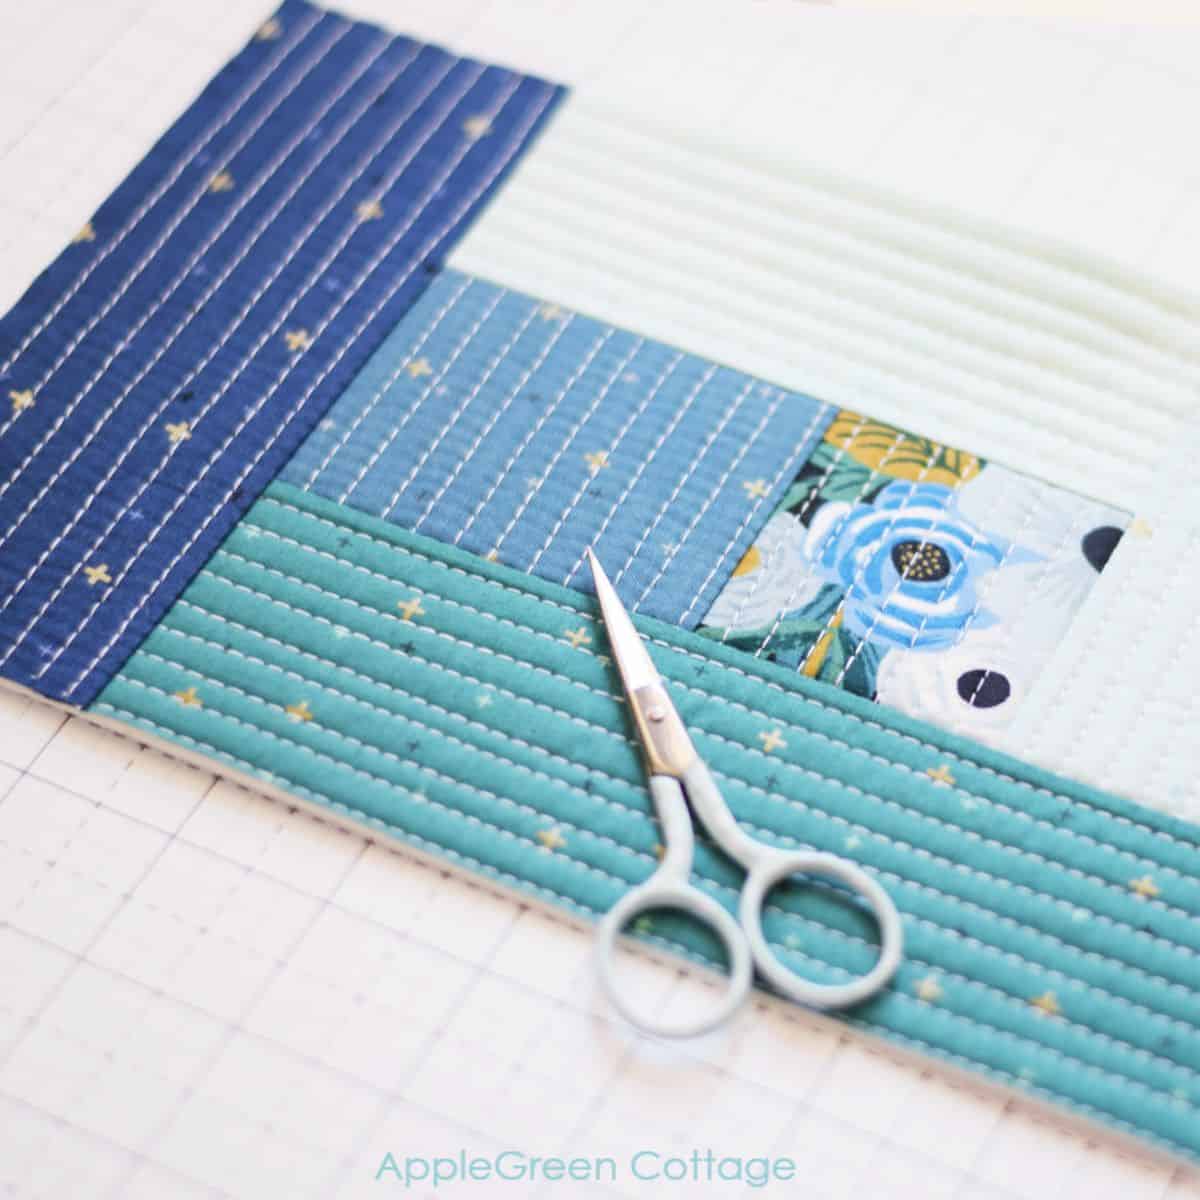
Step 3 - Arrange Fabric Pieces
We'll start with small pieces and add larger ones as you move around and towards the outside. We're making a cabin log quilt-as-you-go block. Even if you have never done it yet, this turns out great. Every single time.

And now the numbered photo for your convenience:
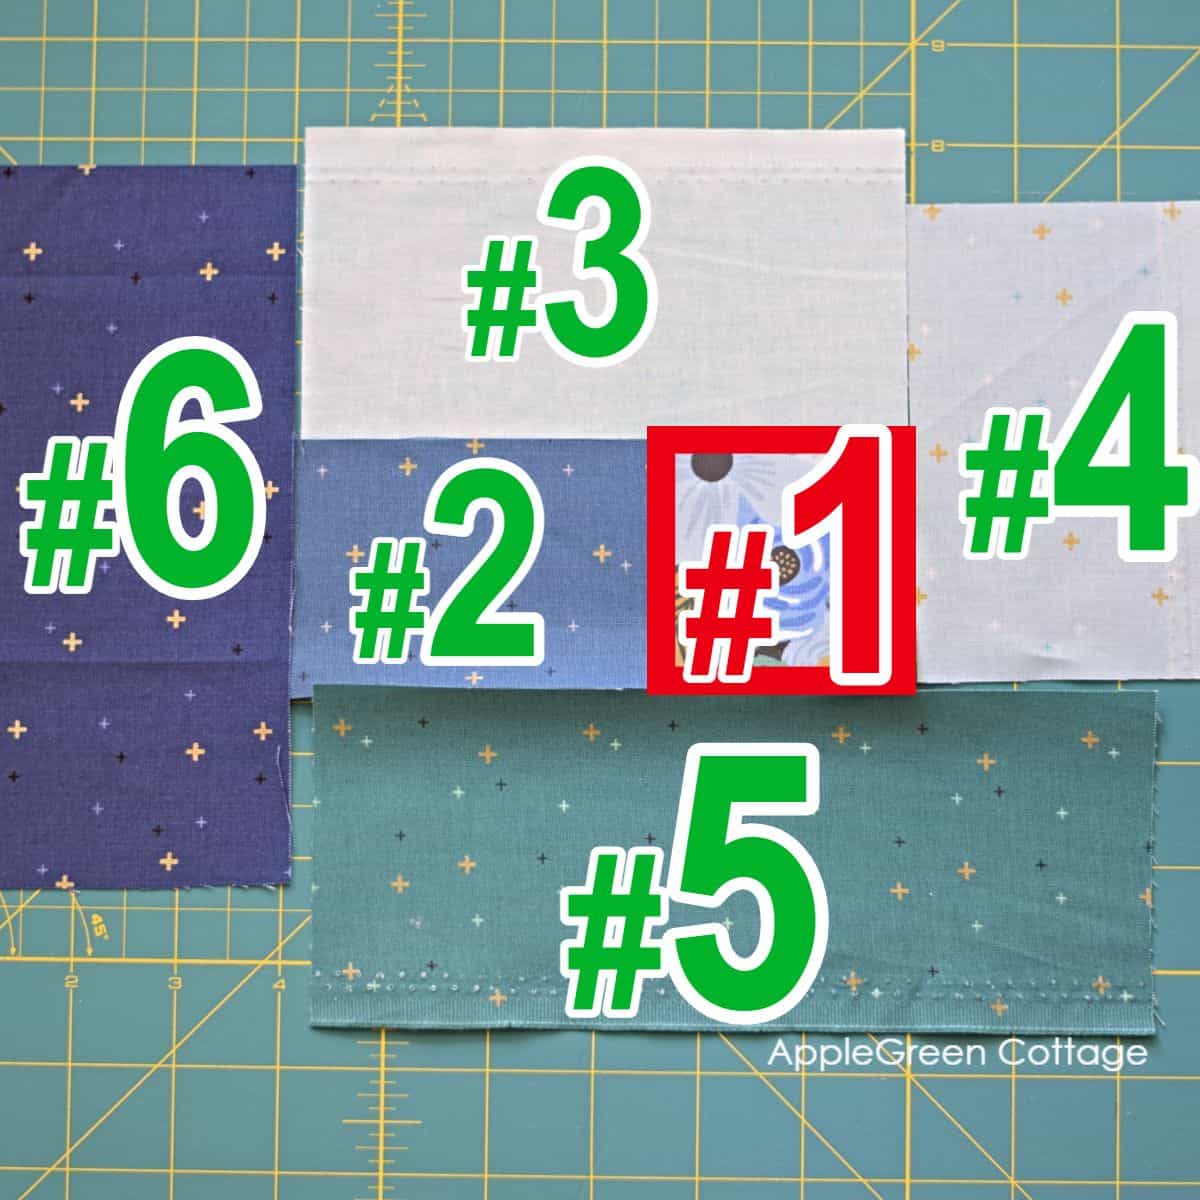
Start in the center and move in a circle, clockwise from the smallest center piece towards the outer edge. Time to sew!
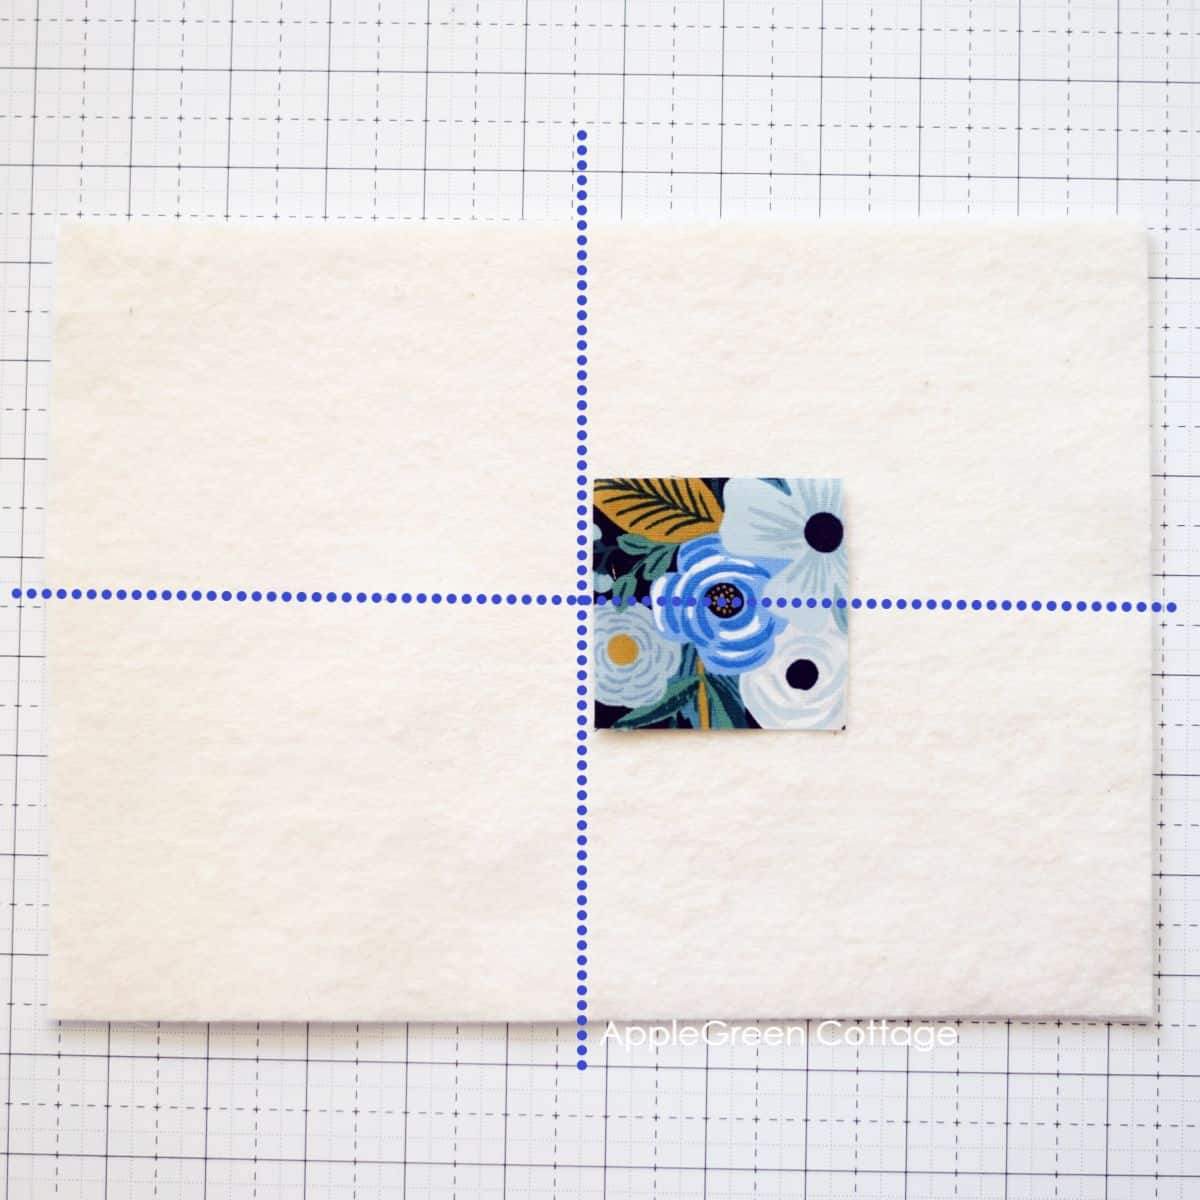
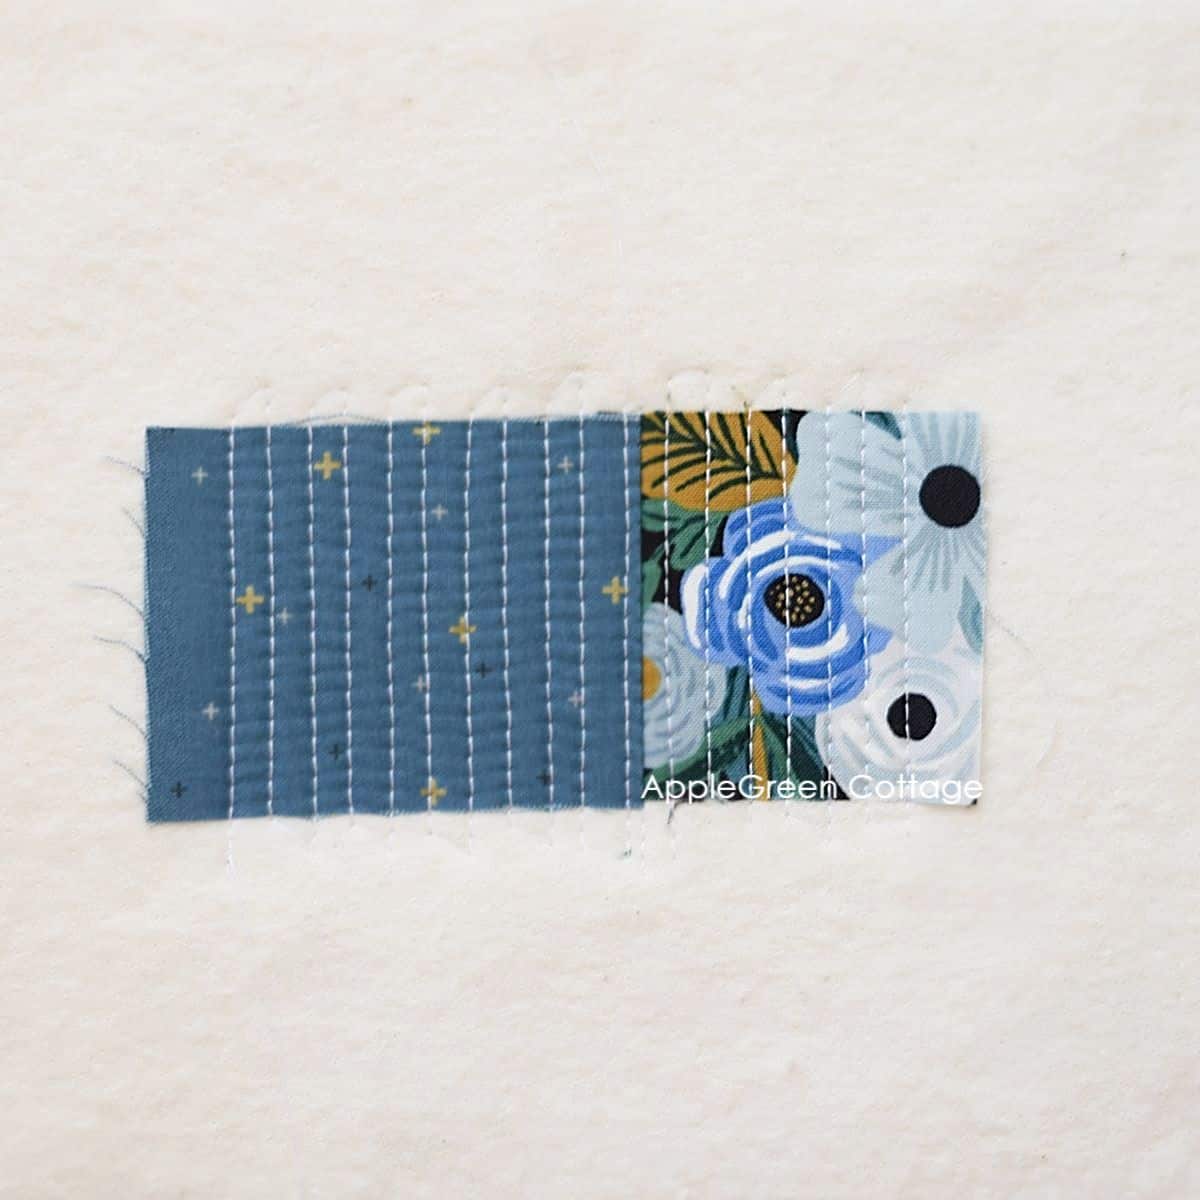
Step 4 - Attach Piece No 1
Place the main, focal piece vertically centered, and horizontally placed towards the right side of your batting piece. The left edge will be aligned with the center.
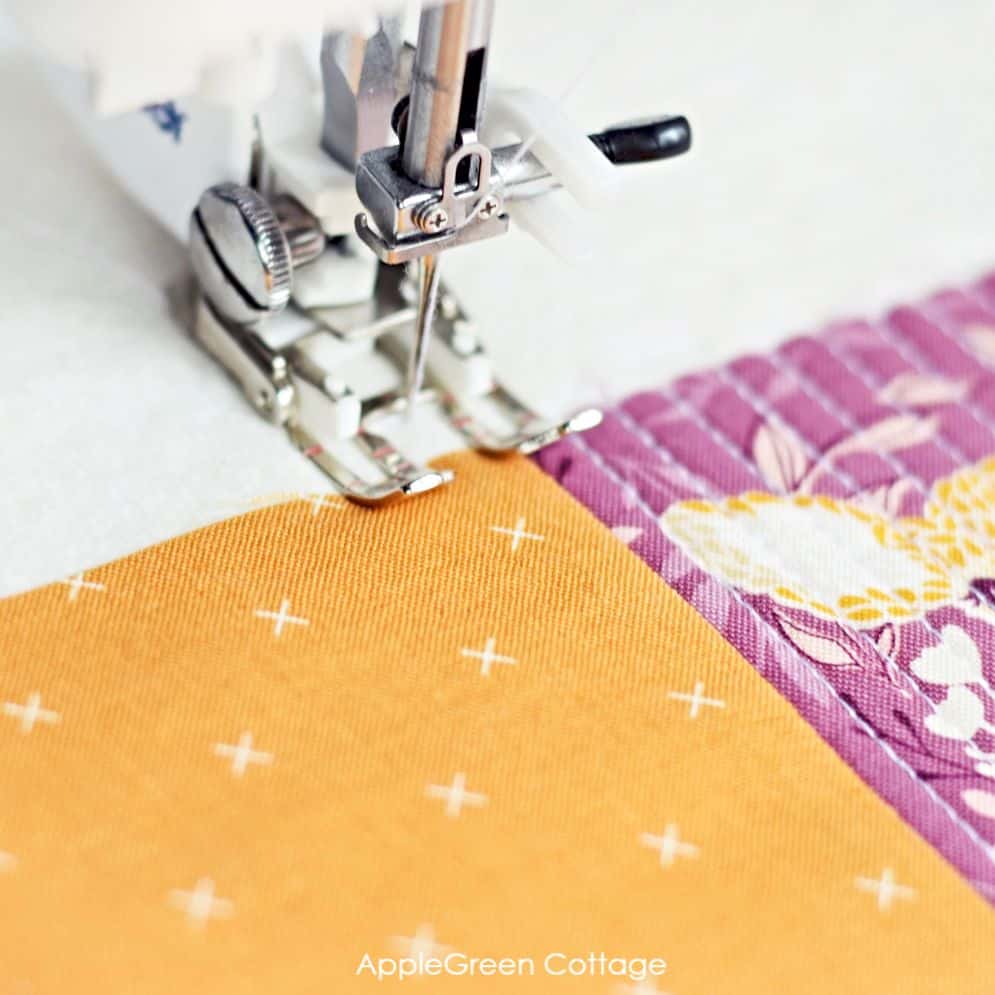
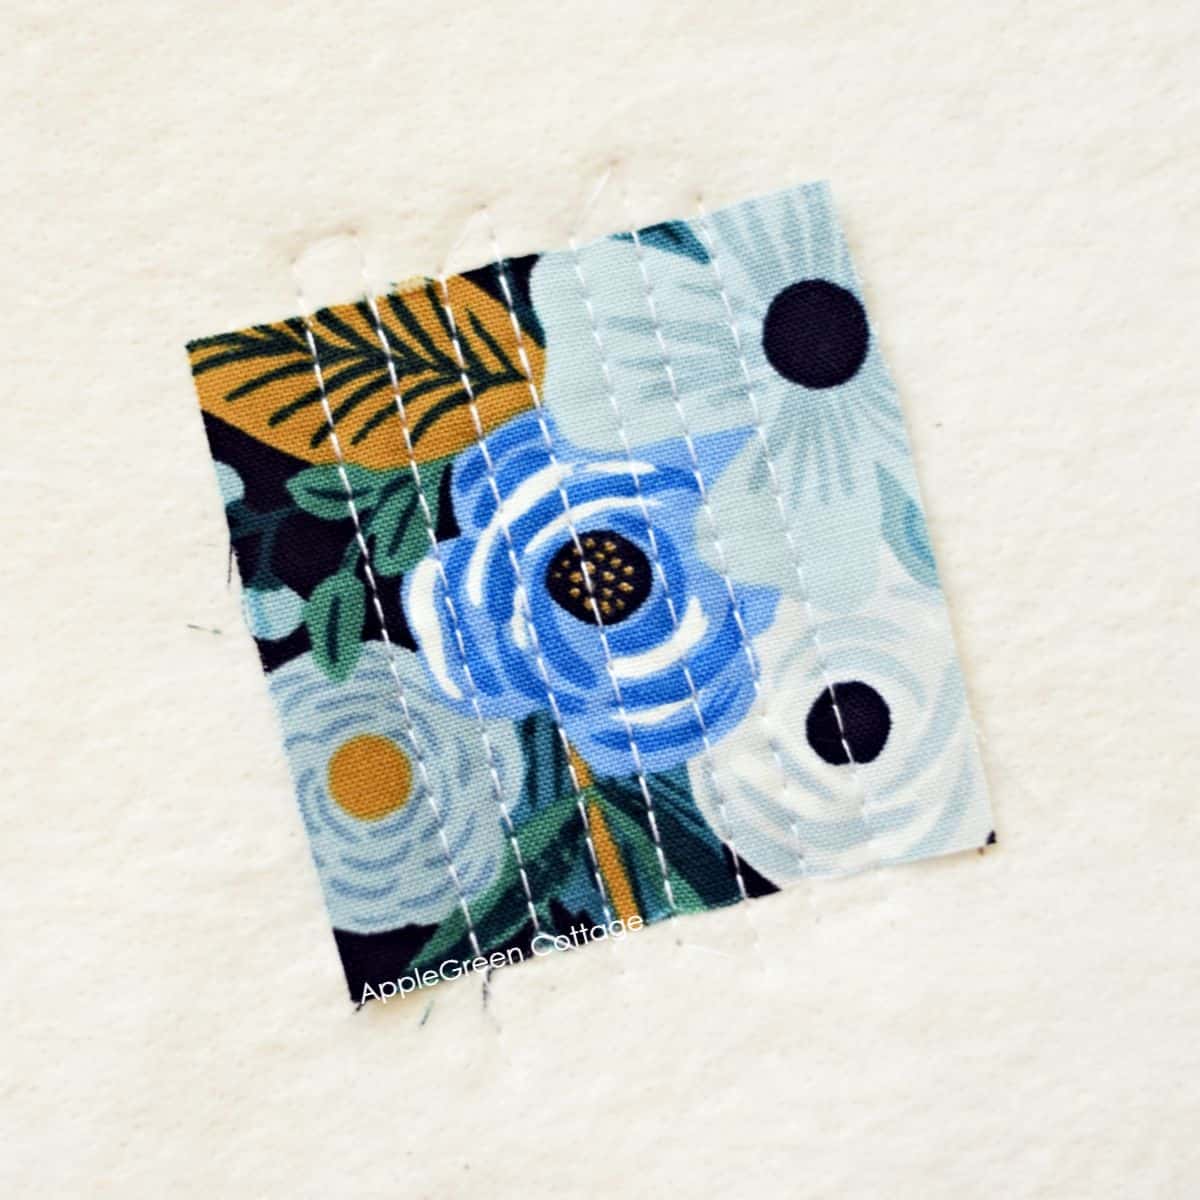
Now when you sew your first patch down, you'll start half an inch away from the right edge and stitch it down with vertical lines in regular intervals of ¼", till you work your way out to the other side of the piece. Stop when you're half an inch away from the other edge of the piece:
Step 5 - Attach Piece No 2
Place your second piece on the left side of the first piece, then flip it onto the first piece.
With the right side of the fabric facing down, align with the edge of piece #1 and sew in place using a ¼" seam allowance.
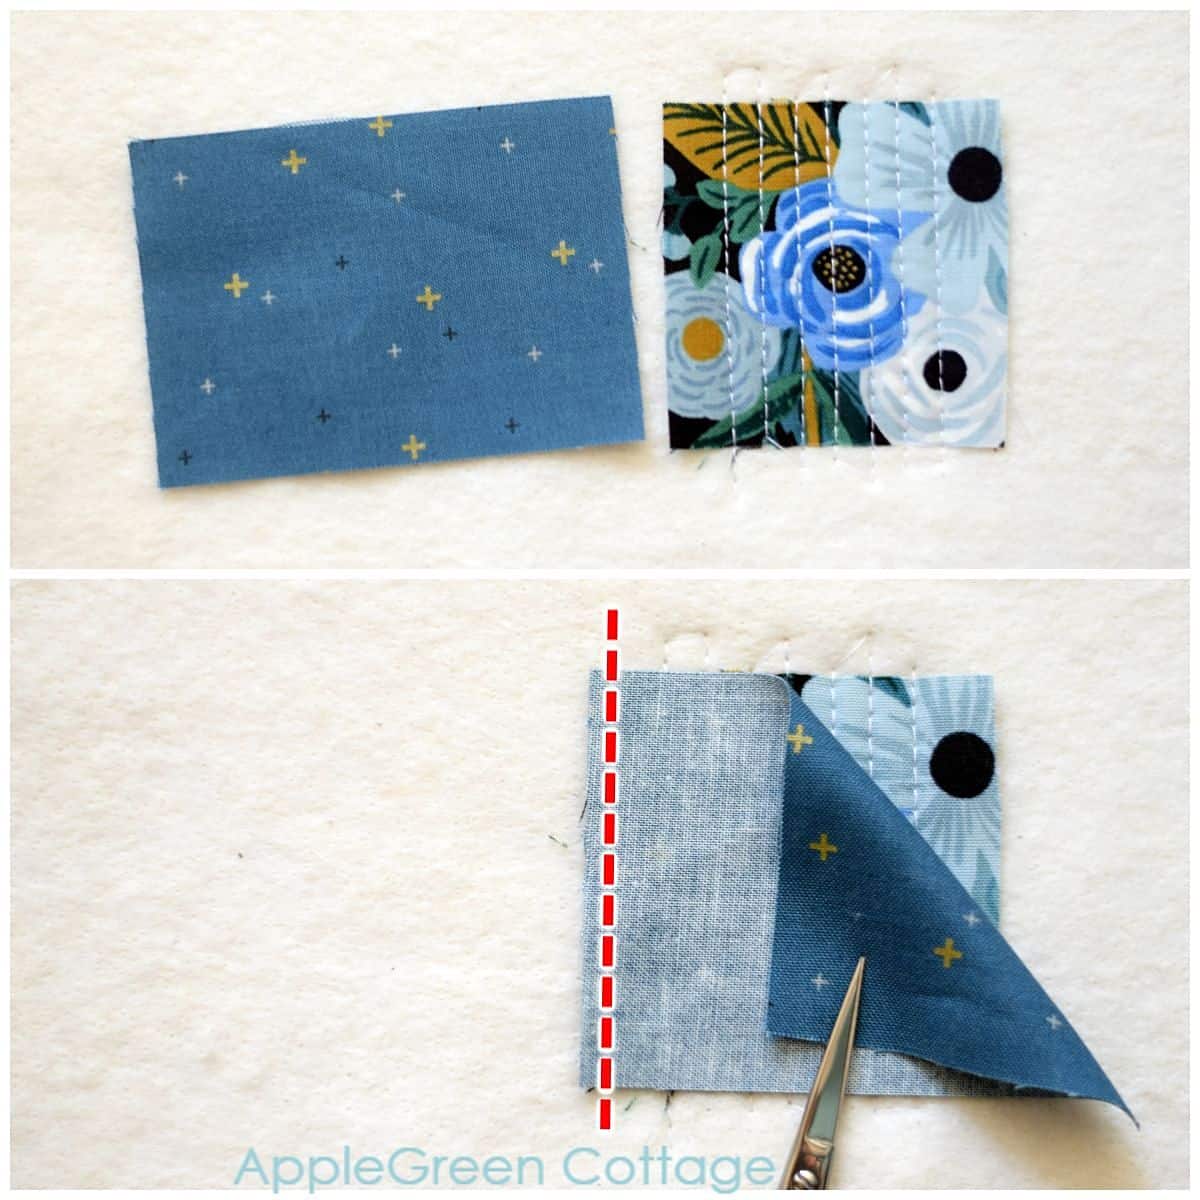
Now flip the second piece back to the right side and strip-quilt it using vertical lines, like you did before.
Step 6 - Attach Pieces Nos 3 to 6
Piece 3 comes to the top. It will need to be wide enough to be sewn over BOTH of the bottom pieces: notice the width?
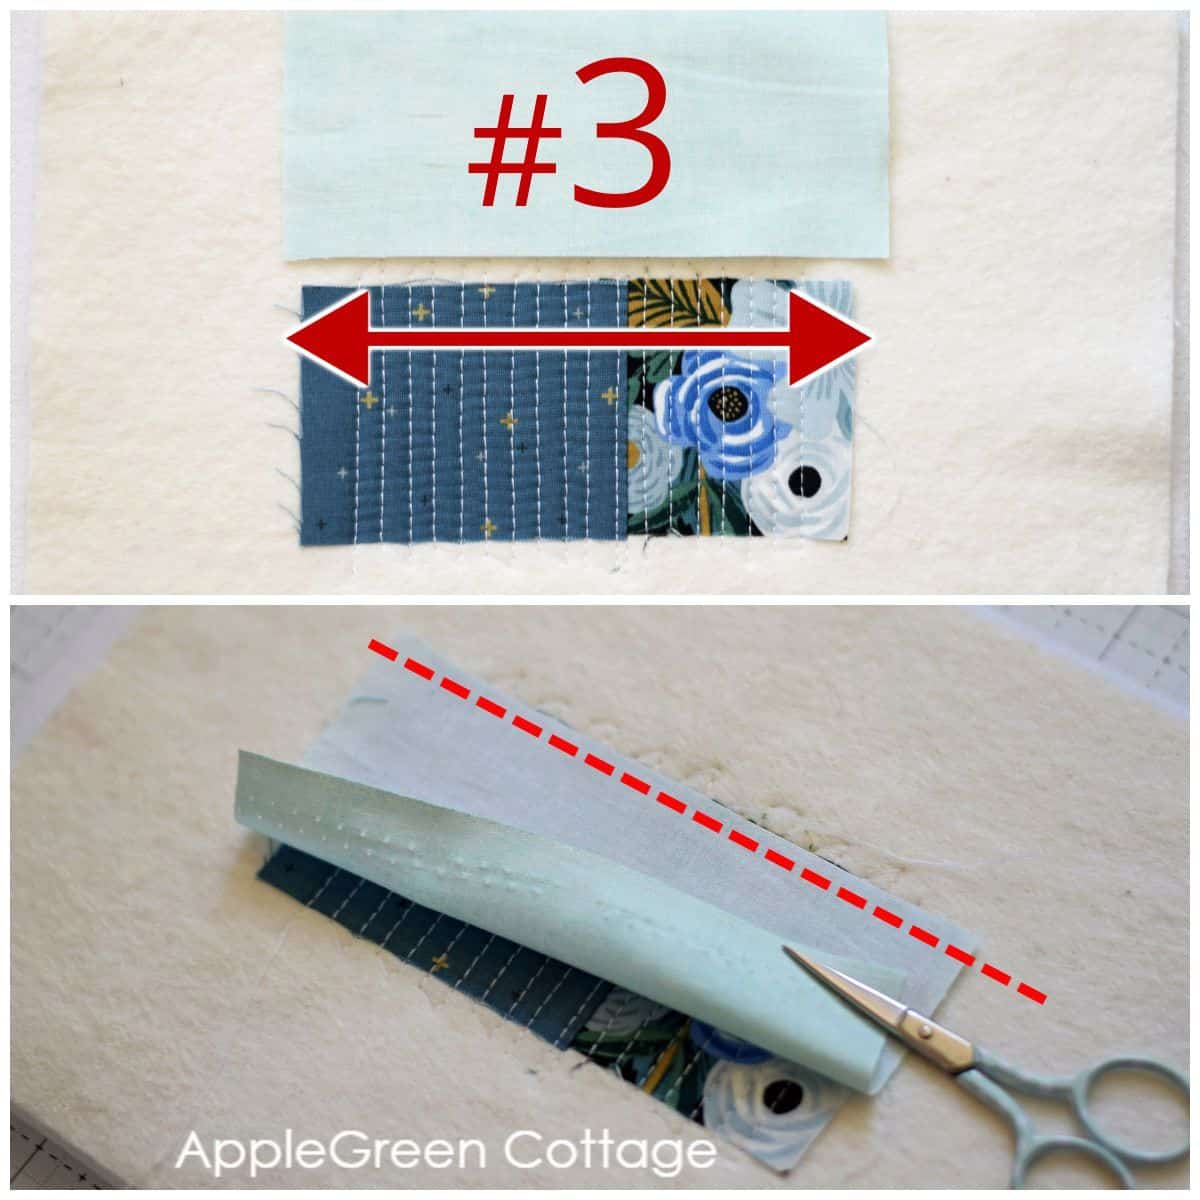
Same procedure: place the piece with the right side facing down, aligned along the top sewn-in pieces' edges. Sew in place using again a ¼" seam allowance. Flip, press, quilt in place.
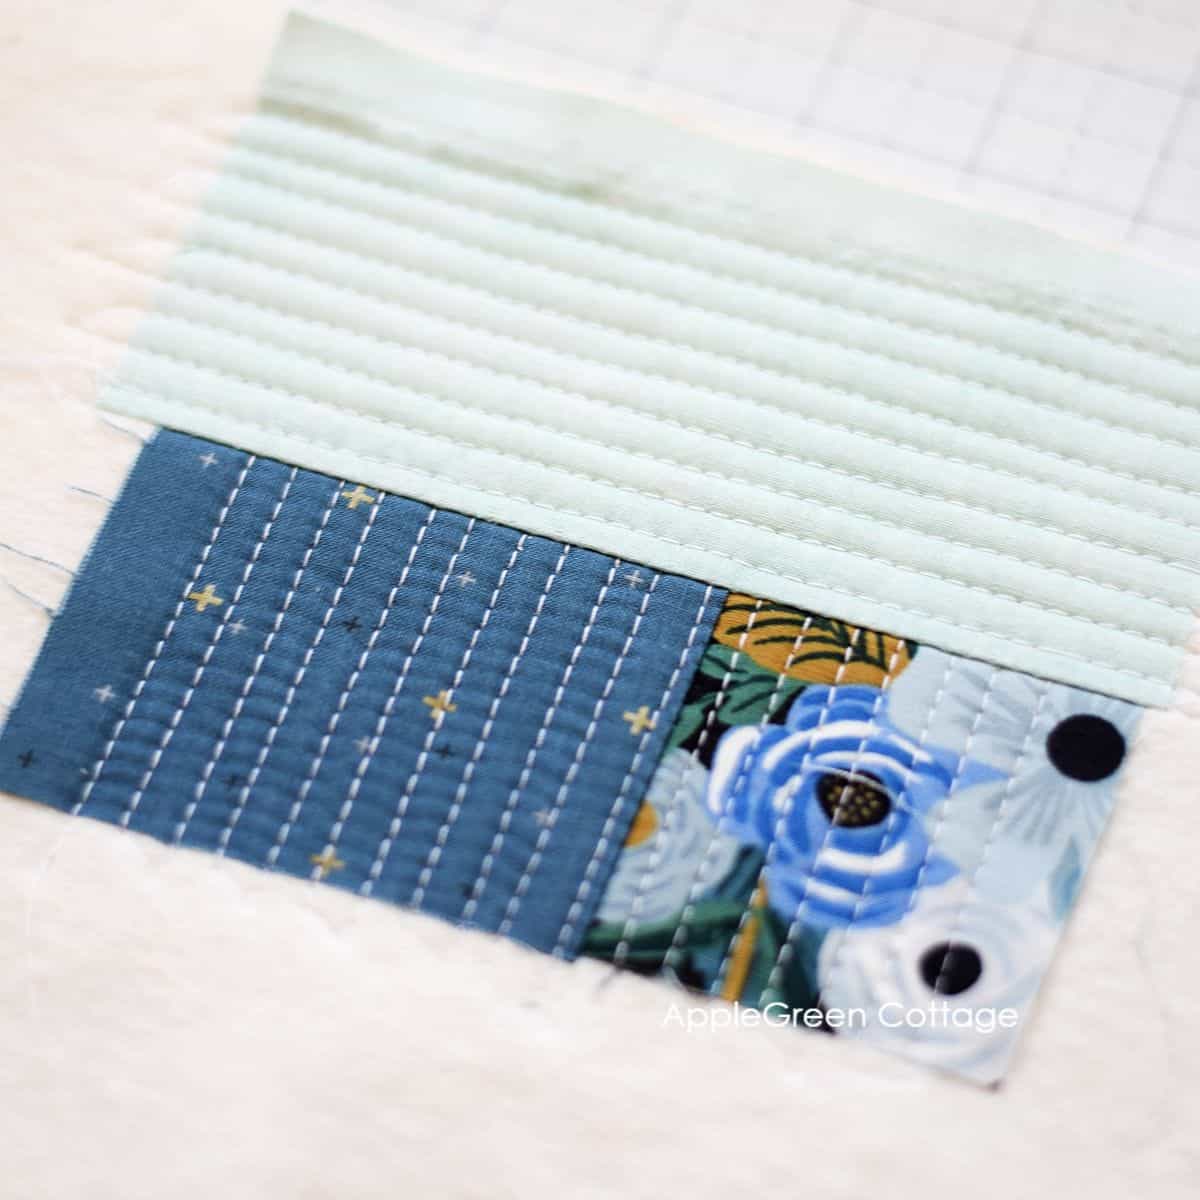
Continue moving clockwise and adding pieces no 4, No 5... Each next piece needs to cover the entire width/height of the previously quilted pieces.
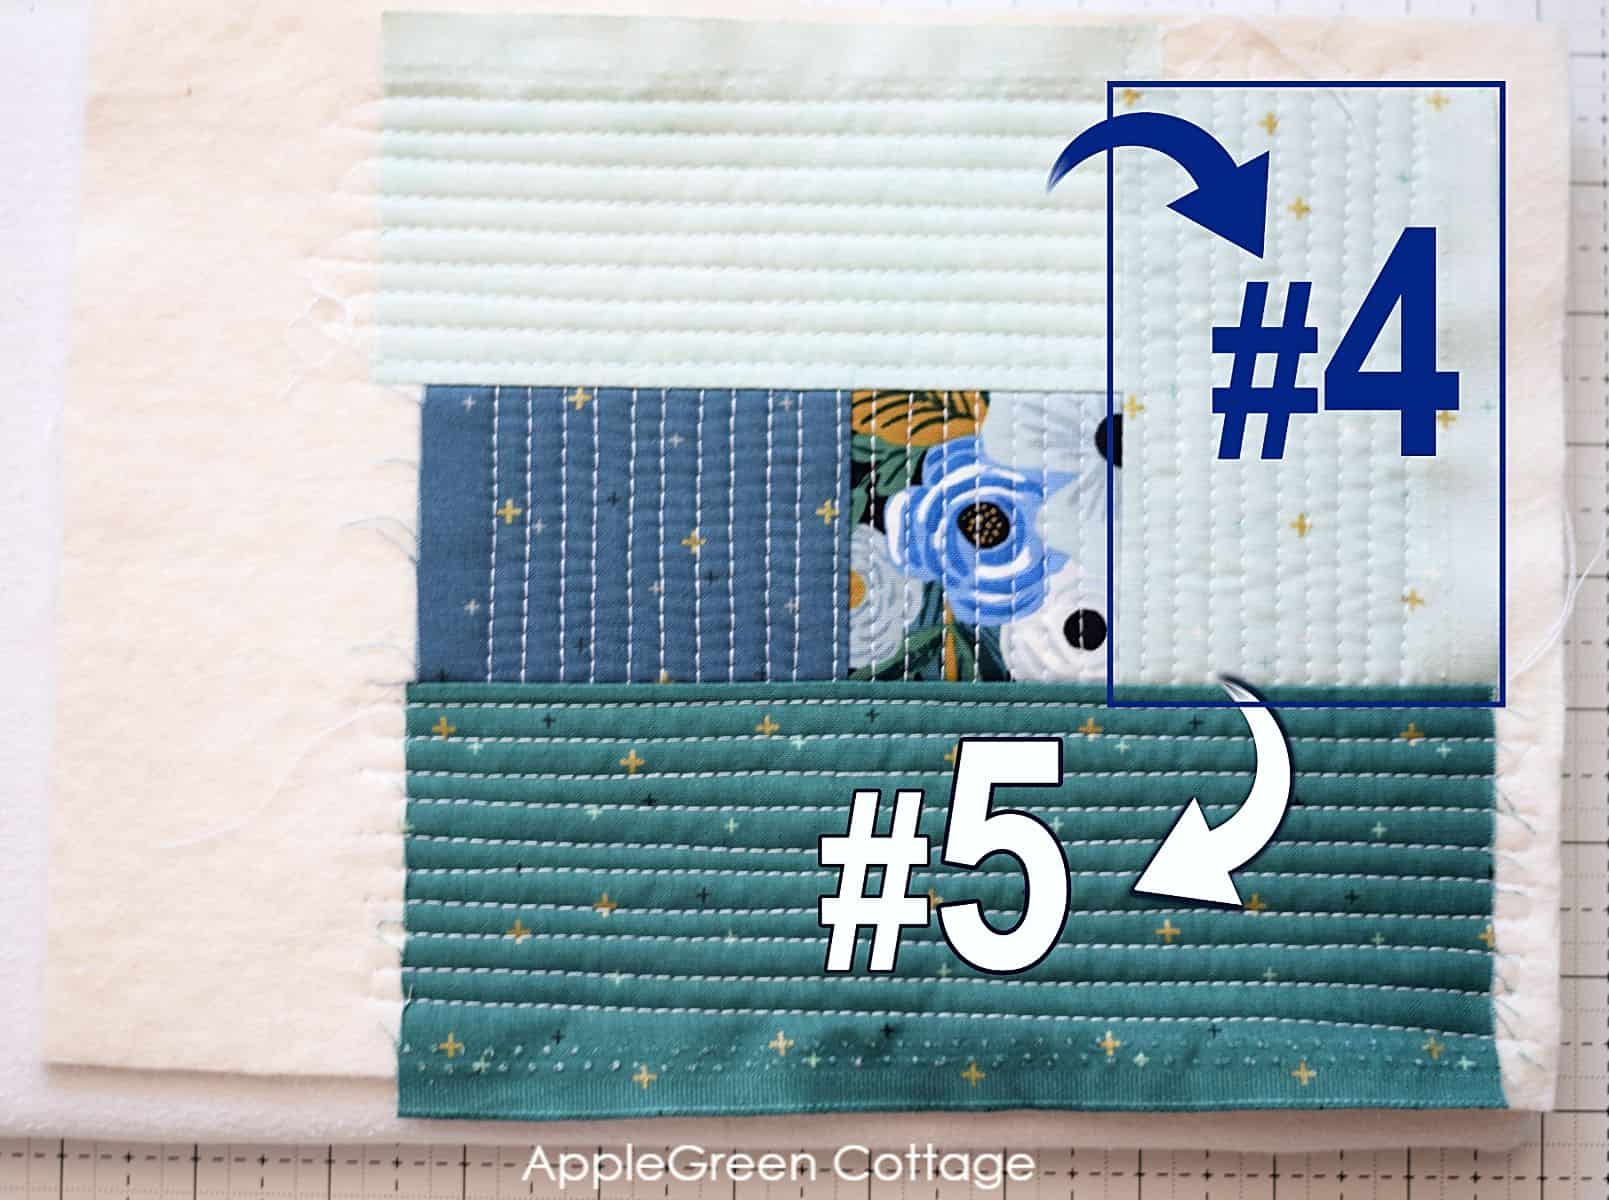
No 6 is the last piece to add:
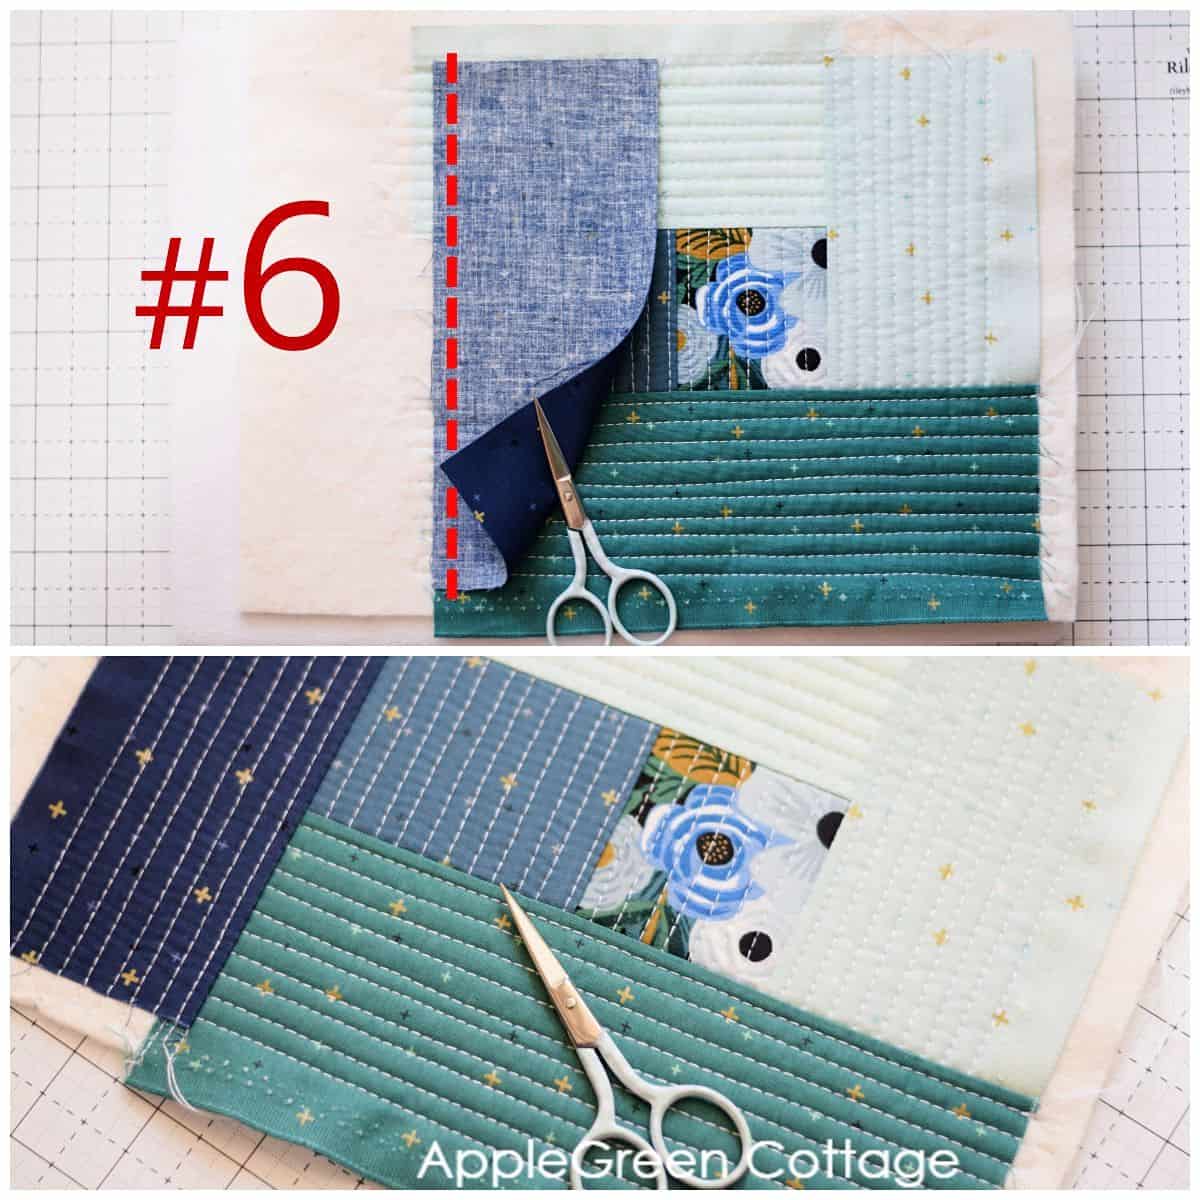
You've covered all batting. Now's the time to square it up.
Step 7: Square it up
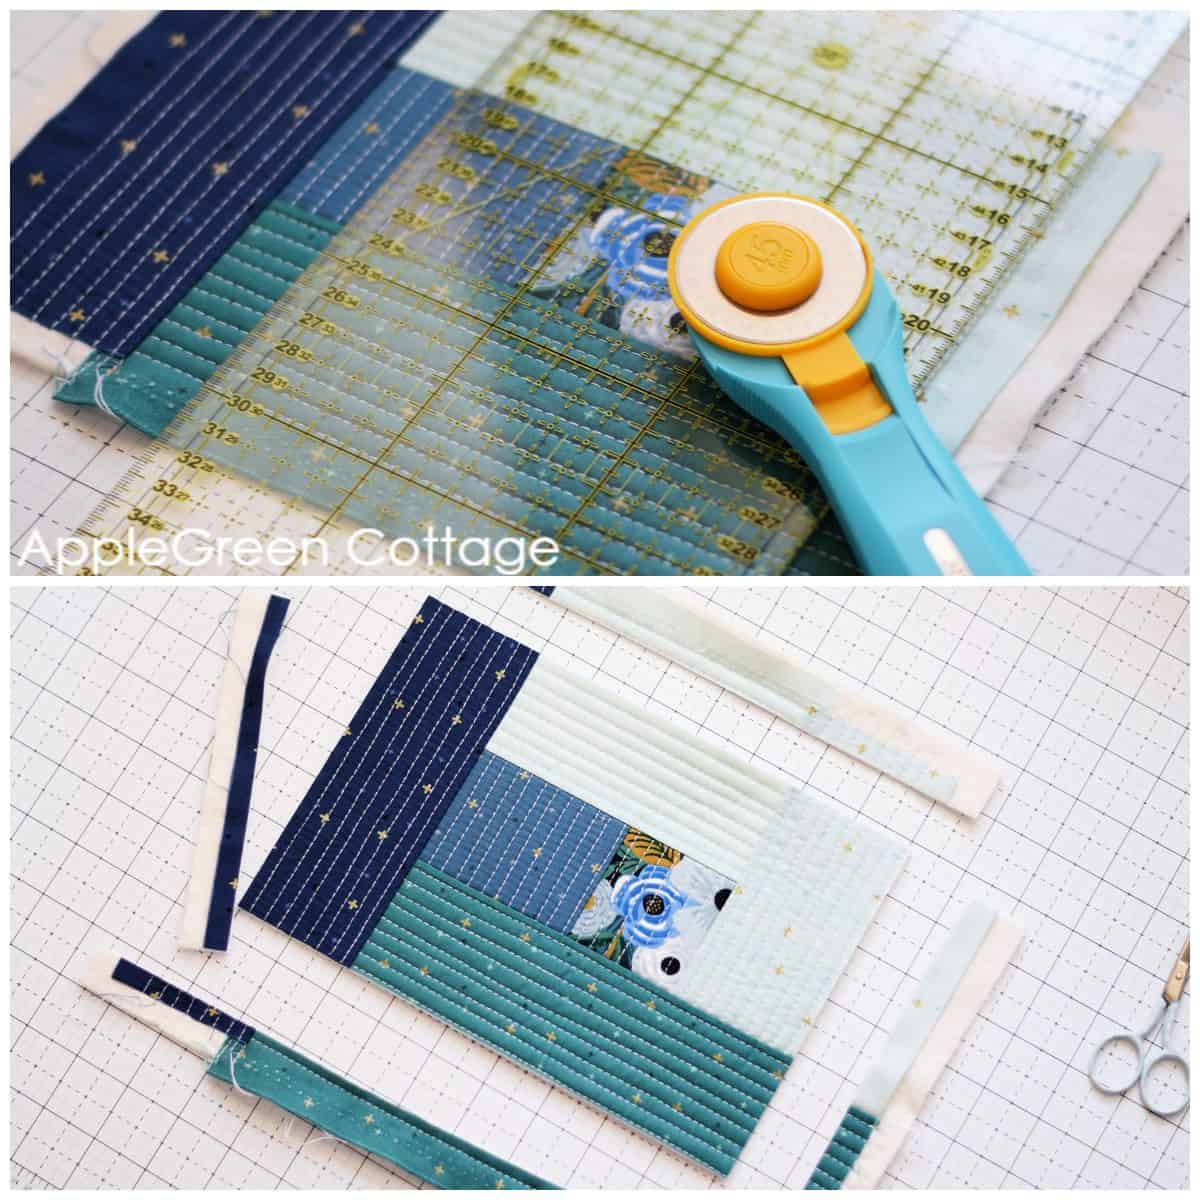
Use a quilting ruler and a rotary cutter to cut off any excess fabric, batting and (utility cloth) backing, to form a raw block to finish at 9 ½" by 6 ½".
I opted for a batting size of 11" by 8" to give you (and me) plenty of space.
Step 8: Attach the back
Place the block with the right side facing up and cover with the 'pretty' backing piece so the fabric is right sides together. Then sew around using a quarter-inch seam allowance - make sure to leave a few inches for turning.
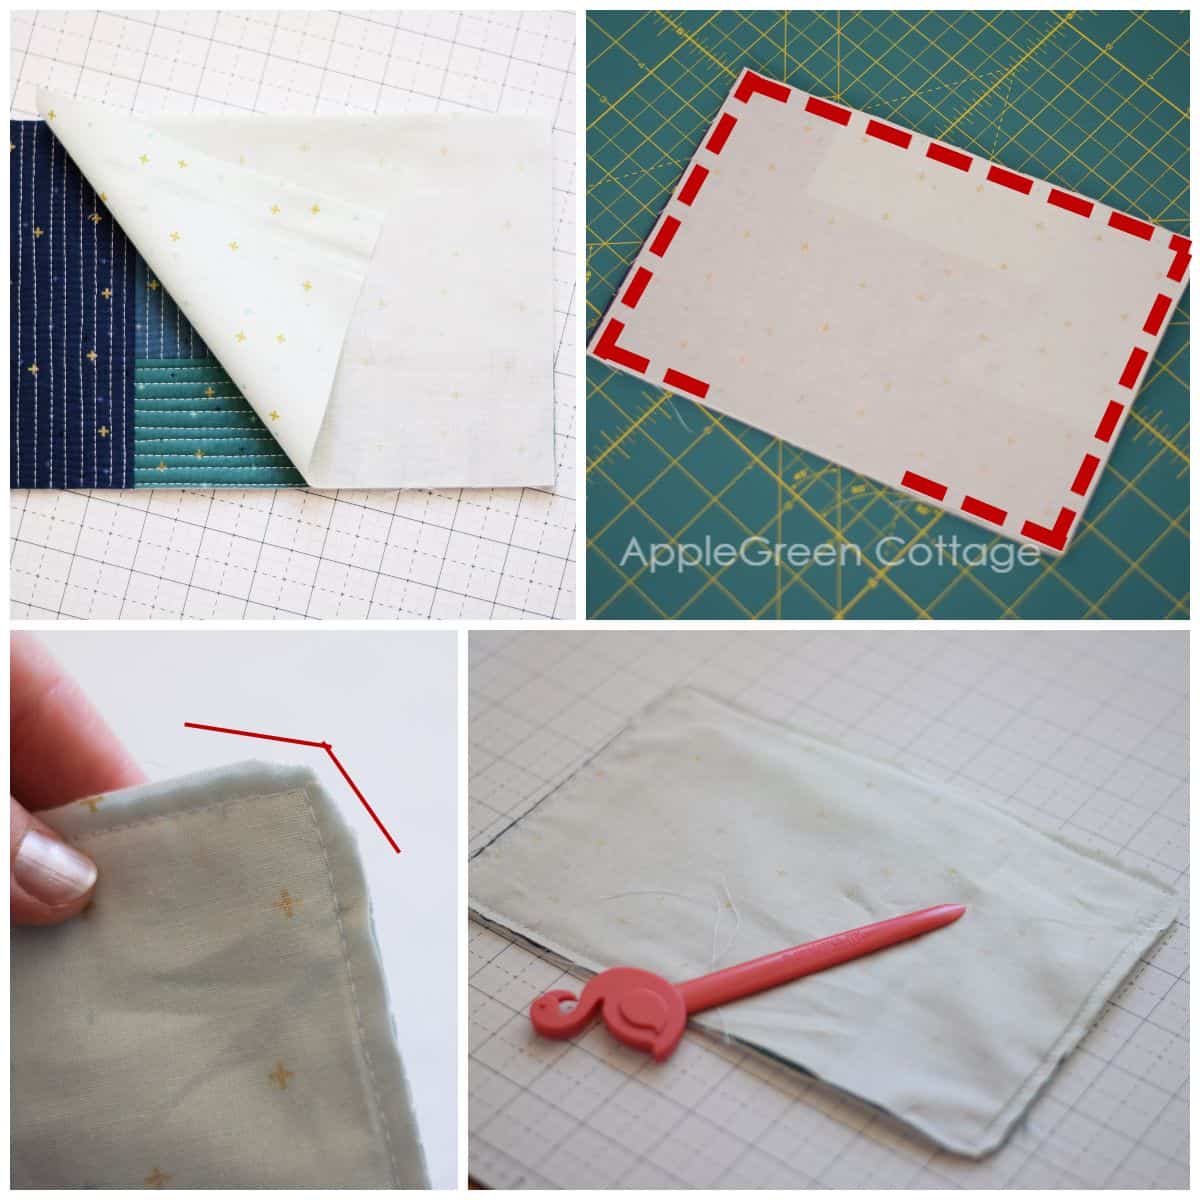
Trim the seam allowance.
Step 9: Finish
Turn right side out, press, and topstitch at ⅛" away from the edge to close the turning hole and stabilize the edge of your new quilt as you go mug rug.
See, no binding is needed! However, if you'd rather attach the binding instead of doing Steps 8-9, here's how to attach binding, plus this clever hack.
Tips for Quilting As You Go
See my master post about quilting as you go for even more useful tips to get you started. Or, if you're new to quilting, try out this adorable quilted zipper pouch pattern. The 4-sized free template can be used in so many ways - the qayg technique is surely one of them!
Do I need to attach the utility cloth or temporary backing when following this quilt-as-you-go mug rug tutorial?
Usually I work with some sort of temporary backing fabric while making a qayg mug rug like this one. This is simply because it's easier for me to sew with an additional fabric layer as opposed to having batting exposed on the feed dogs of my sewing machine. And, especially as there is less lint accumulating - that always means less cleaning. This is why I'll usually add some sort of backing - like a utility cloth, muslin, or plain white quilting cotton.
These easy quilted mug rugs make great diy gifts. Unique, can almost never turn out the same, the closest to 'made-from-the-heart' what I've ever come in sewing gifts. Give this quilt-as-you-go mug rug tutorial a try, make your own, and please tag me @applegreencottage if you post it anywhere, I love seeing what you sew with AppleGreen Cottage tutorials!
Also, save it for later to Pinterest, so you've got it ready whenever you want to make a lovely homemade gift:

WANT MORE FREE TUTORIALS AND PATTERNS?
Get email updates and never miss out on new patterns, printables, and tutorials:
Or …check out my latest PDF pattern in the shop - the SILA Duo Zipper Bag pattern. Two patterns in one, see more here:


Kristi says
Thank you for an easy and lovely tutorial
Sharon says
I love it. Is there no quilting required for the backing?
Damjana says
Sharon hi, it's a small project, so no need to quilt the backing, it works without too.
Cindy Mash says
Appreciate the detailed tutorials. Fun and useful projects!
Emma says
Very nice. Love the QYG tutorial and the minium size of the MR.
Will surely make this!!! Thank you for your generous sharing.
Tami says
I can’t wait to make these. Love your instructions. Thank you for sharing so many of your items with us !!!
Sandra Hernández Lizano z Lizano says
Me encantó.. Muchas gracias y miles de bendiciones para ti desde Costa Rica.
Dani P says
Couldn't find a link to the video, but it's easy enough to follow without one. Thanks, these will be cute gifts with seasonal fabrics!