
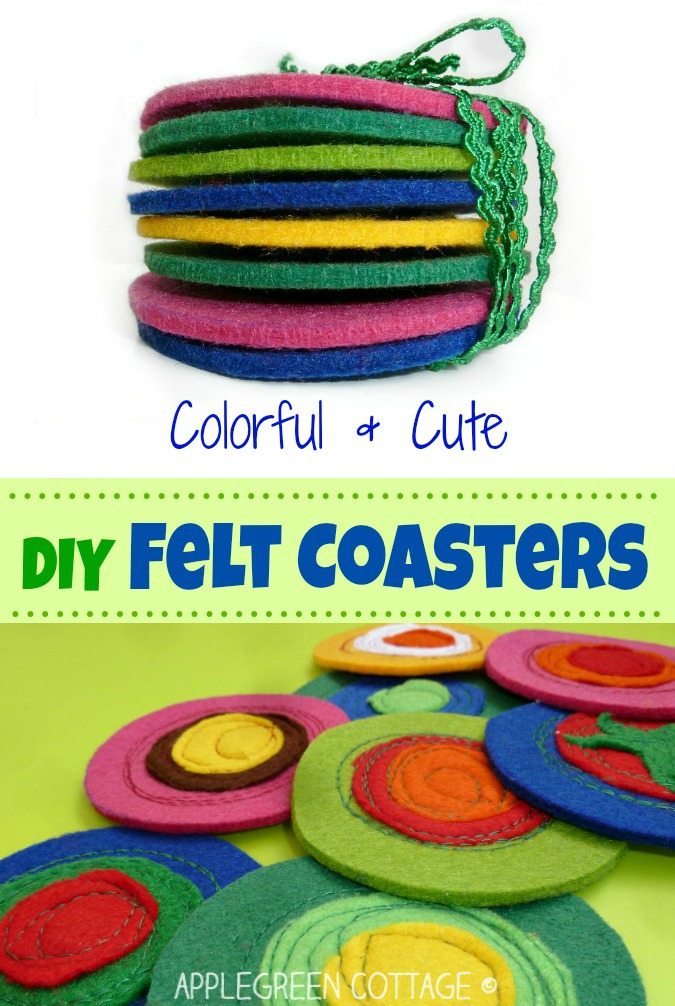
See how to make thick felt coasters everybody will love. These diy felt coasters are incredibly easy and really quick to make. And they make the best homemade gifts!
Here's a quick and easy coasters sewing project you can make really fast. These diy felt coasters are an easy, no-fail beginner sewing project. An eye-catcher at any party, and a perfect handmade present.
If you like felt projects, you'll find tons of easy projects here, including
- How To Make Bookmarks With Felt Applique
- Super Easy Felt Storage Cube - Free Template
- Diy Party Lanterns .. and more!
Diy Felt Coasters
These coasters are made of several layers of felt: the bottom one from a thick, 3mm felt, and the rest from thinner, 1.5 mm felt. See my post on how to choose felt for crafts if you'd like to know more, or scroll down for a few places where you can buy heavy felt in multiple colors.
But first, I need to give credit to the girl who made these and gave me the idea in the first place: it's Nancy from Do Small Things With Love. Though I adapted the coasters to make them even faster to sew (see below), the idea is definitely hers. Thanks, Nancy!
Diy Felt Coasters Features
Why I love them {and why you will too}:
- Simply cute and wildly colorful! - But they would work in any color combo.
- So much fun sewing - No need to be precise when sewing, yeey!
- Easy to make - Even for total sewing newbies, really! Seen it happen!
- Can be made in no time - add them to your last-minute-DIY-presents list!
- Oh, and they will protect your furniture from scratching and moisture!
Learn how to make diy felt coasters, and you've got the best homemade gifts! Now let's start.

Supplies for Diy Felt Coasters
You'll need:
- felt in various colors (thick felt for base layer, thinner felt for upper layers)
- sewing machine
- scissors
- sewing thread
Where can I purchase the heavy felt for the base layer?
A few sources where you can get the thick 3-mm felt in multiple colors:
- at the Felt Pod
- heavy 3mm felt on Amazon

How To Make Thick Felt Coasters
Here are the steps to help you sew diy felt coasters:
Step 1 - Cut Felt Pieces
First you'll want to cut circles in three sizes from various felt colors. Always start with the largest circle. Cut it from thick and sturdy felt (mine was 3 mm thick). Cut all the smaller sizes from thinner felt.

Step 2 - Stack Felt Pieces
Then mix and match the colors and sizes. Choose the thread you want to go with. (I usually choose contrasting thread, it's so much cuter!)

Step 3 - Sewing Step
Then place the 3-layer stack (your coaster-to-be) under the sewing foot and start sewing. I always start sewing in the middle from the thickest material and work my way out toward the outer edge. {To me, it's way easier than from the outside towards the inside.}

Then sew several circles around it. You only need a few to keep layers in place, the rest is purely for fun! (No precision required. At all.) You'll know it's enough when it starts feeling like being on a merry-go-round. 🙂
Step 4 - Cut Threads

Then you just cut off the excess sewing thread and you've made it! Your pretty DIY coasters are here!
What Sizes And Shapes of Diy Felt Coasters to Make?
You can get creative making them in various shapes, or add details. Did you notice I made one a bit different from the others? One of the blue coasters. I call it the tomato, it's here just for presentation purposes. {You can make an entire veggies selection here!}

So go find a color combination that works for you, use it to compile the coasters and you've nailed it! Everybody will love the DIY coasters on your table.
Oh, and one thing more: since you'll be using the thick felt for the bottom layer, you don't need any backing. The felt coasters will be sturdy enough as they are. {Didn't I say these coasters will be the easiest presents on Earth to sew ?}

Aren't these DIY coasters just adorable? An eye-catcher at any party, and a perfect gift for Christmas or for any other occasion!
WANT MORE FREE TUTORIALS AND PATTERNS?
Get email updates and never miss out on new patterns, printables, and tutorials:
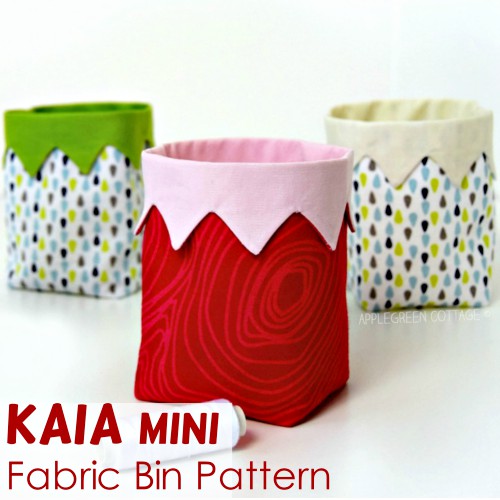
And if you like sewing cute little bins, check out another pattern in our shop - the Kaia Mini Bin here:
Näh begeisterte says
Your coasters are totally beautiful ... and remind me of the first spring bloomers.
Maybe I'll try her out with my kids. 🙂
Have a nice weekend your Nähbegeisterte
Tammy says
I was looking for a way to use some extra felt I had. I am a child care provider and we use mostly loose parts and open ended materials. I stumbled upon your felt coasters and thought they would make great loose parts for play. It was a super fun project for my 11 year old son and I to do together. I have very little experience sewing but this was so easy.
Anonymous says
Nice I will try to make some when I have a minute