
Cuteness alert! These DIY gnome ornaments are so easy to make and add a charming, handmade touch to your tree.
With their cozy beards, pointy hats, and adorable noses, these gnomes make the cutest additions to your festive decor. They're sure to bring a smile to everyone who sees them!
Use our free gnome ornament sewing pattern and create these cute little figures using basic materials you likely already have on hand.


This tutorial is also part of Printable Tutorials BUNDLE
100 PDF tutorials now, and growing!
Table Of Contents
Make your holiday season feel special with these cute DIY Christmas gnome ornaments! Pair them with the adorable mitten ornament pattern or create these popular origami Christmas ornaments, and you'll have the perfect homemade holiday tree decor.

Gnomes symbolize protection, joy, abundance, and connection to nature during Christmas, embodying the spirit of festive giving and the warmth of home. Also, these creatures are super cute - no wonder there's a whole collection of DIY Christmas gnomes here at AppleGreen Cottage! Now let's create a bunch:
Supplies
Shop my personal favorite sewing supplies on Amazon HERE.
- a scrap piece of red felt
- a scrap piece of fabric
- a scrap piece of long-pile faux fur
- a tiny pompom
- a few inches of a narrow ribbon or baker's twine for a hanging loop
- a pipe cleaner (optional)
- a bit of poly-fill or other toy stuffing material
- matching thread, sewing machine, needle
- scissors or rotary cutter and a cutting mat
- small embroidery scissors help with cutting faux fur
- Free template
Diy Gnome Ornament Video
Here's a quick video on how to make gnome ornaments, followed by step-by-step instructions:
How to make Christmas gnomes - STEPS

Step 1 - Print the free Gnome Ornament Pattern
Join our mailing list and get the Christmas gnome pattern emailed to you:
Do you want a printable copy of the WHOLE tutorial? → See it HERE or get it in the huge-value BUNDLE!
How To Print this PDF file
For best results, download the PDF to a desktop or laptop, open it in Adobe Reader, and print at 100% size. (I recommend not printing directly from a browser window or from mobile, it could cause issues.)
Step 2 - Cut the Fabric, Felt, and Fur
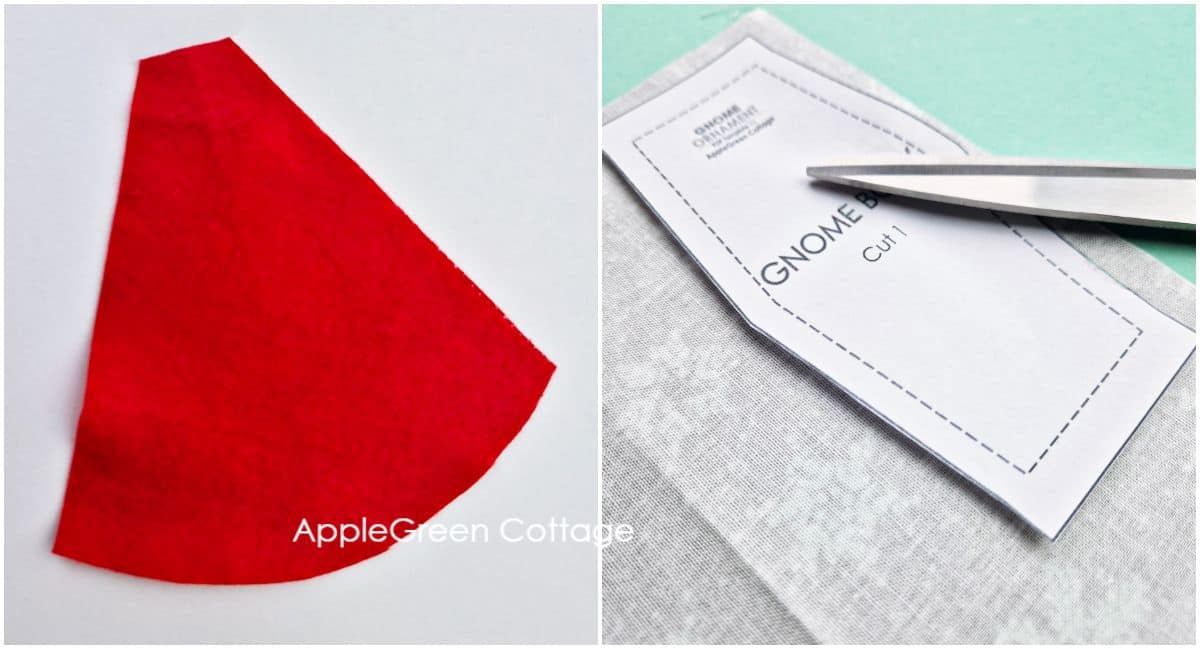
Cut 1 piece for the hat out of red felt and a piece for the gnome body from fabric.
How to cut faux fur
When working with long-pile faux fur, you want cut only the backing material, not the fur on the front. Here's how to cut long-pile faux fur:
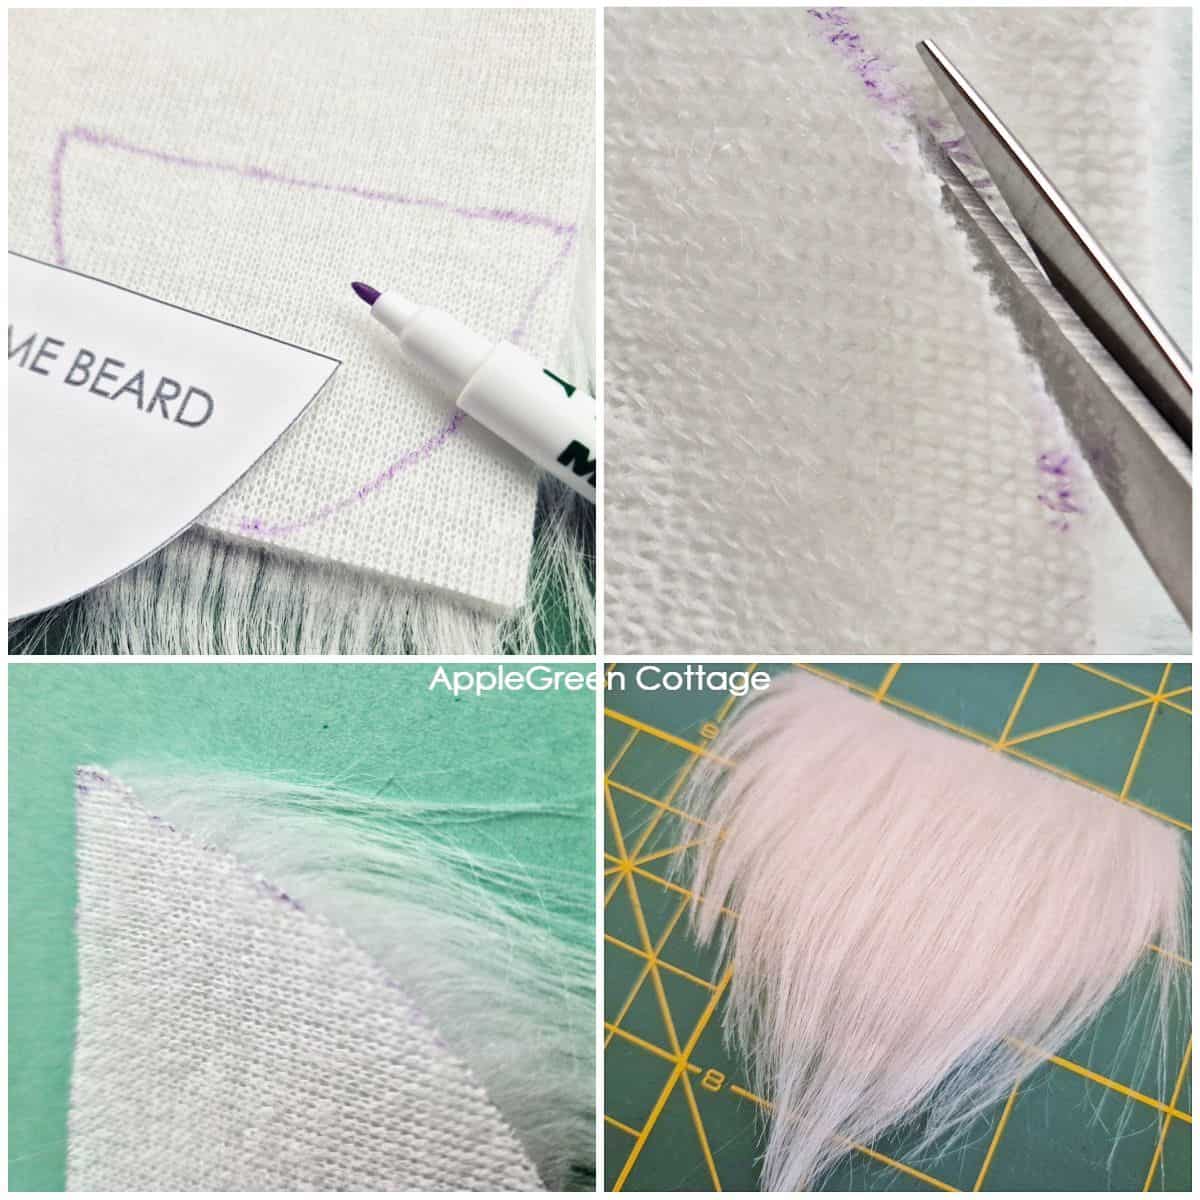
- Turn the faux fur over to the back and trace the gnome beard pattern on the back of the faux fur fabric.
- Start cutting: take very small snips with your scissors to cut just into the backing and not into the front fur strands. Do not open the blades wide when cutting. You only want to cut the fabric backing, not the front.
Top Tip
Using small embroidery scissors helps get the blade just under the backing layer and cut tiny snips along the marking line. If you only open your scissors a little when cutting and let one blade slide just behind the backing, the blade won't get all the way through to the front where long-pile faux fur strands extend.
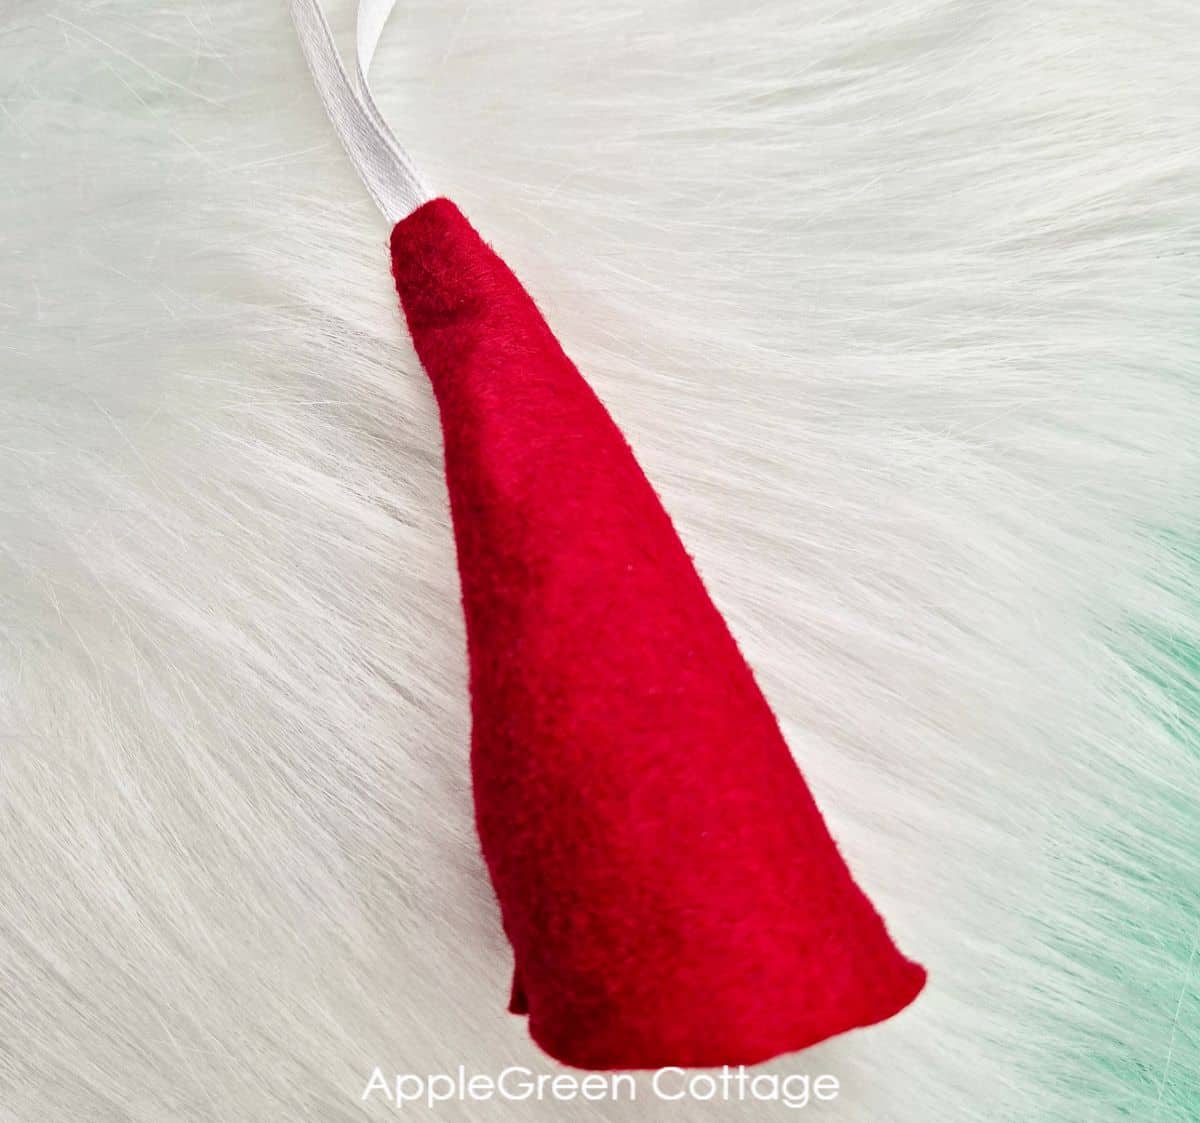
Step 3 - Make the Gnome Hat
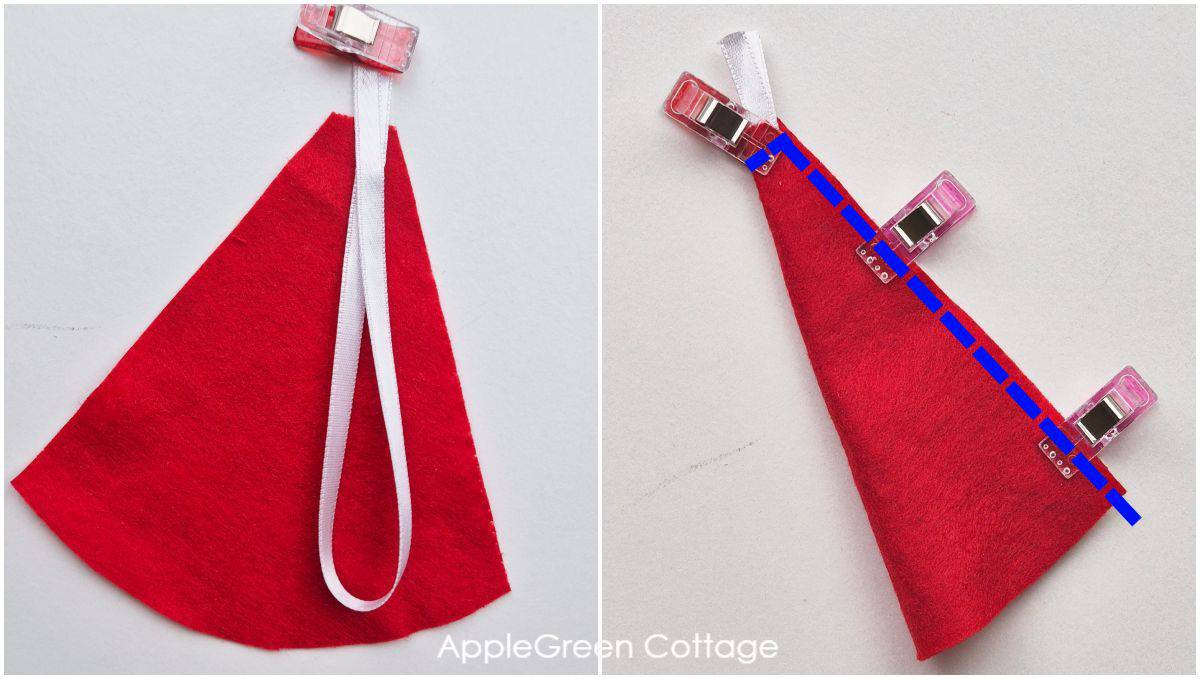
Place the gnome hat felt piece on a flat surface, and add a folded ribbon so the raw ends are peeking through the top edge of the hat. Fold the hat in half, hiding the entire ribbon loop except for the raw ends.
Stitch along the side and top raw edge of the felt, attaching the ribbon too. Make sure to sew back and forth at the end to secure seams. Then turn it right side out, or ↓↓↓
Optionally, you can add a pipe cleaner to make the gnome hat 'bendable'. Here's how:
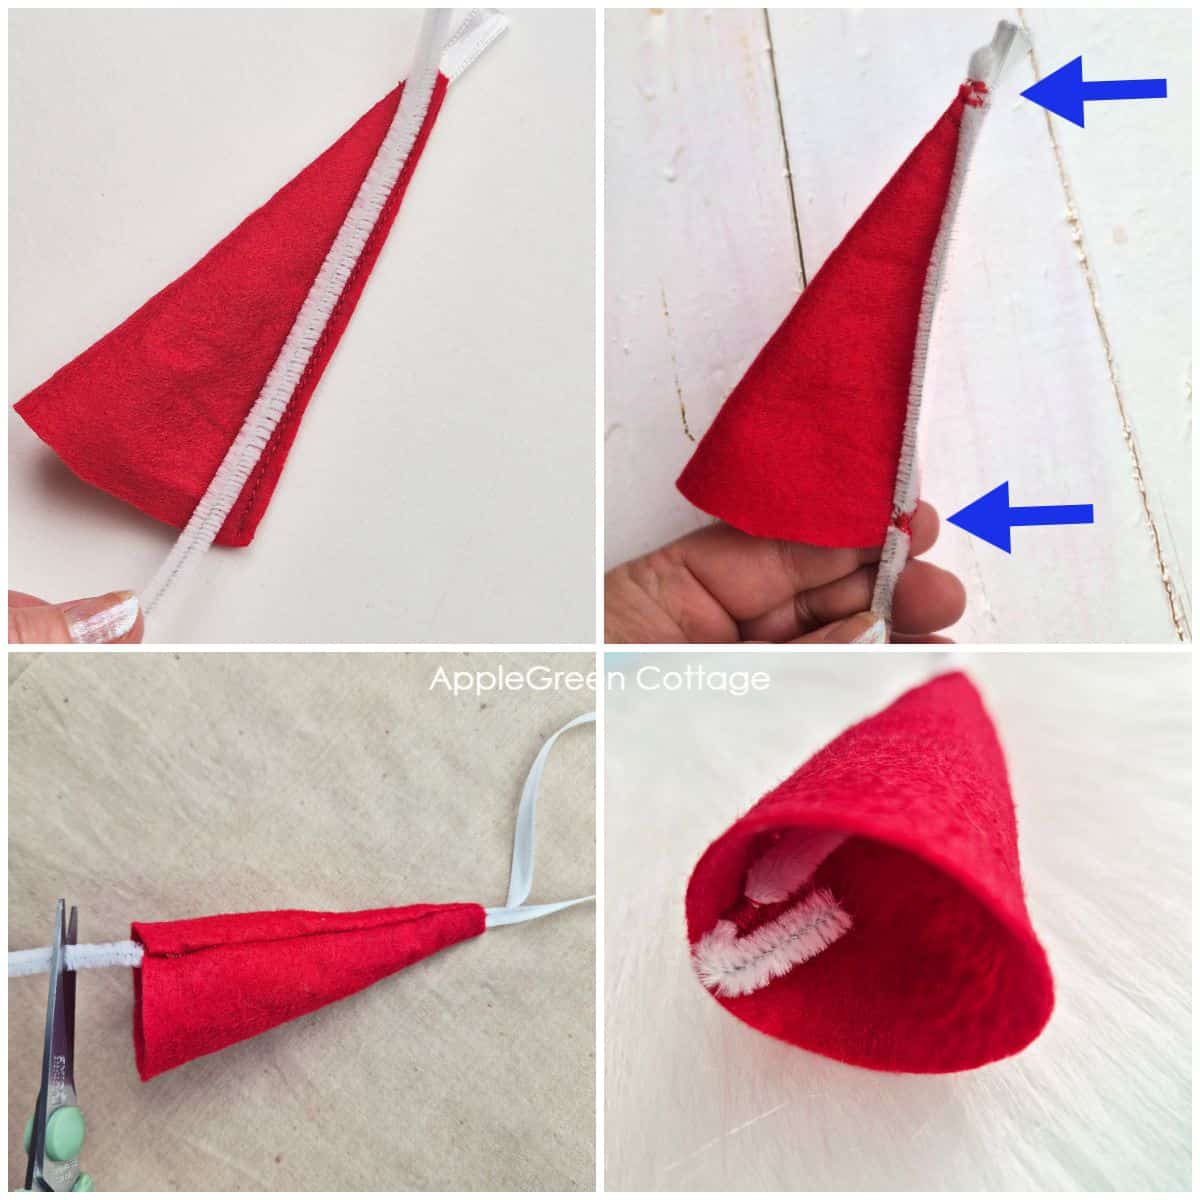
- Place the pipe cleaner very close the vertical hat seam so it is peeking out from the top of the hat by half an inch.
- Attach it to the hat seam with a few hand stitches to the top and bottom of the hat.
- Turn the right side out and cut off the excess pipe cleaner so that half an inch is peeking out on this side.
- Fold the excess pipe cleaner bit upwards into the hat, so it is not visible from the outside.
Gnome hat finished!
Step 4 - Sew a gnome body
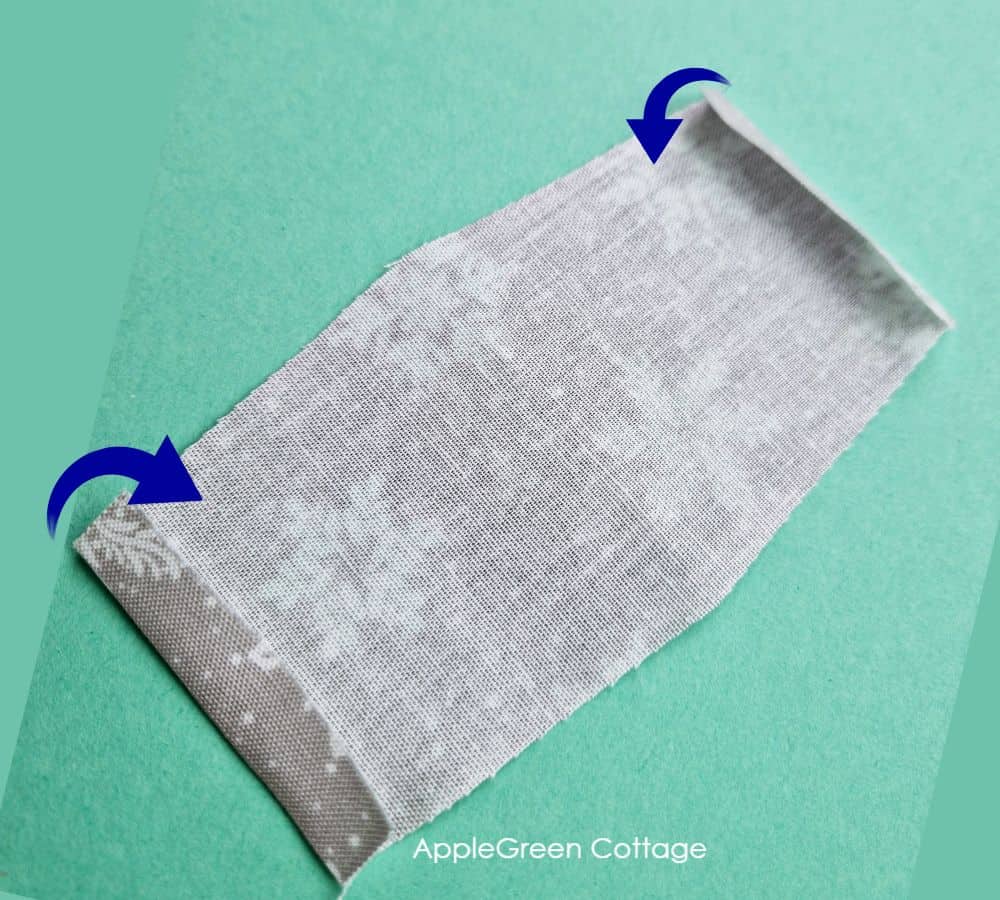
Lay the gnome body piece with the right side down and fold the two short ends upwards by ⅜" (i.e. towards the wrong side of the fabric).
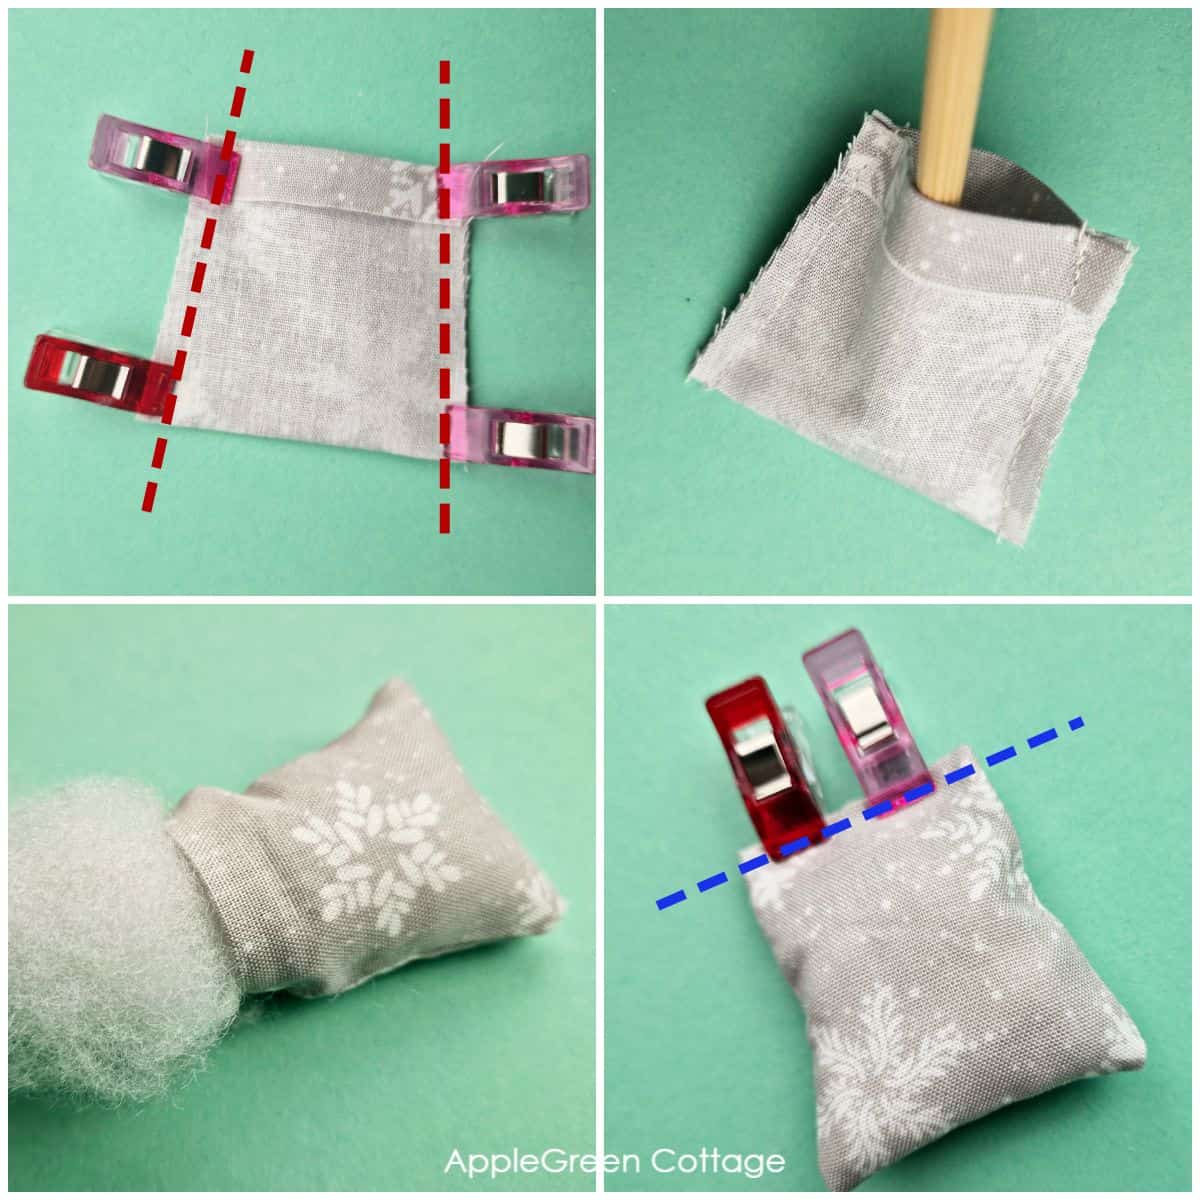
Now fold the entire piece in half with the right sides together, sew the sides using a ¼" seam allowance, and turn the right side out. Fill the 'pocket' with poly-fill.
Topstitch along the top edge to close the hole.
Step 5 - Attach Gnome Beard and Nose
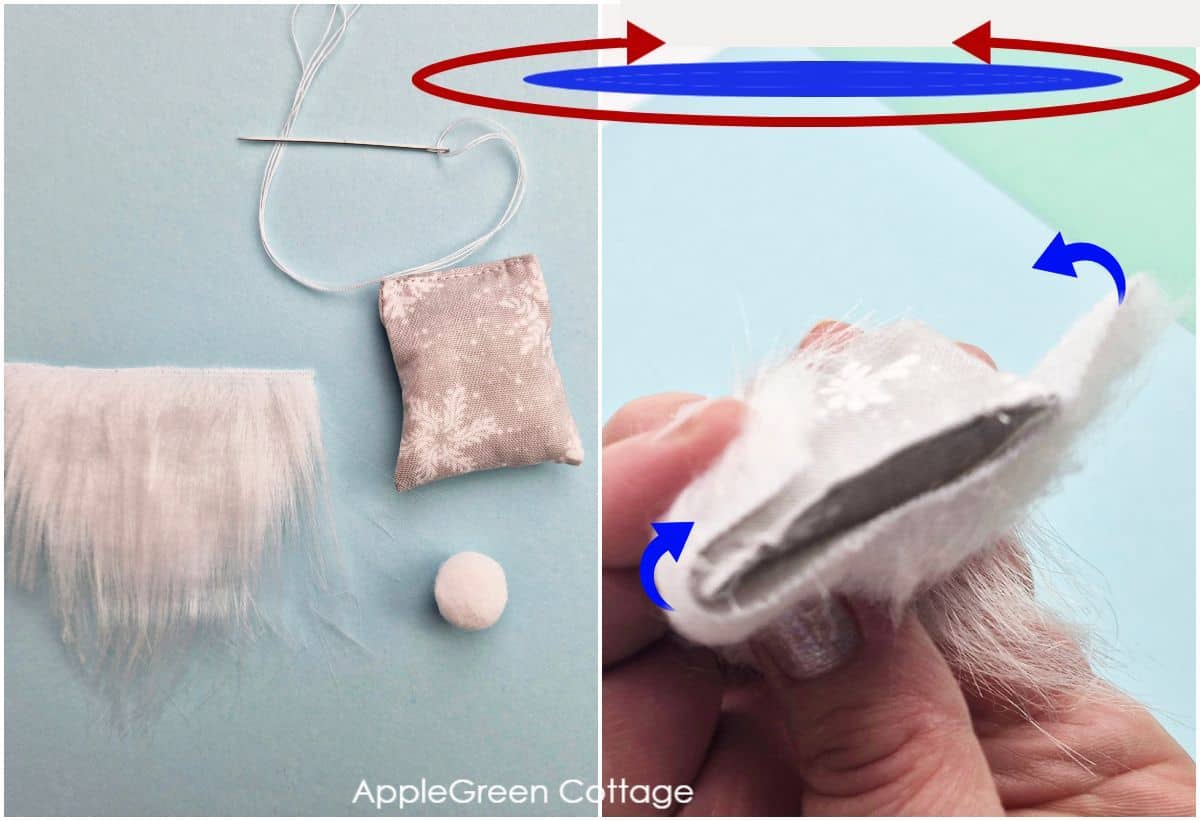
Align the gnome beard piece with the straight top edge along the top edge of the gnome body, center it, and fold the right and left beard ends around the gnome body to the back. This is how it looks like once secured with clips:
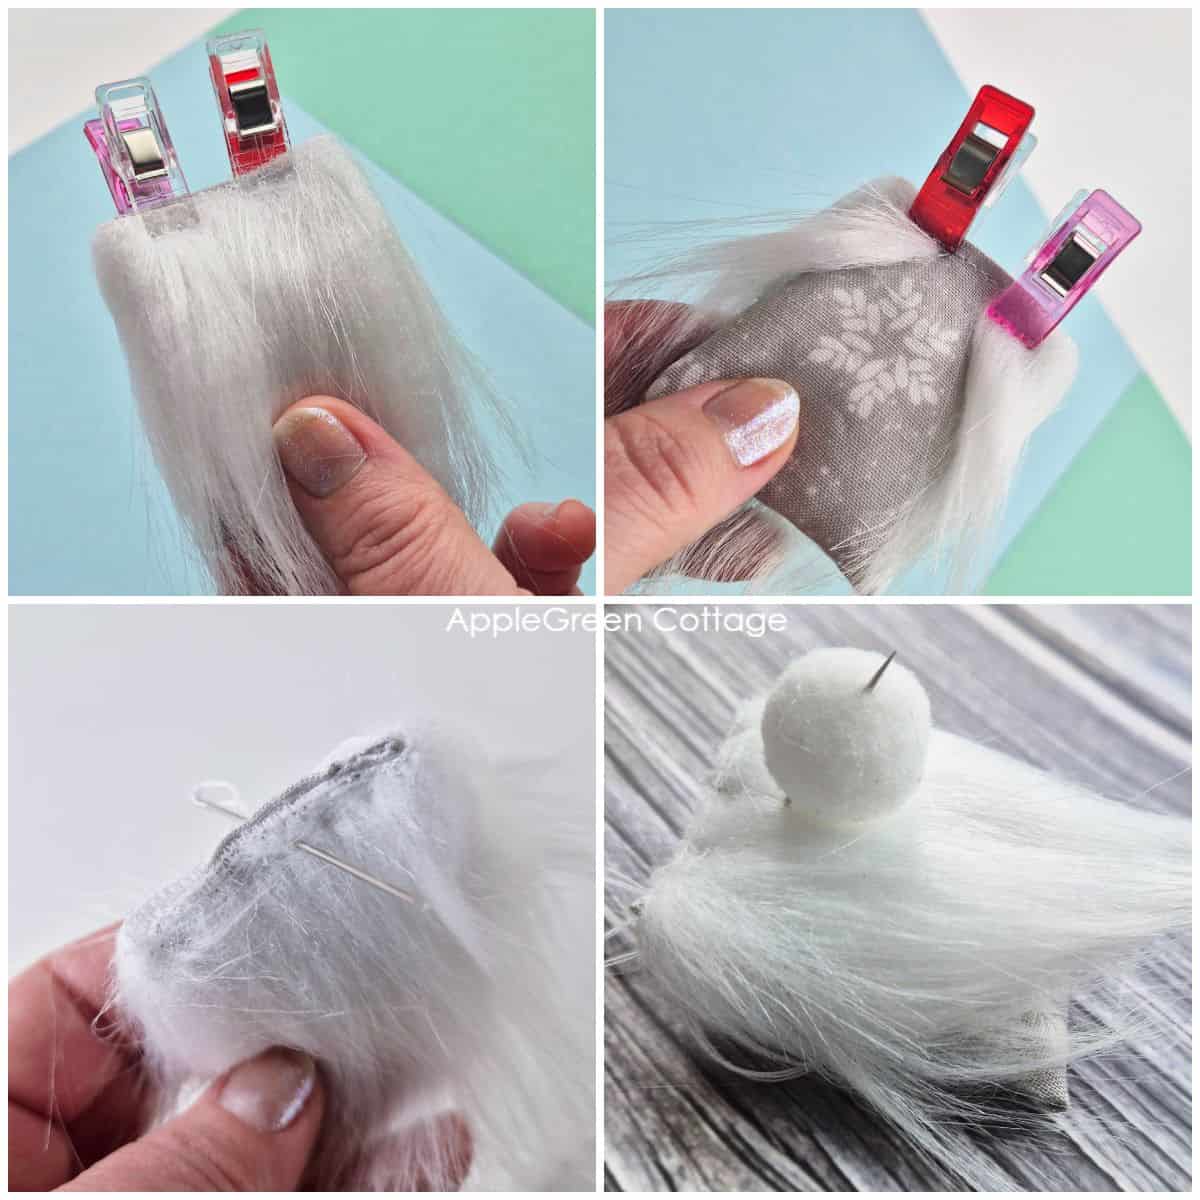
Grab a needle and thread and do a few hand stitches to secure the beard, then push the needle from the back to the front at approximately half an inch from the top of the beard, and attach the gnome pom pom nose.
Do not cut the thread yet.
Step 6 - Attach Gnome Hat
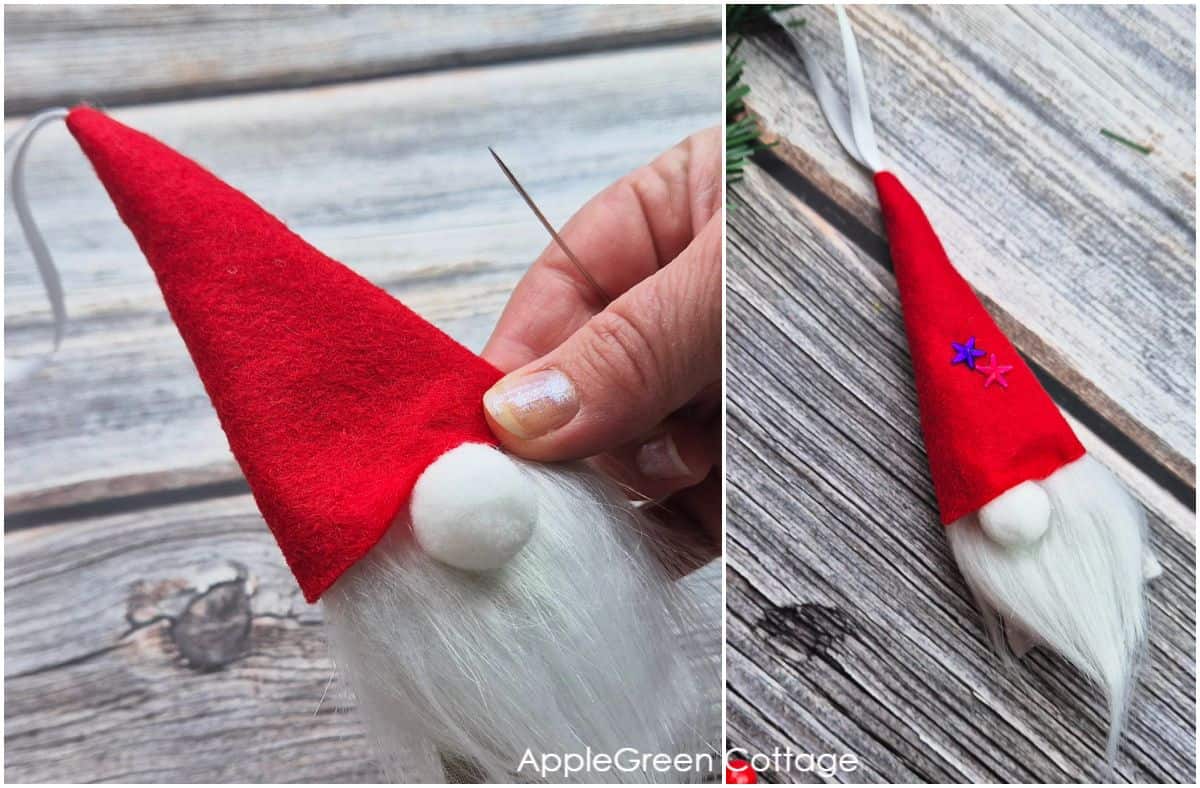
Pull the needle to the back and grab the gnome hat. With the seam of the hat in the back, place the front edge of the hat over the nose.
Attach the hat with a few stitches to the back, sides, and front.
Finished, congrats!
FAQ
Want to make a no-sew gnome ornament? Sure, you can use our free pattern and a hot glue gun! If sewing isn't your thing, simply use the hot glue gun to assemble the top cone, gnome hat, body, and attach the beard and the nose. I prefer sewing, but I get that every creative person is different. So, choose whichever method you like best.
Here are some fun, creative ways to decorate with your handmade gnome ornaments this Christmas:
- Hang them on the tree for a whimsical touch.
- Make a garland for the mantle or staircase.
- Attach to wreaths for a cute, handmade look.
- Use as gift toppers for a personal touch.
- Display on shelves or tables for cozy charm.
Related Holiday Decorating Ideas
Looking for other projects like this? Try these:


Conclusion
I hope you liked the tutorial on how to make Christmas gnomes. These DIY gnome Christmas ornaments can turn into keepsake decorations you'll be pulling out year after year, with wonderful memories of crafting with your kids, friends, family. Wishing you a wonderful holiday season.
Want a printable copy of the whole tutorial?
Do you want an ad-free, printable copy of this online tutorial? Get it in our shop. Or get the whole →BUNDLE!

And if you want to create even more, check out all the Christmas sewing patterns here at AppleGreen Cottage. Or visit our FREE gift sewing email series:

Join the FREE 6-part email guide and make super easy diy GIFTS - each in 30 minutes or less! You'll love it!
Or …check out the gift bag pattern in 6 sizes in our shop - a super easy no-corner-boxing sewing project. Reusable gift bags for all your future gifts!


Yvonne says
Thank you for the cute easy pattern and the tip about cutting the faux fur. I picked up a bag from a thrift store along with some wool sweater scraps. I almost ordered pom poms but I have a bunch of yarn, so I can make my own. I am going to make the hats with the sweater scraps. This is the perfect comfort project, kinda like comfort food hahaha but I am seriously looking forward to making these little guys for our tree and perhaps some gifts too!
Eloise Preston says
looks like a great project for Christmas. Thanks for the free pattern
Damjana Jakos says
You're welcome, Eloise. Happy holiday season,