
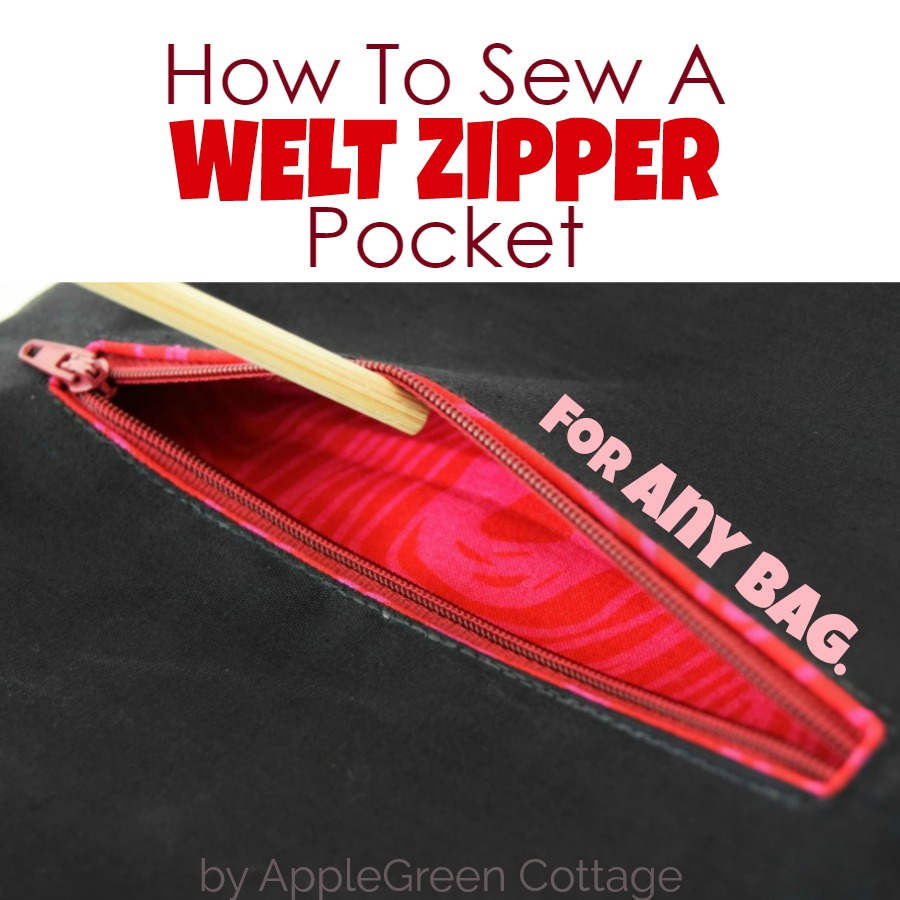
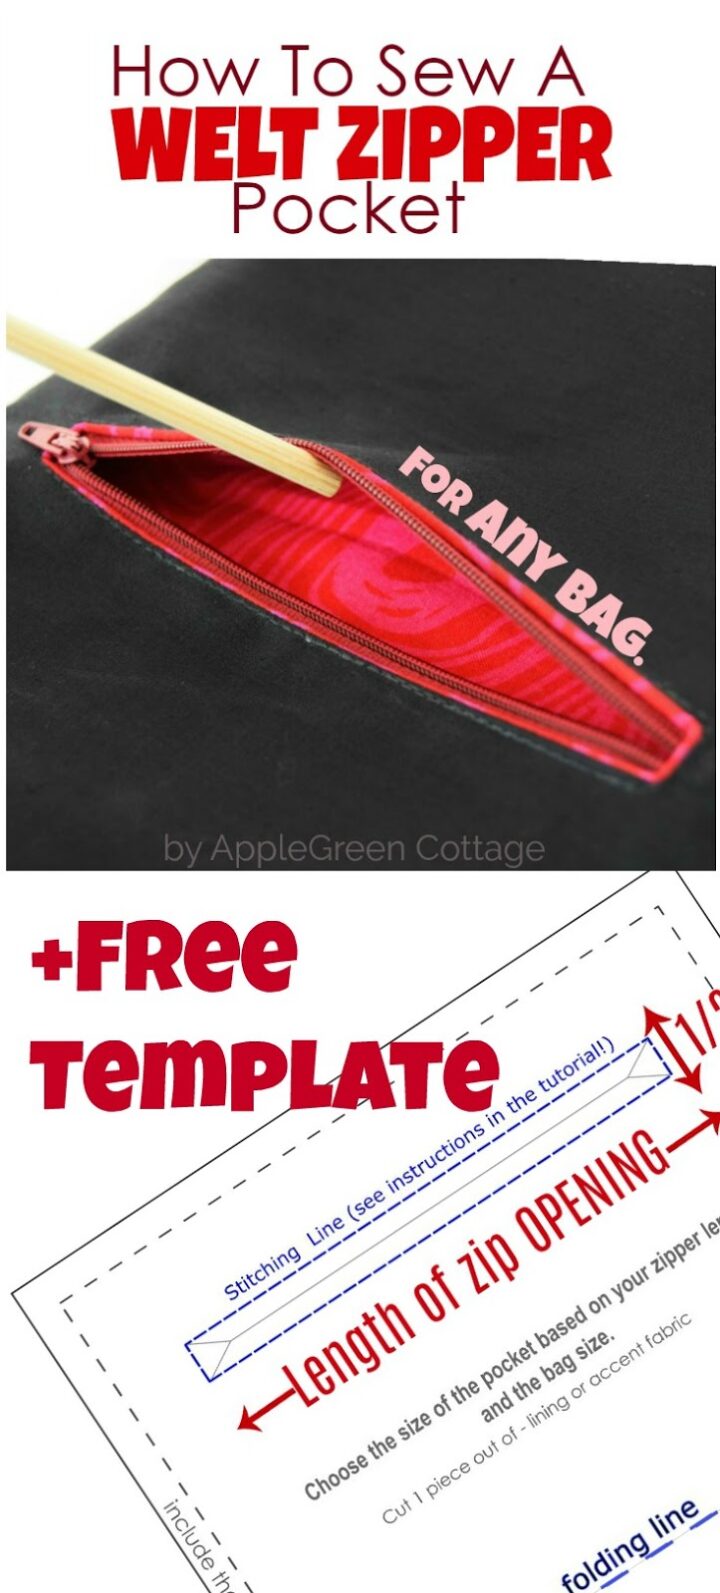
Learn how to sew a welt zipper pocket on any bag (the one you'll want to use everywhere from now on!)
This post contains affiliate links. Thanks for your support. If you're here for sewing tips, also see
- how to sew patch pockets
- and check out these tips for bagmakers
- You'll find a lot of bag sewing tutorials here at AppleGreen cottage.
- my main list of all learn to sew lessons.
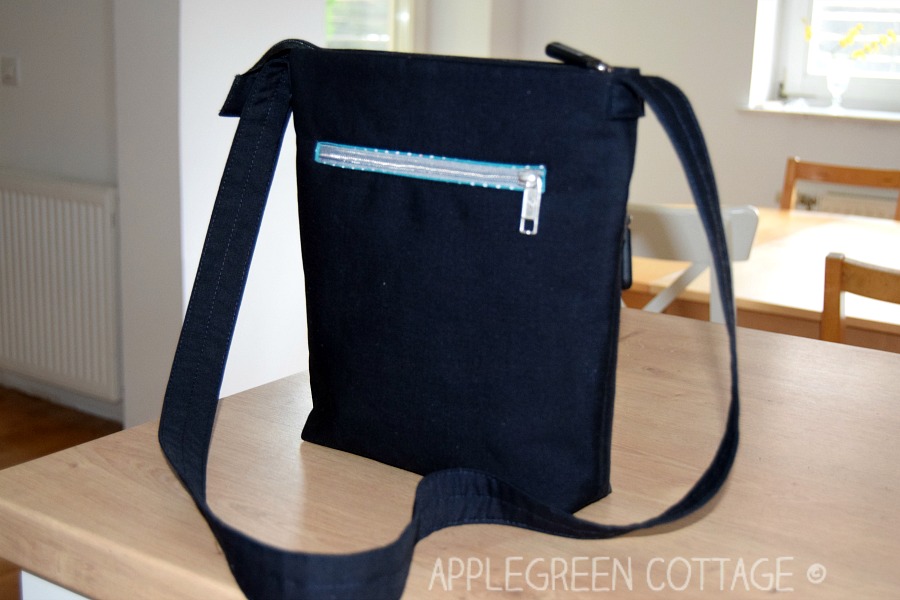
Adding a zipper pocket makes your bag way more useful, and any bag pattern can be modified to fit an additional one. I'm showing you how I added a welt zipper pocket to the TEYA Crossbody Bag, but I think anyone else would love to use this how-to, too. Take a look at this beginner-friendly sewing tutorial and learn in minutes how to add a welt zipper pocket either to the outside or to the inside of a bag.
Sew a Welt Zipper Pocket
I'm showing you the part of bag sewing when you start making the welt zipper pocket. You usually sew the zipper pockets at the beginning of the projects, so your bag panels are still detached, not sewn together.
Supplies
- the piece of the bag fabric where you want your pocket to be placed. (black cotton in the tutorial, it's the main bag piece for outer back.)
- one piece for the pocket lining, twice the size of the finished pocket (here red cotton print; also see the template below)
- matching thread
- the usual: measuring tape, scissors, sewing machine
Welt Pocket Lining Template
This is the template for the welt pocket lining that should help you along the way. You can save it, or just bookmark this tutorial on your computer for later use. Or pin, of course!

How To Sew A Welt Zipper Pocket tutorial
Now, first find a project on which you could test the welt pocket. Just an idea... what about adding a welt pocket to that large market tote bag that you have been meaning to make since spring (but is still on your to-do list?) Oh, don't ask me how I know, haha! I've got TWO market totes on my own to-do list, since Christmas! 🙂
EDITED: Fast forward a few years from now, they are finished. This diy blocked tote and this square market bag. Love them both. But let's get back to the welt pocket tutorial:
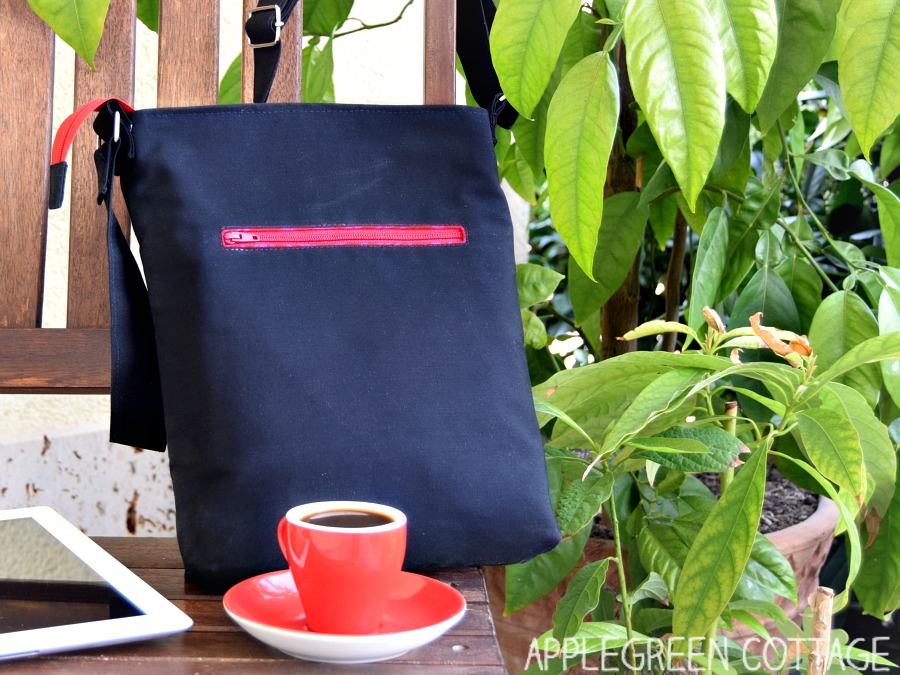
I'll show you how to make a welt zipper pocket on the bag outer - that's why I'm taking one piece of this bag's outer shell. (in my case, it's the TEYA Crossbody Bag, pattern here.)
Step 1 - Position the Welt pocket Lining

1) Place the outer panel face-up, and the pocket lining face-down on top of it. (=They should be right-sides-together.)
Horizontal position: the pocket lining centered on the outer.
Vertical position: The top edge of the lining fabric should be shifted down from the top of the outer fabric, depending on how low your welt zipper pocket should be placed. (mine: shifted down by 2 ⅜" (=6 cm)

2 - Mark The Zipper opening on the pocket lining
2) On the pocket lining piece:
Draw the zipper rectangle (stitching line) and the inner cutting lines: copy them from the template and adjust them to your desired zippered opening size (horizontal adjustment)
As you see, the zipper opening will be half an inch 'tall' (vertical). Do not adjust this.

3) Just draw the zipper rectangle. NO CUTTING YET!

3 - Sewing Step
4) Now, shorten the stitch length to approximately 12 stitches per inch (or 2 mm in metric). Stitch exactly on the stitching line of the rectangle you just drew.

4 - Make the welt pocket opening (cutting and turning)
5) Cut along the inner line until the triangle. Then also cut into the corners into the V-shape, until very close to the stitching line. Make sure not to snip into any stitches!

6) Pull the pocket fabric through the window to the other side, so you get the pieces to be wrong-sides-together.

7) When you have the lining on the other side, you'll have to pull on the lining and finger-press the seam to get that lining part hardly visible from the front side.

8) Press.
5 - Add A zipper to The Welt pocket

9) Flip to the backside. You'll place the zipper on the opening:
- Place the zipper onto the opening. Zipper teeth should face the outer side. Center the zipper, and make sure no metallic parts (zipper stoppers) are in the way when stitching.
- Pin in place, or glue the zipper into the opening (Wonder Tape works great!)
On a side note, you'll notice that the bag outer is backed by interfacing. You might or might not need to have any interfacing on your piece. (Just follow the instructions for your own project).
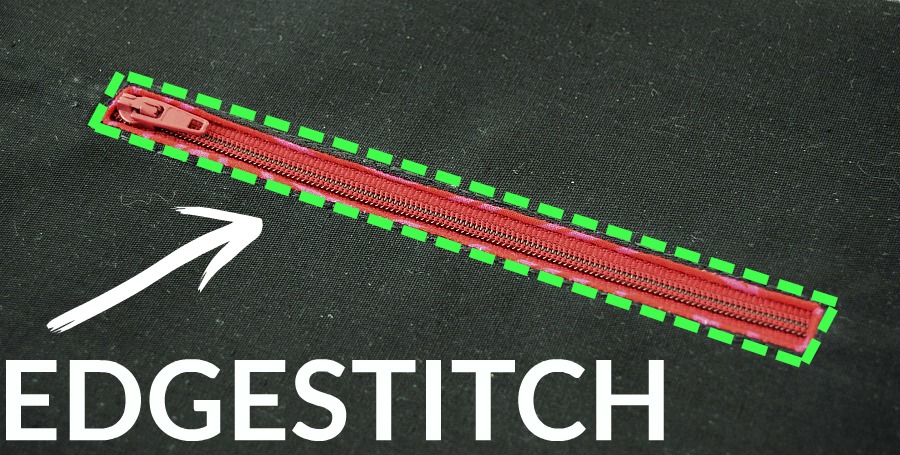
10) Start somewhere on one long side, stitch to the corner, stop with the needle down, lift the presser foot, pivot, and keep sewing. Repeat at each corner.
Top Tip
To help prevent that little diagonal skipped stitch right after pivoting, stop with the needle down, then turn the handwheel just enough to lift the needle a tiny bit - needle eye still in the fabric - and only then raise the machine foot and pivot.

11) I often sew twice around when making a heavy-duty bag, to make sure the zipper will hold all the wear and tear. You don't have to; sewing over twice might make it hard to keep the stitching line neat.
6 - Sewing the Pocket lining

12) Cut off any excess zipper tape. Then fold the pocket lining upwards and pin in place.
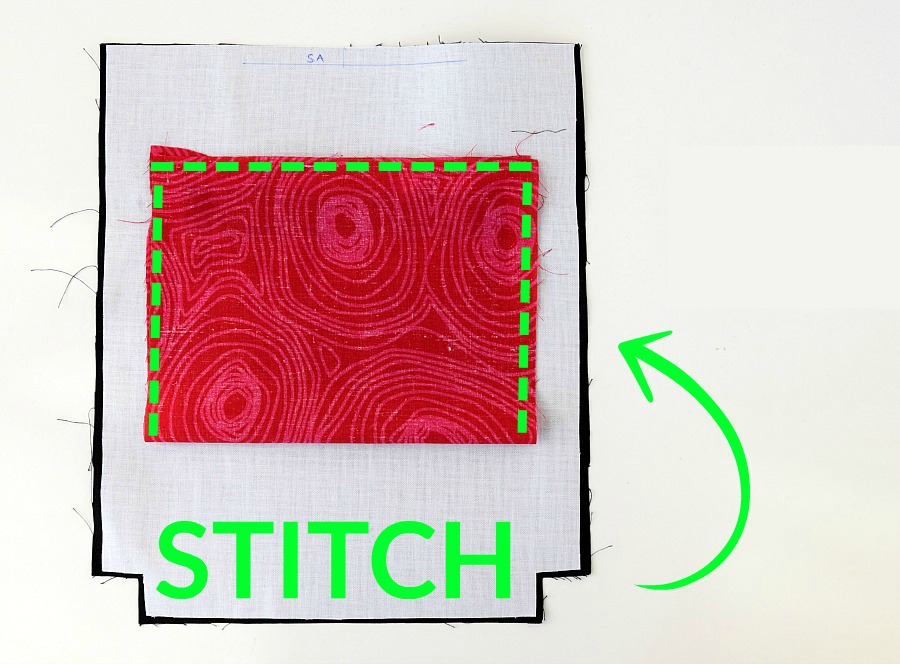
13) Stitch around the 3 sides, only catching the pocket lining fabric.
IMPORTANT: Make sure you never catch the outer fabric - here black. You just stitch the pocket lining (red cotton print here), fold the outer bag fabric out of the way.

14) Your first welt zipper pocket finished! Now bag sewing will never be the same again for you. Enjoy the new skill!
Now think any bag, purse, pouch or tote (and don't stop there!) You can add this type of welt pocket to many other projects as well, like pants, skirts, dresses, and many more. It's easy and it should take your bag to the next level - looking more professional and practical.
You can test this tutorial on heavier fabric too. However, If you sew a lot with heavier textiles, leather, and upholstery fabric, maybe it's time to check out this post on best heavy duty sewing machines on a budget.
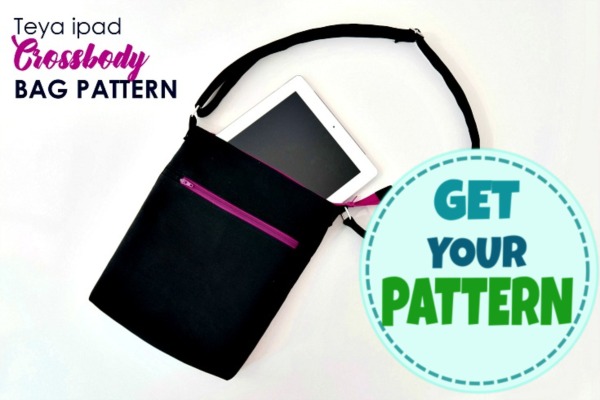
For those wondering where this tutorial came from, I made it when sewing one of my own designs, the TEYA Crossbody Bag. I love it for its convenience and beginner-friendly sewing procedure. The pattern itself is marked as intermediate though because it's perfect for those who have already sewn a bag or two. Want to make one welt pocket and test its use?
Then it's best to choose a project to go with it. I'd recommend using it with the original TEYA Crossbody Bag pattern in our shop:
Top tips to sew better zipper pockets
Here are some handy tips I've picked up while sewing zip pockets:
- Shorten your stitch length when sewing the rectangle for the zipper or zipper facing - a lot! I usually use a 3mm stitch length. But for the zipper pocket facing (that long rectangle for the zip to peek through!) I decrease it to just 1.5mm.
- Get really close to the corners when cutting the tiny v-notches in that rectangle. I use my embroidery snips but some bagmakers will get even better results using a craft knife.
- Press the seams before you push the lining through, and then again. As an alternative, use a seam roller if your fabrics don't like heat.
- Always press the seams again before you attach the zipper.
All these tips together really improve the final bag!
WANT MORE FREE TUTORIALS AND PATTERNS?
Get email updates and never miss out on new patterns, printables, and tutorials:
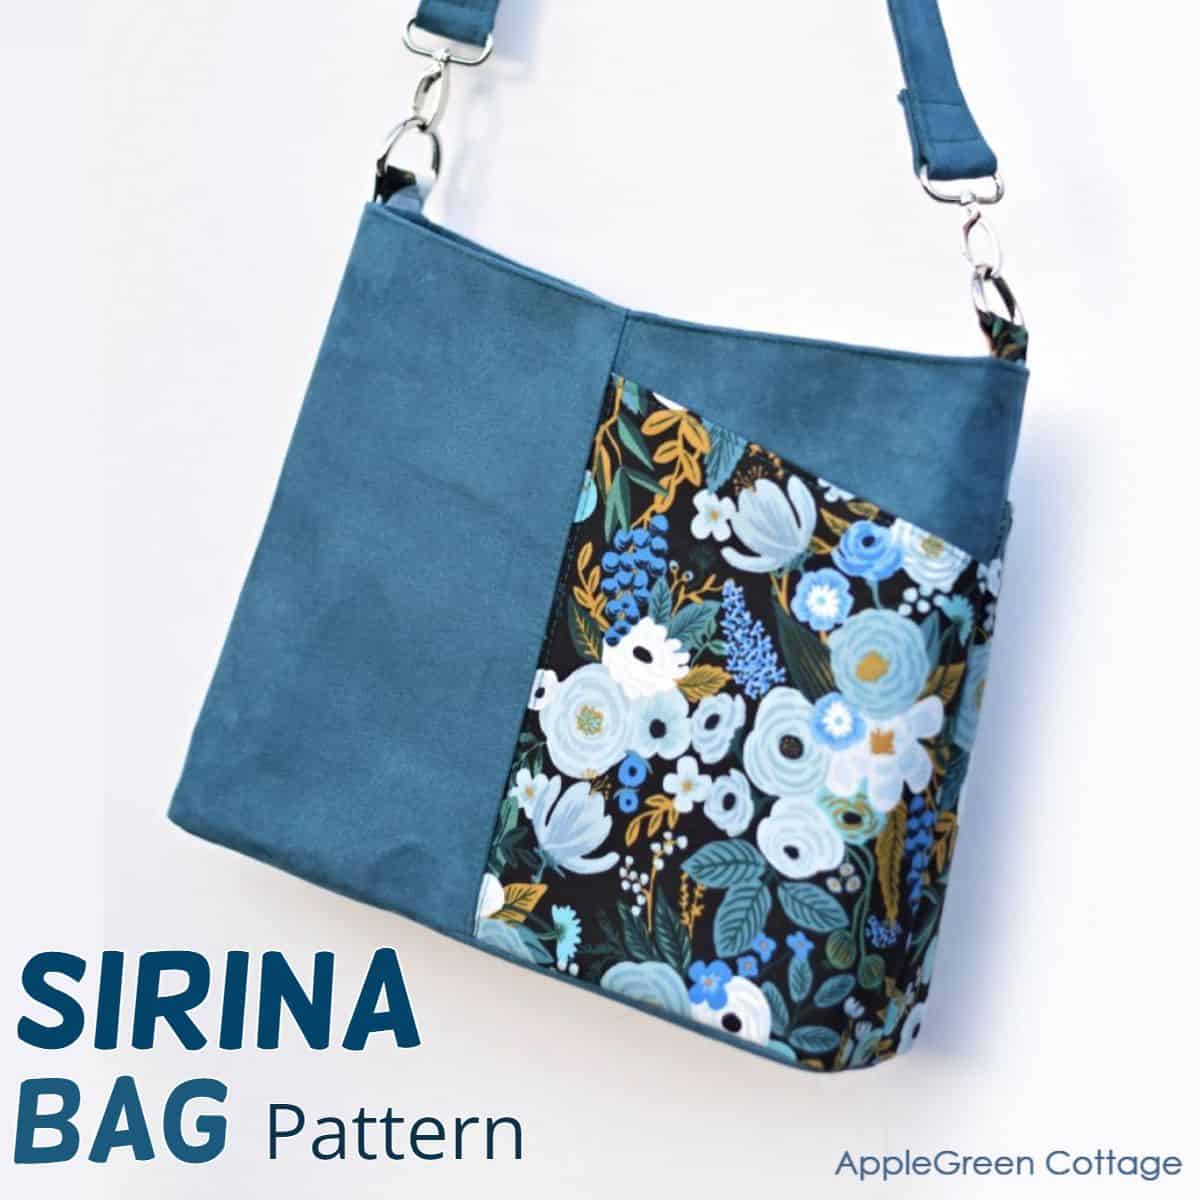
Or check out the classic SIRINA Shoulder Handbag pattern in our shop. Ample space, pockets inside and outside, two closure options, and a beautiful feature front pocket - for your favorite fabric print!


Diannalynn Claridge says
I just followed your tutorial, to put a welt zipper pocket in a knitting needle case I designed for myself. Your instructions were very clear and helpful! Thank you!
Damjana says
I'm so glad the welt zipper tutorial helped you. Happy sewing,
Pam @Threading My Way says
As always, an easy to understand tutorial, Damjana. You can never have too many pockets in a bag. Showcased today...
Cucicucicoo: Eco Crafting & Sewing says
What a great tutorial! I remember the first time I tried to figure this technique out, I got so confused. Pinning and sharing! 🙂 Lisa
Damjana at AppleGreen Cottage says
Lisa <3thanks!
Diana says
Extremely clear directions without confusing asides. Thank you for writing this. I will check out your other tutorials.
Damjana at AppleGreen Cottage says
Thanks, Diana. Happy sewing,
margaret says
thankyou for this tutorial, have converted it to a pdf and downloaded it. I still have to learn how to put a zip in a bag never mind a pocket! but will get there as I want to make some pouches and they need zips.
Damjana at AppleGreen Cottage says
Hi Margaret, thanks for your comment - and yes please, use everything you can on this site - have you noticed there is a page with all my free tutorials and patterns? All yours if you want. And stay tuned - I've got something about easy zippers scheduled for July and August, too! (cant' tell you more, but one thing is certain: you've come to the right place 😉 Have a great day,
Damjana at AppleGreen Cottage says
Oh, one thing more: if you'd like to learn to sew the basic zipper pouch, along with zipper installment (the EASY way) - check out this beginner tutorial (free pattern included): https://www.applegreencottage.com/zipper-pouch-tutorial/