
Sweet 🍬 candy and no calories? Yes please!
Make these super fun red and pink diy candy ornaments for your Christmas tree! This is an easy and quick sewing project for beginners.
These diy candy cane ornaments are part of our huge FREE Homemade Holidays pattern Bundle. Scroll down to grab all 18 patterns for free!
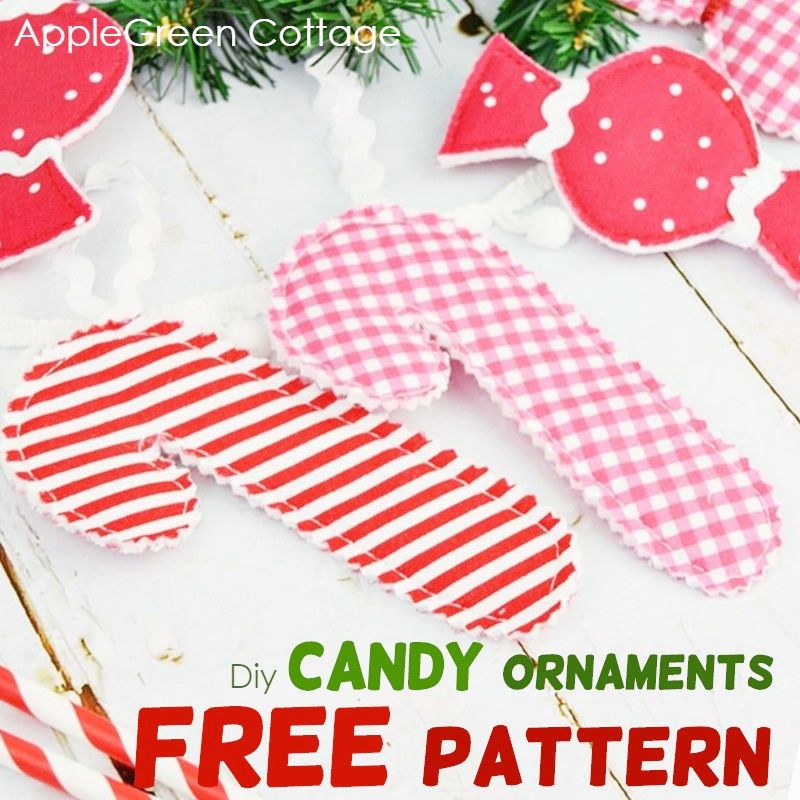
Table Of Contents
If you're ready to break away from the traditional red and green, these candy-colored ornaments are just what you need. Bring on the red and pink for a fun twist!
For an extra wow factor, mix and match them with these adorable flat felt ornaments, or these elegant DIY fabric finials. They're irresistibly cute!

These diy candy cane ornaments are super fun to sew, and they only require basic sewing skills. With the free template, they are even easier to make.
Sewing Video
First, check out this quick slideshow to get an overview of the project:
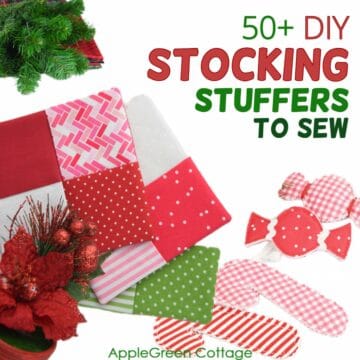
Diy Candy Ornaments
You will get two templates: a candy cane sewing pattern and the classic candy printable template.
Also, you get both of them in 3 sizes so you can either choose the small, medium or large - or a wild mixture of all. Here I used the smallest size - this one is perfect for garlands, mini tabletop trees, and even for decorating your workplace.
Supplies
Shop my personal favorite sewing supplies on Amazon HERE.
- a fabric piece twice the size of the template you are using to make candy ornaments
- 6" ribbon for hanging (longer for large sizes)
- matching thread, scissors, sewing machine
- Free template - download and print page 11 from our Homemade Christmas Patterns Bundle:
HUGE Holiday Sewing Pattern BUNDLE - FREE!

17+ sewing patterns to craft your own, cozy holidays!
Diy Candy Cane Ornament Tutorial
Here's how to make them:
Step 1 - Print out the template (page 11) from the FREE Holiday Bundle
Join our mailing list and get the Free Homemade Holiday patterns BUNDLE emailed to you:
Download to your device and print out page 11. Decide on the size and cut out the two templates. The page will look like this:

Step 2 - Add fusible fleece to the fabric

Use an iron to fuse the fusible fleece to your fabric piece. Please note that the fabric piece should be twice the size of the template you are using to make your candy ornaments.
Step 3 - Fold the fabric

Fold the fabric in half, wrong sides together.
Step 4 - Transfer the template to fabric

Using a disappearing fabric marker, trace the template ONCE to the right side of the fabric. You'll fold the fabric, so place the template on one side of the fabric piece (not the center).
Step 5 - Stitch the Diy Candy Ornament

Using a straight stitch, sew the layers together, sewing exactly on the line. Don't add any seam allowance.
Step 6 - Trim

Cut around the sewn ornament, roughly ⅛" (3 mm) away from the stitching line. You can use pinking shears.
Step 7 - Add a short ribbon for hanging

Fold the 5-6 inch ribbon in half and attach the raw ends to the center - on the backside of the finished ornament.
Diy Candy Ornaments - Template No 2
There are two templates on pattern page 11 - this one is for a candy ornament, the one above was for a candy cane. Same procedure as before: add fusible fleece to the fabric, trace the template, sew and then trim it, using pinking shears.

And now comes the only part that's different: you can either tie a piece of ribbon or twine directly by tying a simple knot or stitch it to the candy ornament like in the tutorial above. Your choice!

More Christmas Ornament Projects
If you're looking for more holiday patterns, try these:

Where can I get the free pattern?
Join our mailing list and get the template for free - and more, the entire (huge!) Homemade Holidays BUNDLE, with more than 18 templates to create your own cozy holiday decor:
Or …check out the gift bag pattern in 6 sizes in our shop - a super easy no-corner-boxing sewing project. Reusable gift bags for all your future gifts!


Leave a Reply