
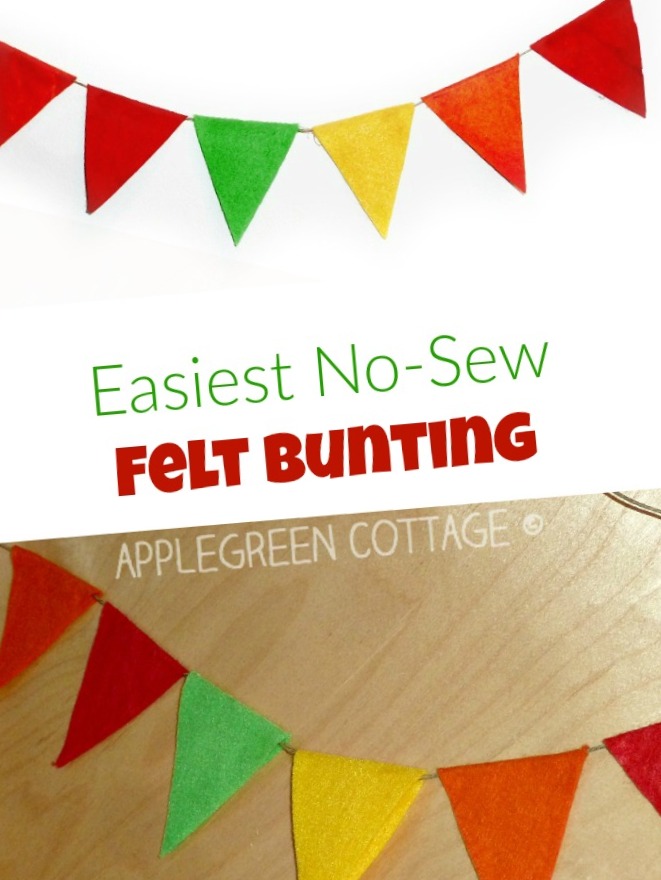
Welcome the first day of school by making an easy, no sew felt bunting. It will bring a sense of festivity into your home and your kids will feel it's a special day. After I made a double sided banner and turned it into a tutorial (with a free PDF template!) a while ago, I also wanted to give a no-sew version a try. It was made really, like really quickly. A fun family crafting activity, too!

This post includes affiliate links. Thanks for your support.
How To Make Felt Bunting
If this isn't the easiest thing of all I've ever done! Really, it's easy to make. All you need is a few felt scraps, glue, and a piece of twine. If you are lucky to have a backyard, hang the felt bunting outdoors and play fun games as a family. Like this painting activity using homemade paint brushes, or this back-to-school fun activity with pebbles. (Spoiler alert: no cleaning afterward needed!} It will be a day to remember, and a perfect kick-off to the school year. What do you say, are you in?
The EASIEST FELT BUNTING TUTORIAL

1) Gather your materials. Easy! Scissors, glue, twine and felt. Done!
Here, you might want to ask yourself what felt to use. This is one of the few projects where ANY type of FELT will do. Lucky you! However, if you want to find out more about felt, you can check out my post on how to choose the right felt for your creations. However, no matter where you get your felt, it's good to check thickness, material, and stiffness before buying it! Now, back to the how-to!

2) Fold a piece of felt and cut a triangle from it, meaning you've just cut out a RHOMBUS. See the image above. Easy!

3) Use the first (still folded) piece as a template to cut more of same-size triangles (that is, folded rhombuses).

4) Stop when you feel there are enough, depending on how long you want your bunting to be. I only needed 6 pieces.

5) Place the first rhombus on a flat surface and the twine over it. Now add glue to cover one side, like this:

6) And fold the other side of the rhombus over the glue. This way, you'll get a triangle with twine right through the top side. Even small children will love the folding process!

7) What you get is a cute, no-sew, colorful bunting to use for a first day of school. Or for any day you want to make special, actually!

Welcome, first school day! Nothing says this better than a cute & colorful bunting banner. Happy crafting!
However, if you happen to have more time and want to make a more durable bunting banner, that is - one that can be washed and reused - or personalized by adding a name - this is what you'll want to check out:

WANT MORE FREE TUTORIALS AND GOODIES?
Get email updates and never miss out on new patterns, printables, and tutorials:
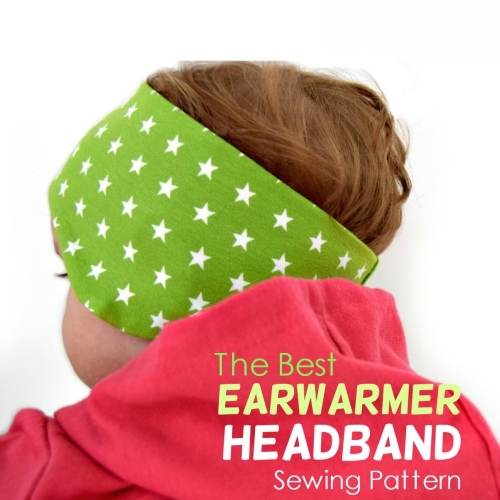
Or …check out the Earwarmer Headband pattern in 8 Sizes in our shop:


Leave a Reply