
What's here: an easy sewing pattern storage file tutorial - See how to DIY a flat sewing pattern storage for printed sewing patterns.
So, dear readers, this is one of my early 'inventions' to cope with sewing pattern storage: Nothing fancy, but so useful! It's a supersized cardboard holder for your sewing patterns. I'll show you how to make it, check it out.

Feel free to browse a few of my other storage and organizing tutorials, too:
Sewing Pattern Storage - A Diy Version
Want to make a supersized cardboard file for your patterns? To start, let me tell you why I love my diy pattern storage. It's
- zero cost,
- green (upcycling old cardboard boxes)
- easy and fast.
And these storage files are huge! They can be used for a number of purposes, like kids' art folders. Seriously, these can house even the largest art creations they have brought from kindergarten!
With that being said, the top value of these diy folders comes from being able to store a wealth of those large patterns that come in huge sheets of paper. If you are looking for where to store them, this is the tutorial to bookmark. First, the supplies.
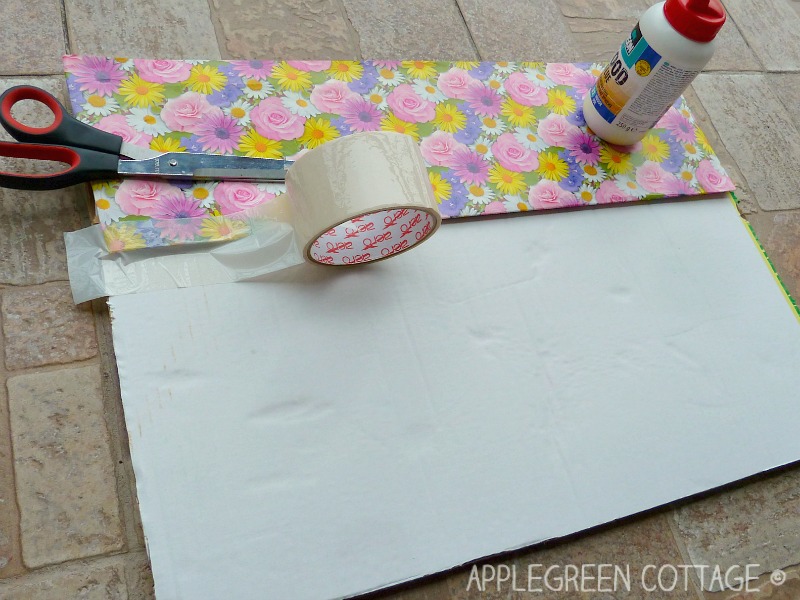
You'll need this:

and two cardboard boxes like this one:

How-to:
1) Cut the two boxes so you get one bottom piece and another one - but mind, you need to leave one side of the box attached to the bottom - see the next 2 photos before cutting!

2) See? One bottom of the box and one bottom with one side still attached. You'll use these two pieces.

3) Glue them together so the (additional) 'side' of one piece will overlap, as seen in the photo below:

4) This is optional: I glued some wrapping paper over the top of one side, to make it prettier. And used duct tape to make the embellishment last longer 🙂

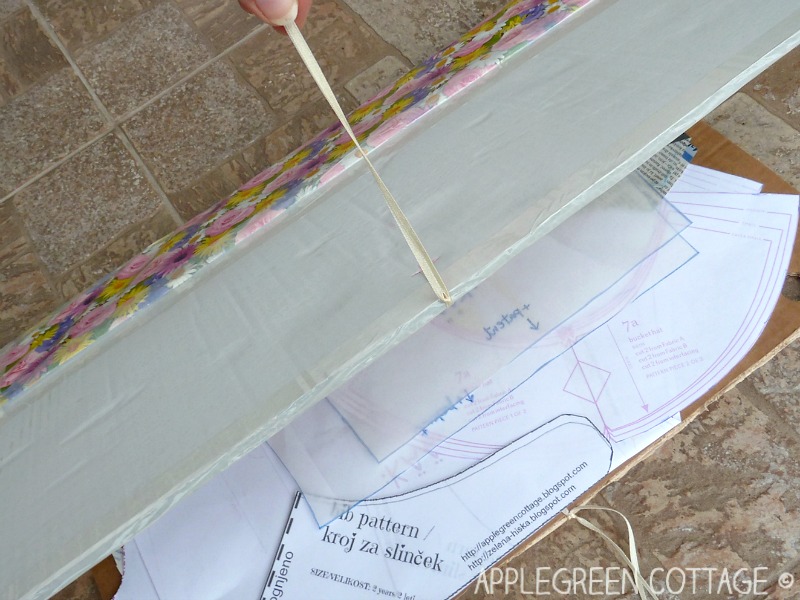
5) Using an olfa cutter, cut two tiny holes to the front and the back piece of the folder:

6) ...and insert a ribbon into each hole. You'll use this to tie the two parts together.

7) Done!

If you only have a few large pattern prints, one single folder will be perfect. Others might need a whole closet, but I am not talking about that... Yet 😀 This solution is great for those sewing enthusiasts who don't (yet) own a huge pile of patterns but could use a smart way to tuck them all into one place...And one more thing is of HUGE importance to me: it takes nearly no space in my home! (I'm always in search of space-savers) Now, one more thing: it's good to eliminate the guesswork and label the individual pieces of every pattern properly. What I do is totally easy: write down the name of the project and the total No of pieces. On each piece. Even if they fall loose, you'll be able to find them again. You'd like to know which pieces belong together, right?
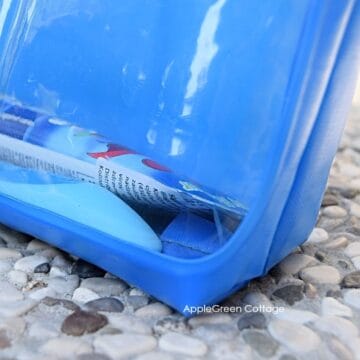
On a side note, you might need to store that little patterns, for bibs and similar ones: for smaller items, you can use clear plastic envelopes or transparent binder sheet protectors - you'll find them in any office supply store.

It doesn't look really large in this picture, but let me tell you this is the largest yellow box I have, and it holds nearly half of my stash of knits. But the folder fits right into this box, and this is what makes it PERFECT for me.
OK, it's not much but it's a good start, isn't it? I hope it works for you too. However, I'd still be happy if you let me know what pattern storage solution works for you. Especially if it's a DIYed version, I'd love to see that!
Other Ways To Organize Your Sewing Patterns
Here are a few ideas I've collected and think could help organize your sewing patterns:
- Put them in super large plastic bags. Store or hang them by designer, then in alphabetical order.
- Get huge envelopes
- Use gallon-size zip lock bags
- Put them in sleeve protectors in binders
- Storing in the open space? Get a rod ( cable) and rings like the ones are sold in Ikea, and hang your pattern pieces like that.
- Have you got a lot of patterns? You need a big file cabinet!
How Not To Store Printed Sewing Patterns
To keep your sewing patterns in good shape, avoid folding them too many times, as it can leave creases and distortions, making it hard to cut out pattern pieces accurately. Sunlight exposure can fade and make the paper brittle, causing it to tear easily. Avoid storing patterns in damp or humid areas as moisture can cause wrinkling and distortions. Keep patterns away from sharp or heavy objects that can puncture or tear them, rendering them unusable.
Here are 2 ways for pattern storage that didn't work for me:
1 - Patterns Scattered in A Drawer.
My first-ever place to store my patterns was in a drawer. My mistake: I didn't organize them, but instead just let them lay loosely around in a drawer. You've guessed: not a good way to find all the individual pattern pieces again. Ever. Especially, because they shared space with my scribbles on pieces of paper and grocery shopping lists - and it did sooo NOT work! (What was I thinking?)
2 - Patterns Stuffed into Envelopes.
This was my second solution, having pieces of larger sewing patterns stuffed into envelopes. If an envelope is too small for a pattern, you'll have to fold the pieces too many times. Folding printed sewing patterns can cause creases and make it difficult to use them in the future.
Who wants to handle a pattern piece that had been lying in an envelope, folded a hundred times? There is no nice way to tell this: it sucked. This is why the flat storage file has been a great help for me to improve my printed sewing pattern storage organization. Hope it helped!
How do you handle the sewing pattern storage issue? Which one works for you?
Do you want to know how to store fabric? I can help, check out our post about fabric storage organization. Super helpful, readers say!


Judy says
I used to do beading ( a lot ) and had to quit for several reasons. I had some left over plastic storage boxes I had bought at Wallyworld, I think they were called shoe boxes, but the are the perfect fit for patterns. One for mine and one for the kids patterns that I make for my two generations of grandchildren. I also take those flimsy tissue patterns for things that I used often and cut copies of them out of much stronger paper. Butcher paper would be good, but I am lucky enough that my daughter owns a printing business and she saves me the huge sheets of backing that her signs are printed out on. It's very heavy and almost a vinyl, stands up to anything. I used file folders to put my copied patterns in and guess what? they fit perfectly sideways in those same plastic boxes!! 🙂
Damjana at AppleGreen Cottage says
Judy,that's a great idea, thanks! (What a challenge it is sometimes to get all the pattern stuff tucked away in such a way that are able to find it right when you need it again - at least to me it was! Happy sewing!
Kim says
Good idea! I can see how this would save some space in my pattern drawer.
Damjana at AppleGreen Cottage says
Kim,thanks!
Nicole says
Oh man, I barely sew, but you have no idea how much I already need this project! So much better than the mess I currently have.
Damjana at AppleGreen Cottage says
Nicole,then it's just what you need too. I know the feeling.. But now I always know where to find that exact pattern I used...3 years ago or so. What a relief, all in one place now, yeey! And happy sewing!
Julia Nyanyo says
That looks like it' might work for me - and for practically free it's got to be worth a go! Thanks
Damjana at AppleGreen Cottage says
Julia,yes it's definitely worth to try, and free too 😀 I hope it will work for you too 🙂
Cathy McInnes says
Love, love this idea! Super creative, useful and love the word free! I am definitely gloing to give this a try! Hope that you are doing great Damjana! 🙂
Cathy
Damjana at AppleGreen Cottage says
Thank you, Cathy, I am!