
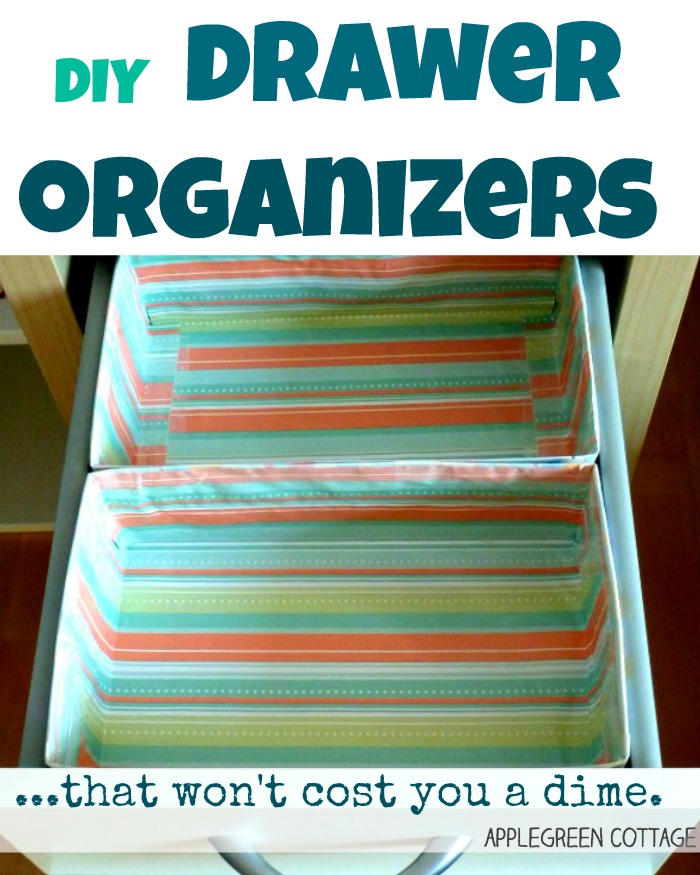
Tame the mess in your home, it's time to organize your drawers. If you think a zero-cost diy drawer organizer is something you could use, have a look. It's really easy to make!
Yes, those messy drawers in which you never actually get to find what you are looking for. All it takes is a few cereal boxes and you're set! Here's my favorite way to turn them into dividers and organizers, see below!

Diy Drawer Organizer
Let's take a quick look at what you need to diy them:
You'll need:
- empty packaging boxes*, cereal boxes, any leftover packaging made of cardboard
- wrapping paper (any that you like will do, it can even be reused gift wrapping paper)
- regular and double-sided tape, some glue (optional)
- pencil
- scissors
- box cutter
- a yard stick.
*To stock on these zero-cost materials, you may want to start collecting cereal or towel tissue boxes. And, if you're a parent to a baby, off course, diaper boxes! Very soon you'll have a nice pile of packaging boxes (I promise it won't take you long!) - and you can start your drawer organizing session! Or, just go through your pantry to get several boxes and you can start right away.

What Is The best Material To Make Diy drawer Organizers?
Cereal boxes are thin enough and perfect for your home office drawers. They will house just about anything - from tiny post-its to glue sticks, washi tape, and anything else that would otherwise make a mess in your drawer. These are what I used for my drawer organizers in this how-to.
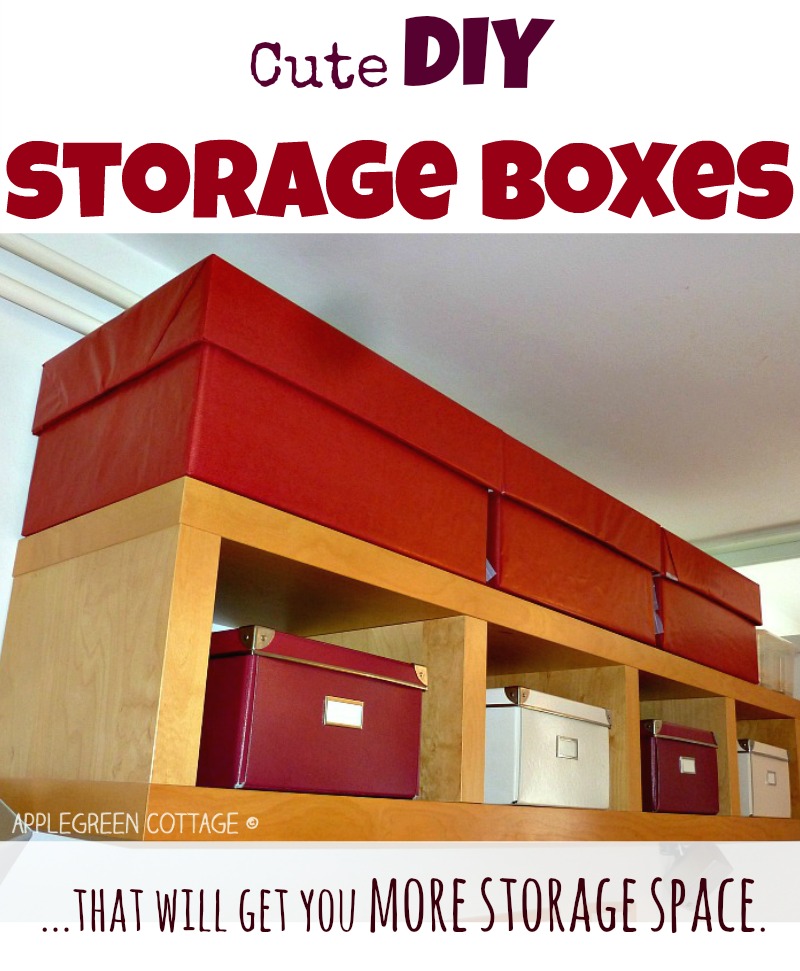
However, if you need to store heavier items (like pasta and other pantry stuff), cardboard boxes will be your solution. Here's a great and easy tutorial to make large DIY storage that will fit anywhere - perfect for small spaces - check it out here:
HOW TO Diy Drawer Organizers:
So, let's get back to our DIY drawer organizers.
1) You just find the messiest drawers in your home (shouldn't be hard!) and set the desired location for each of the boxes.
2) Think what size of drawer organizers you'll need in each drawer. Do you need to store tiny items, or do you need space for A4 paper? Plan accordingly.
3) Now you're all set: Use the drawer as a guide to mark the height around each edge of each box using a pencil. (The boxes usually need to be cut to the desired height.)
4) Then use the box cutter to cut the boxes to the desired height.
5) Now, my favorite part: wrap the newly acquired drawer organizers into the prettiest wrapping paper you have at hand! Glue the wrapping paper to the box for increased stability (optional).
There you go!

Fill these new DIY storage boxes with all the things that usually get lost and mixed up in a drawer. I'm even using one of the larger and sturdier boxes in our tall kitchen drawers, for pantry storage! There you go, you don't even spend a dime here:

A perfect and zero-cost storage and organizing solution! And all using materials I already had and re-purposing food boxes.

Later on, I even starting making these drawer organizers out of felt. One of my easiest and quickest crafting projects this year! The how-to is here (check out the clever no-measuring trick!) - and here's even my brand new video slide-show for those of you who prefer watching a slideshow. Check it out here:
Want More Free Patterns?
Get email updates and never miss out on new patterns, printables, and tutorials:
Or check out this pretty ALLina project bag pattern in our shop - for all your storage needs:


Leave a Reply