

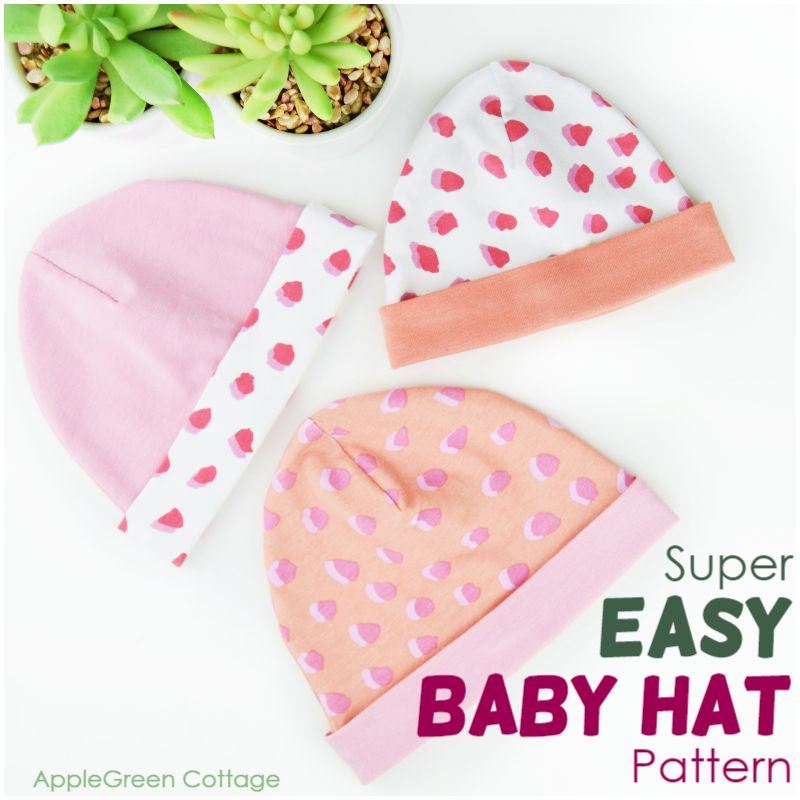
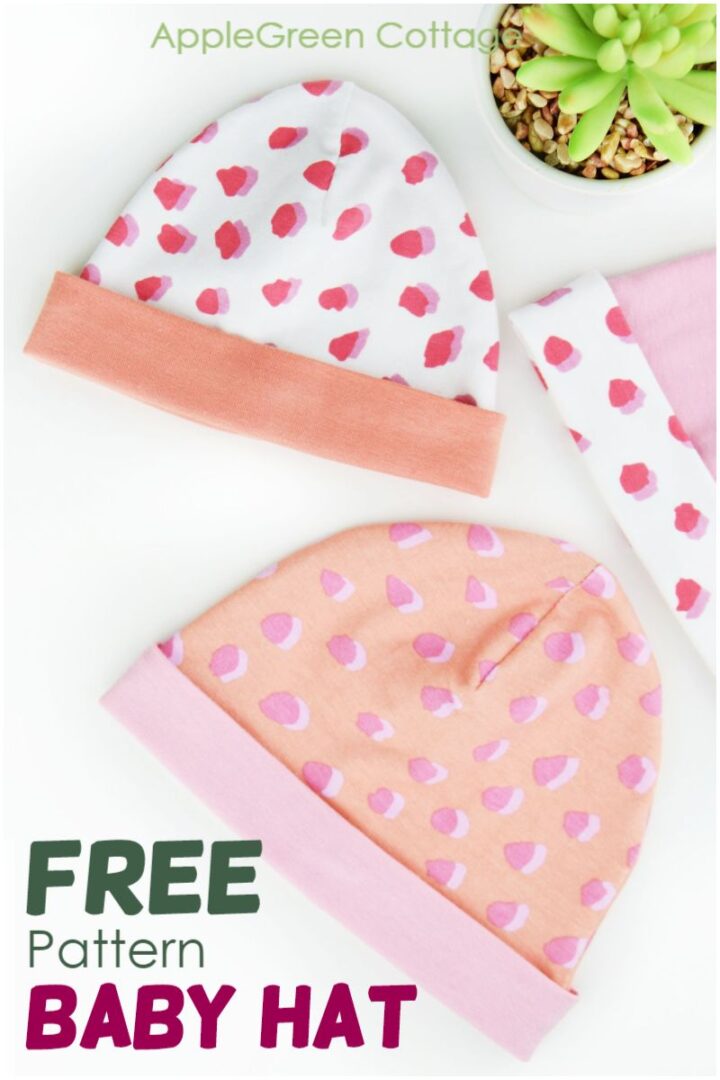
Sew an easy baby hat for your cutie pie using my baby hat pattern - you can get it for free, and it comes in 3 sizes! And make sure to scroll down for a smart sewing hack that will make your diy baby hat even more comfortable!
Prefer an ad-free printer-friendly option of the whole tutorial+pattern? See the → optional PDF file in our shop.
This tutorial is also part of Printable Tutorials BUNDLE
100 PDF tutorials now, and growing!
This post is part of the BABY SEWING PATTERNS series on this blog. Make sure to check out my popular earwarmer pattern in my shop too - it comes in 8 sizes from baby to adult!
Why You'll Love this Baby Hat Sewing Pattern!
This diy baby hat will sew up SO quickly, and you might end up making them in sets - your future go-to baby shower gifts every new mom will love to get:
- soft and safe (no ties!)
- adjustable with a fold-up edge, and
- super easy to sew - even on a basic machine!
This EASY baby hat became my go-to! With 3 sizes and a smart sewing hack, it's cute, comfy, and beginner-friendly. 🧵Read through the easy steps, then scroll down to the pattern link (end of the tutorial) and - well, happy sewing!
Supplies
- ¼ yard/meter of jersey - prewash it because knits will shrink!
- coordinating sewing thread
- sewing machine or serger
- ballpoint needle, iron, scissors, pins
- baby hat pattern.
Shop my personal favorite sewing supplies on Amazon HERE.
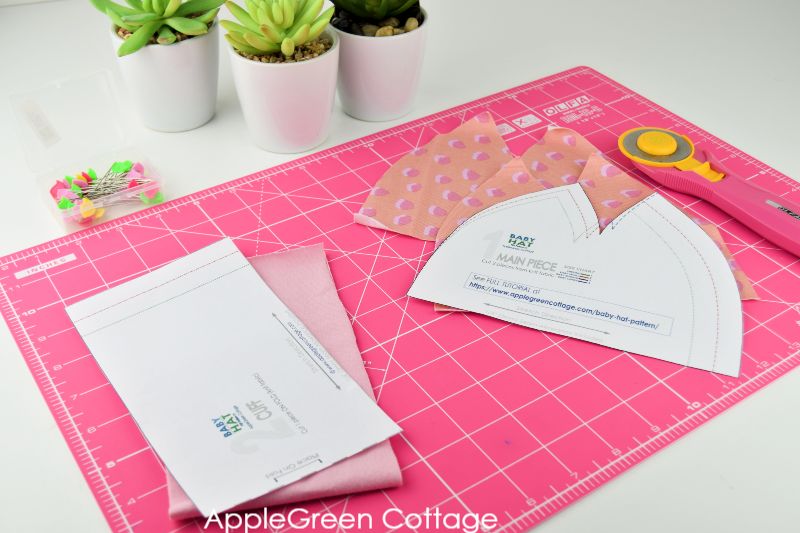
This diy baby hat project is designed for knits, ideally for mid-weight jersey. I used one with a 50% 4-way stretch, it's a 95% cotton + 5% spandex blend. It's a collection by Mimi G Style. So smooth and comfortable!
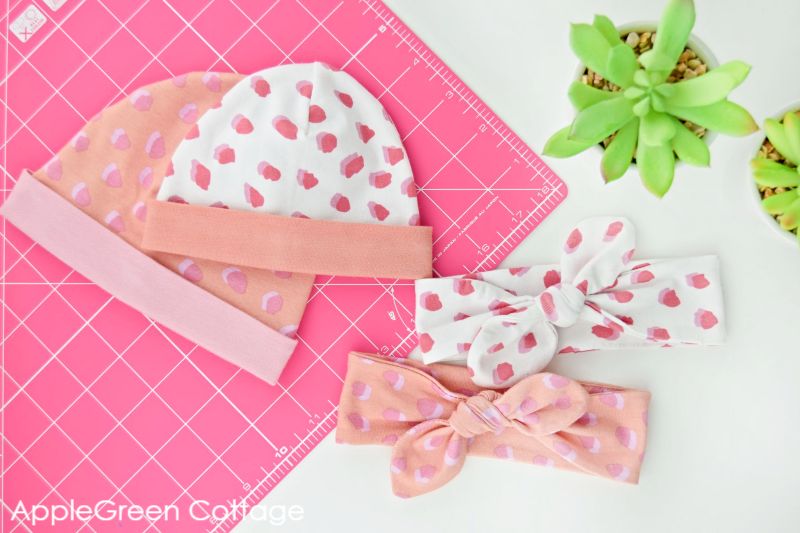
Such fun prints, I couldn't stop at making just one tutorial, and ended up with both this baby hat tutorial you're reading now, AND this cute baby knot headband tutorial. Creative prints, creative projects!
What are the finished sizes of these dyi baby hats?
| SIZE | Hat Circumference Unstretched |
|---|---|
| Baby Small | 12 ½" (32 cm) |
| Baby Medium | 14" (35 cm) |
| Baby Large | 15 ½" (39 cm) |
If possible, measure your baby's head circumference first to make sure the size fits. Also, the fit will depend on the stretch of the knit you are using. Err on the larger side. I used a 50% - 4-way stretch knit, which is a pretty much forgiving material, and easy to work with.
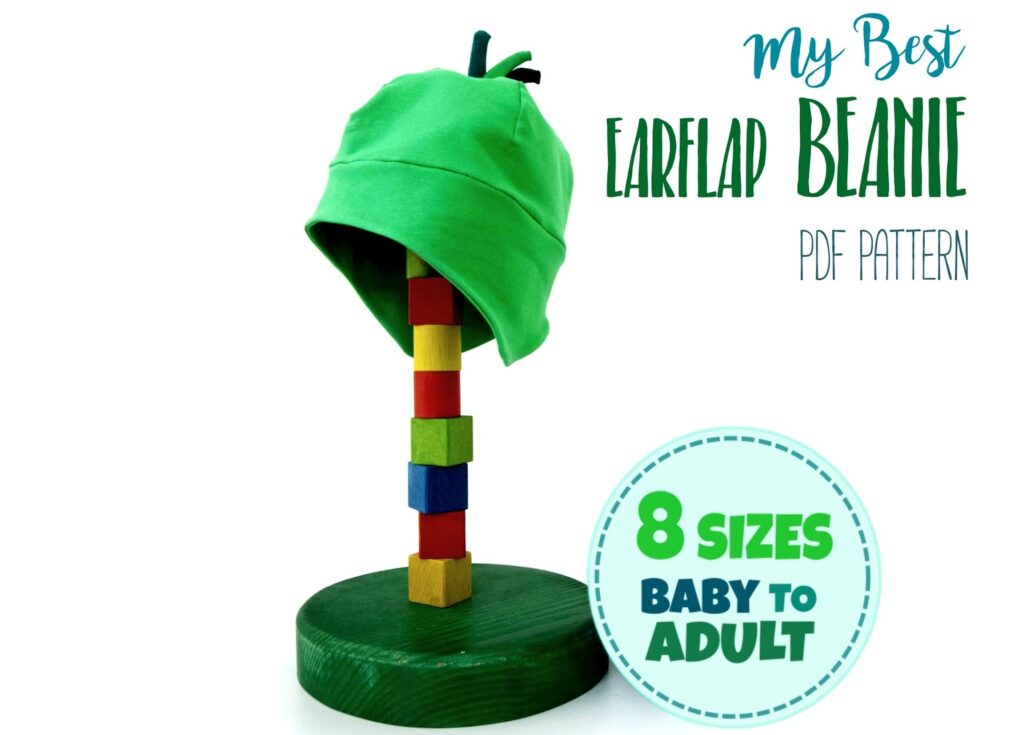
Also, check out this cute earflap beanie pattern in our shop:
Now, off to the baby hat tutorial:
How To sew a hat for baby - Steps
This is a pattern for knits, and your seams need to be somewhat flexible to account for stretch. You'll want to either sew with a narrow zigzag or a special stretchy stitch if you are working on your sewing machine.
Step 1 - Get the free pattern
Join our mailing list and get the pattern emailed to you:
Prefer an ad-free printer-friendly option of the whole tutorial+pattern? See the → optional PDF file in our shop.
Step 2 - Cut The 3 Baby Hat pieces
Using the pattern cut one hat band/cuff part and two cap pieces. The greatest stretch should be across the width of the fabric:
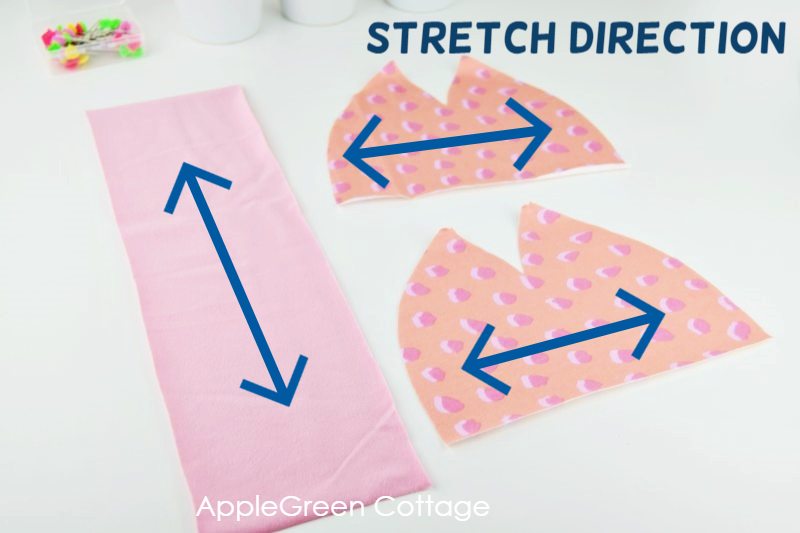
Again, mind the STRETCH DIRECTION of your knit fabric, it is VERY IMPORTANT. The stretch should be running side to side. Usually, this means that you'll see the tiny ribs running vertically.
Step 3 - Sew The Hat Band
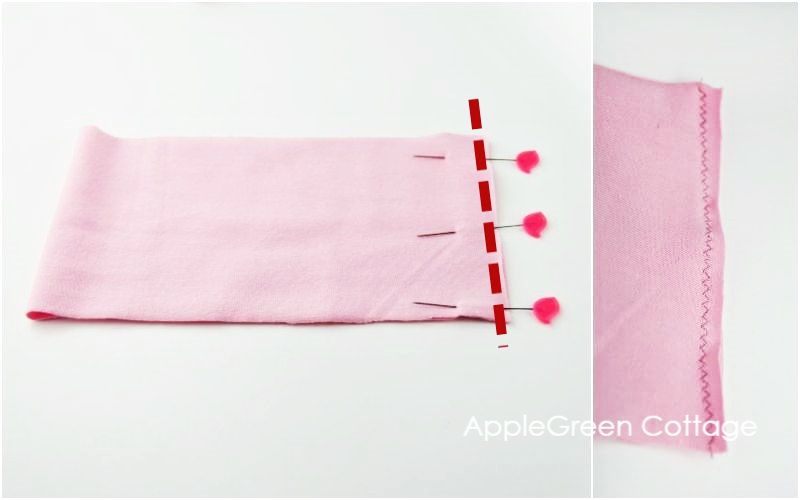
Fold the hat band in half with right sides together. Then sew along the short side using a ¼" (6 mm) seam allowance. Use a stretchy stitch to prevent popping any seams later.
Now we need to fold the hat band in half so it ends up with wrong sides together:
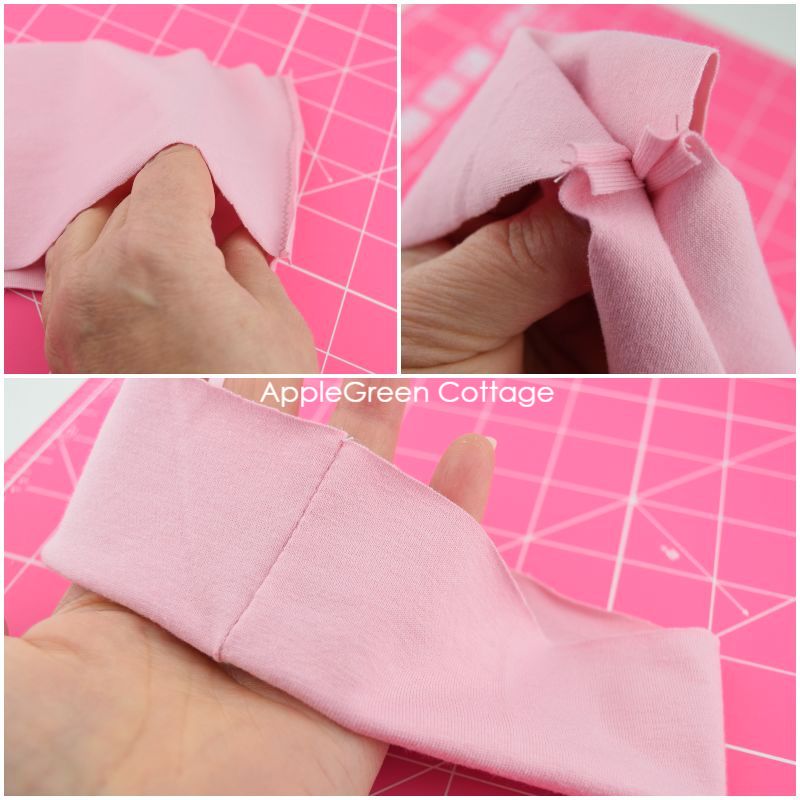
Press and divide into 4 equal quarters using 4 pins on the side with the raw edges:
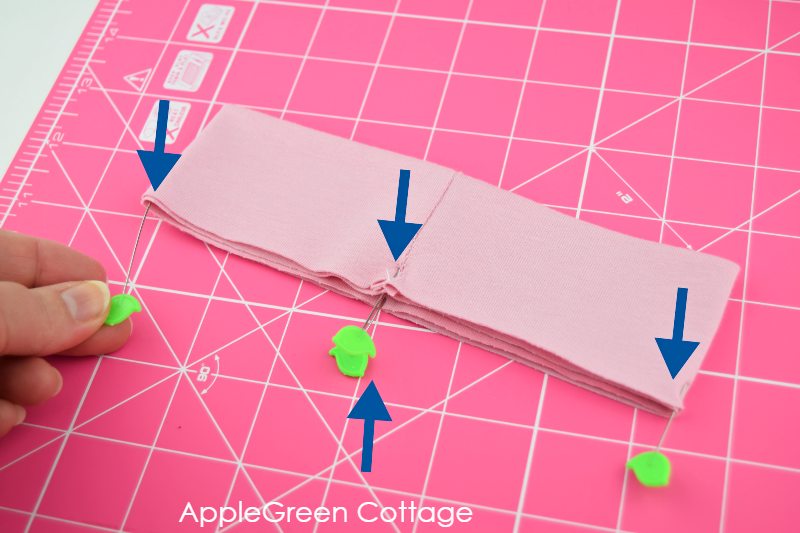
Set aside for a while.
Step 4 - Sew The Darts On the Main Hat Piece
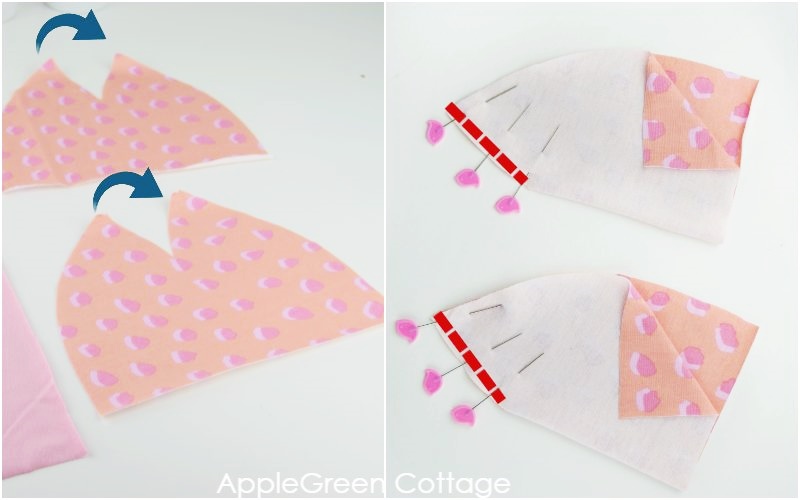
Fold each of the two main pieces in half as indicated in the photo above, then pin or clip the darts. Then sew them with a ¼" (6mm) seam allowance - stretchy stitch, again! It's easier if you start at the tip and work into the dart point (where the two edges meet). Here's a tutorial on how to sew darts if you need more help.
Step 5 - Sew the 2 Main Pieces together
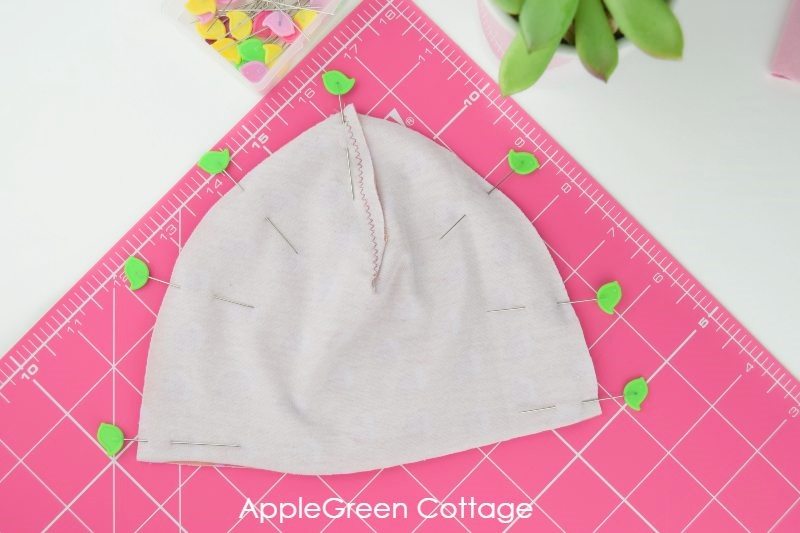
Open the pieces. Clip or pin the two main pieces of fabric with right sides together. Make sure to match up the sewn darts at the top of the cap, I usually first pin the top to ensure that.
Stitch around using a ¼" seam allowance, starting on one side, all the way to the other side. Secure stitches when starting and finishing your seam.
Step 6 - Your Final seam (2 Options)
Now, I'm giving you 2 options for this last seam, and you choose which one fits you best (or your baby).
NOTE: If you plan to leave the hatband unfolded, you need to use option A. If folded, then you can choose between A and B. Let me show you both:
OPTION A - Sew With Both pieces turned right side out.
First, let me show you the conventional way how these hats can be finished:
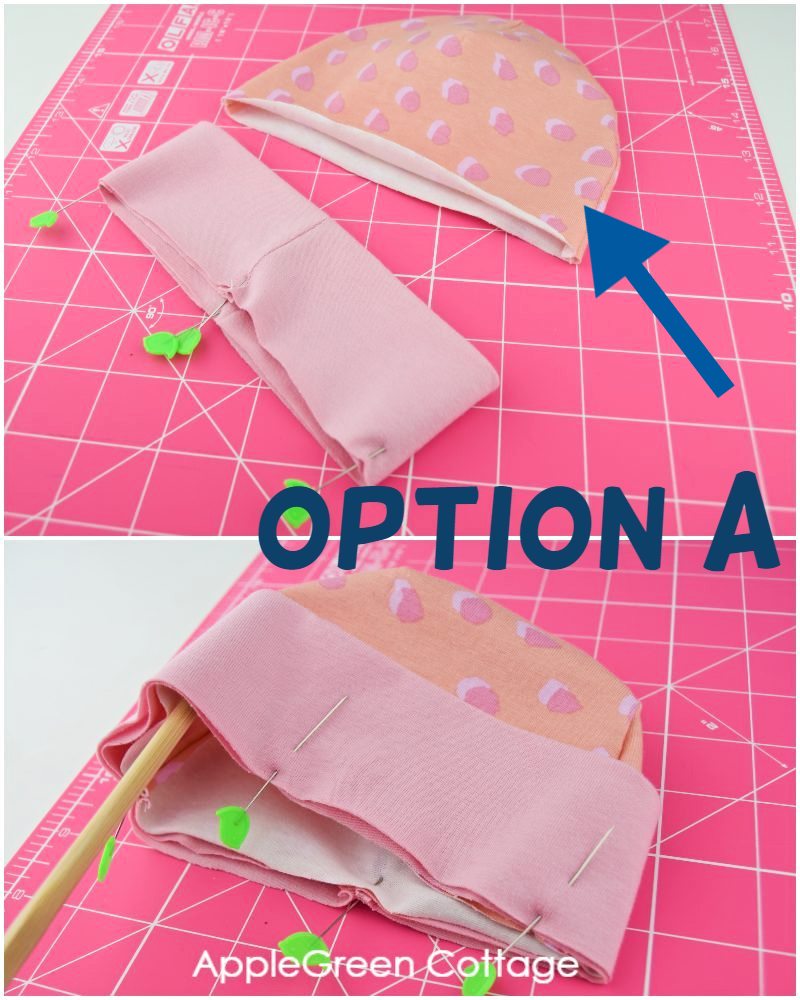
- Turn the hat main piece right side out
- Slip the band around the baby hat aligning the raw edges. Place the middle seam of the hatband at the back.
- Use the pins you added to the band to catch all 3 layers now. I never add more pins - that's because I have them quartered exactly.
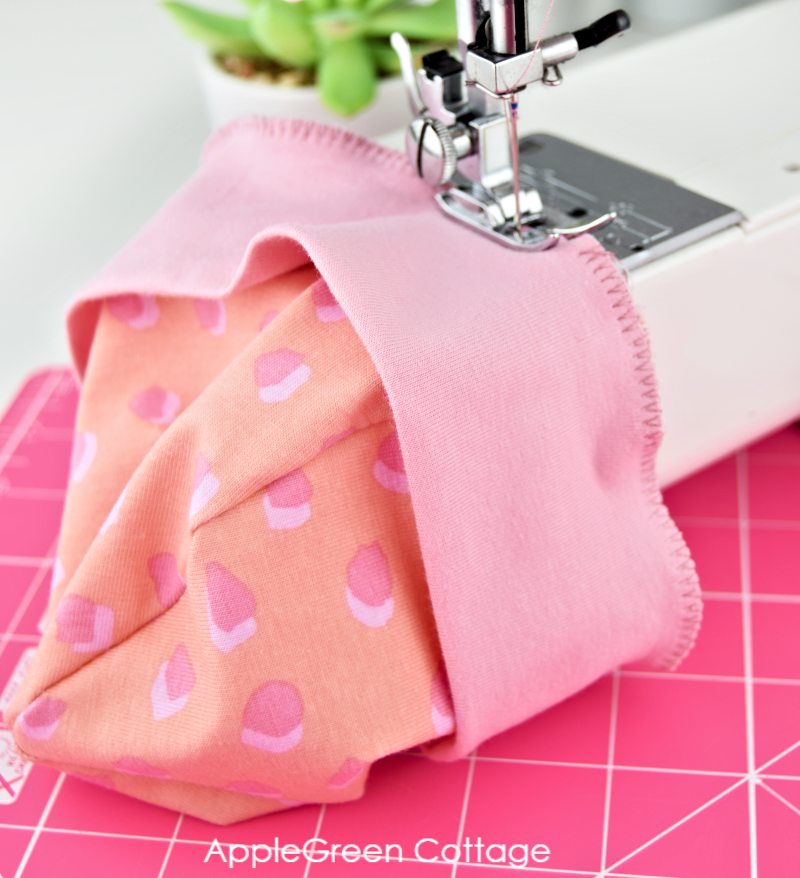
Sew through all three layers of fabric, using a ¼" (6 mm) seam allowance. When I use my regular sewing machine, I imitate the serger: use the widest zigzag to catch all layers and finish the raw edges in one go.
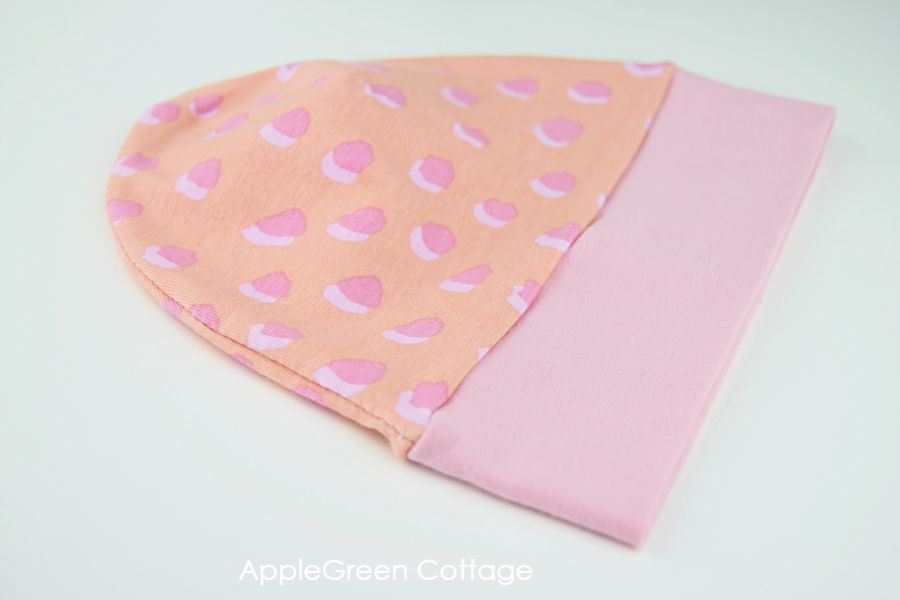
Then fold the band upwards by an inch - or leave it unfolded. Done!
It's a perfect, standard construction of a baby hat, one you can usually purchase - just prettier (amirigt!)
But, let me draw your attention to a little hack that might be an improvement.
OPTION B - A Tiny Hack (Benefits the baby!)
First, take a good look at these two baby hats:
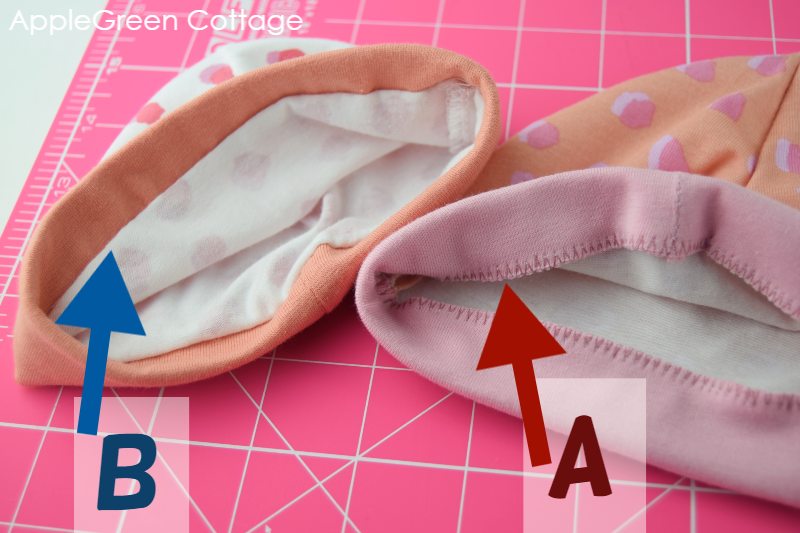
If you were a baby, which one do you think you'd prefer?
I thought so. It's not so pleasant to have an exposed seam running all around your head, directly on your skin, no matter how soft the jersey is. This seam is, I admit it, fairly soft if you sew with jersey or knit fabric. But a finished seam is always better for me. That is, if you are willing to sacrifice the option to leave the hatband unfolded.
So, this is what you can do differently - I'm calling it Option B:
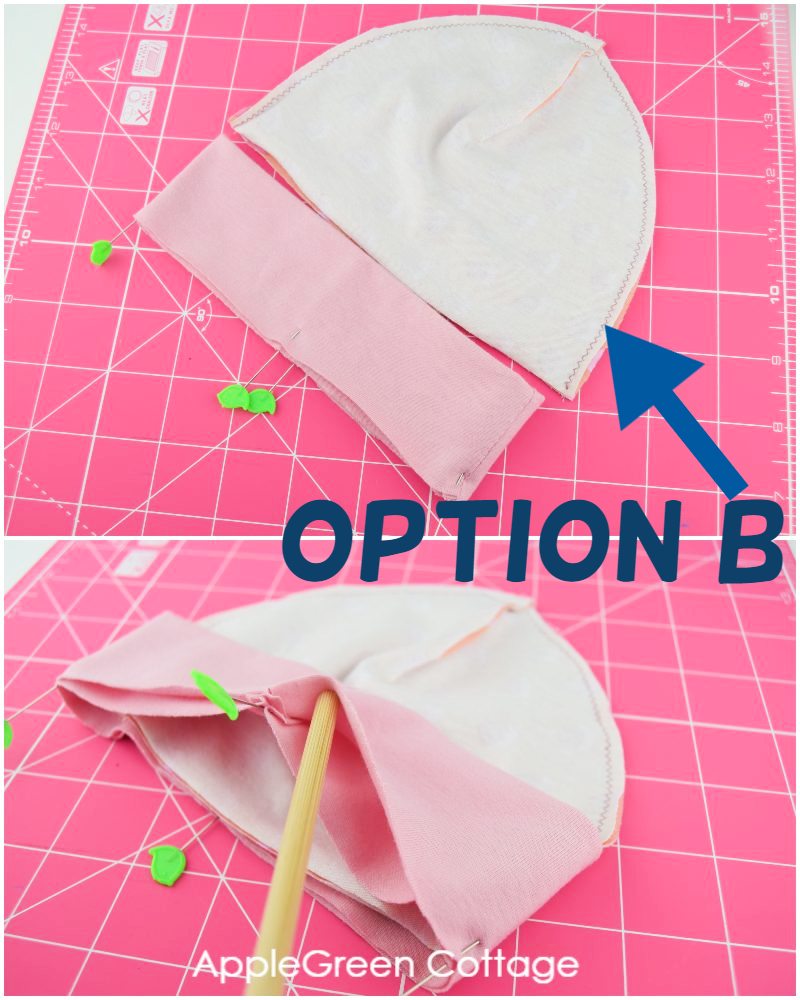
Leave just the hat MAIN piece unturned, that is with right sides together, and just slip on the band and stitch around, this is how (Sorry, not the same print!)
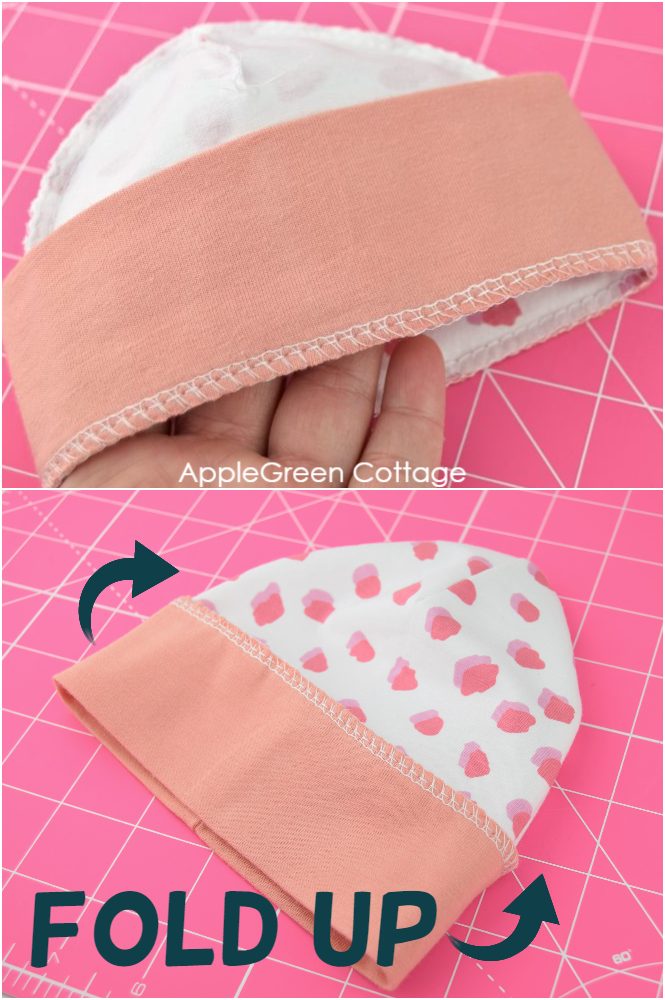
Then fold up the band - done. No raw seam rubbing against the baby's soft skin.
The only downside: you won't be able to leave the band unfolded - you'll have to fold it up to cover the raw seam on the outside of the baby hat. But other than that, you might win your baby (and yourself) a longer nap because she won't be waking up because of an exposed all-round seam. Feels like a reason good enough to me.
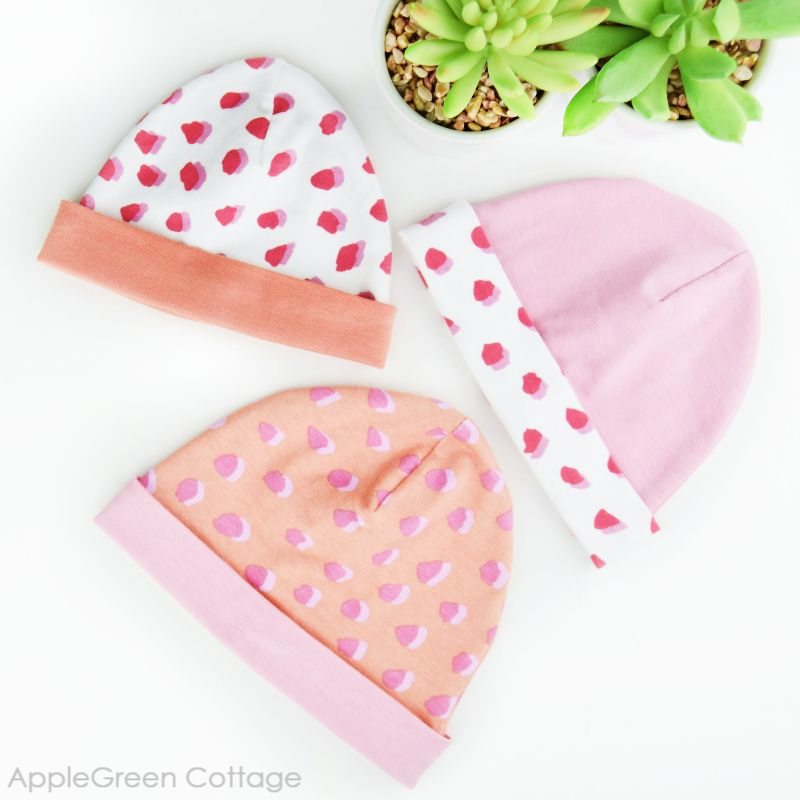
And both hats look the same with the cuff folded up:
Looking For A Different, Earflap Beanie pattern?
Also, check out this cute earflap beanie pattern in our shop:
Want a printable copy of the whole tutorial?
Prefer a full, ad-free and printer-optimized Printable Tutorial with both instructions AND pattern included? ↓↓
This tutorial is also part of Printable Tutorials BUNDLE
100 PDF tutorials now, and growing!
LAURA SCHIARINI says
Mi piace molto questo tutorial, grazie!!
Jan says
All your patterns with instructions are great and very professional. Do you have a baby turban hat pattern that doesn’t have the bulky gathered fabric where the bow is attached. Have tried these but I don’t think they would be very comfortable for the baby. Thank you.