
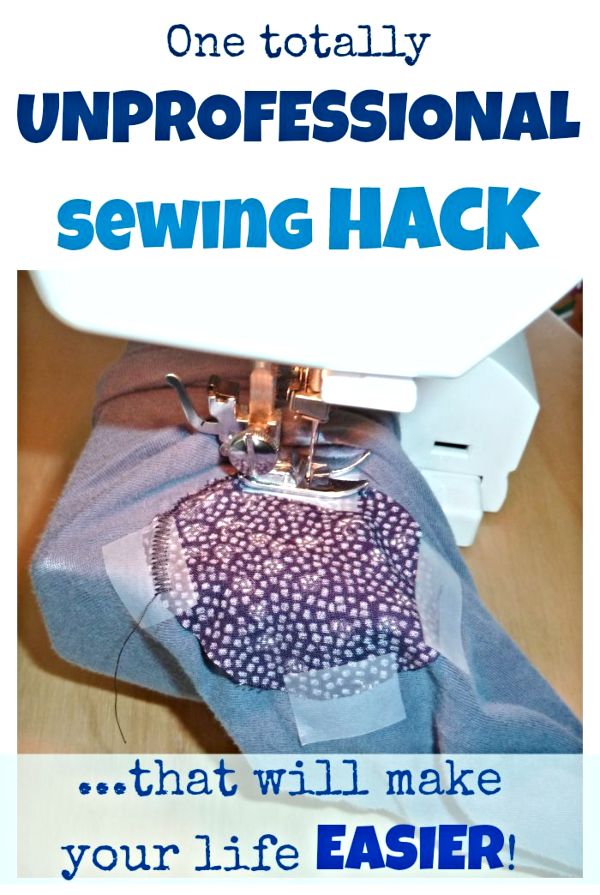
I need to admit: I used a totally unprofessional sewing hack when sewing a jersey patch on a sleeve to make it easier. I still feel a bit embarrassed, but it was totally worth it!
Want to see what it was? It made my project easy and quick.

There it was one day: a hole in the sleeve of my favorite, softest long-sleeve T-shirt. A quick solution was needed, so I found one:
I used scotch tape when sewing over the hole in the fabric. The jersey stayed put and did not move while I was sewing. Mission accomplished!
Yes, it is totally UNprofessional. Totally. But hey, it makes life easier! That's why I am showing it to you. You might need it some day. Just in case 🙂
WHAT YOU'LL NEED:

As you see on the photo above, you'll only need:
- scotch tape (because it's easy to remove - important!)
- a piece of fabric (in the desired form and colour)
- and a sewing machine (you'll need a ball point needle for jersey - my favorite; makes it so easy to sew jersey with it!).
No pins, nothing else.
To my defense, it was a special case, as I didn't want to make the fabric too stiff, so pressing fusible interfacing between the two layers was out of question... So if - for any feasible reason - you don't want to use any fusible interfacing (that would glue the patch to the spot), this is what you can do too.
Sewing hack HOW-TO:
1) Cut a patch from jersey to cover the (oh-too-obvious!) hole in your piece of garment and place it over the hole and fix it to the spot using several small pieces of scotch tape. No pinning required!

2) Stitch it using a dense zigzag stitch:

3) Remove the scotch tape. Done!

Easy and quick! And now I can stil wear my favorite, softest long-sleeve T-shirt 🙂
UPDATE: This t-shirt is long gone now, and by now I've also started using Heat'N'Bond for applique, as I learned a long time ago that it's water soluble, and as such it won't stiffen my soft jersey t-shirts. We live, we learn.
Also, if happened to bump into this tutorial because the photo shows a jersey sleeve, here's my guide on how to sew with knit fabrics.
My Top 7 TIPS!
But I still feel for this old hack and am leaving it here in case it could save the day for someone. Have fun sewing and mending! 🙂
Want More Free Patterns?
Get email updates and never miss out on new patterns, printables, and tutorials:
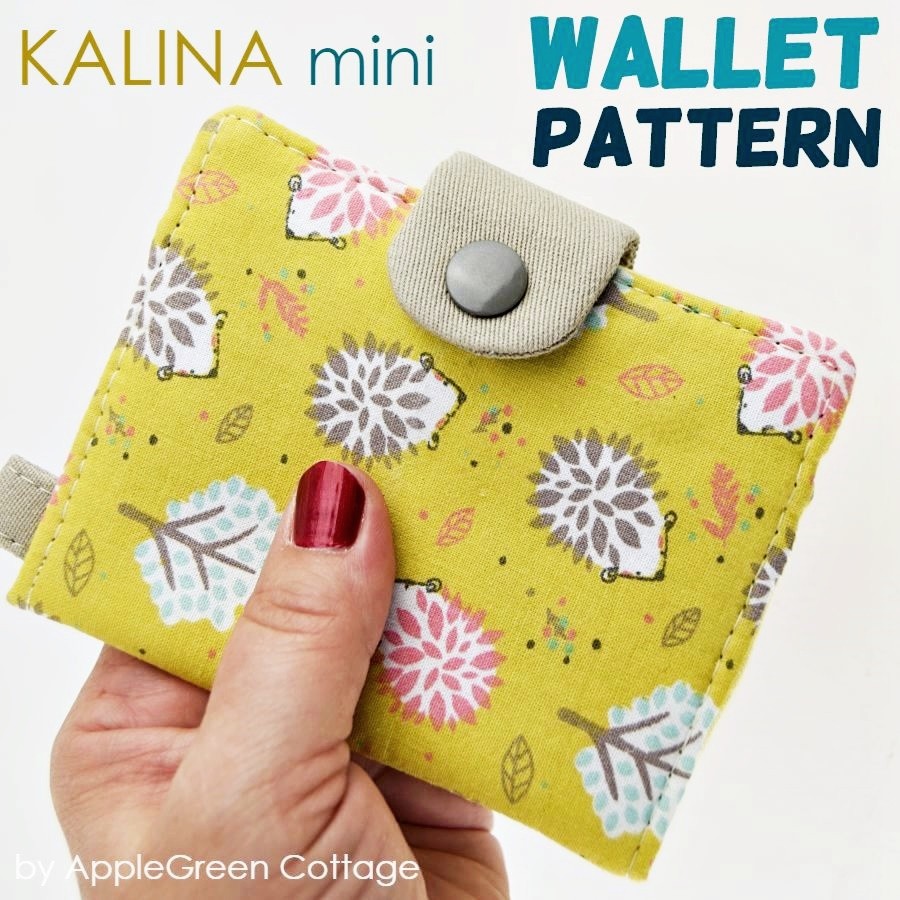
Or …check out this popular PDF pattern - the Kalina Mini Wallet in our shop. So practical!


Joan says
Going to love this. Love sewing and any tips I like I'm going to write in a notebook that I keep by my machine. Now that I'm older I sometimes forget and can look in my book. I am 83 and not so fast at remembering. Thank you
Jo says
I am in my 70s and have been sewing and making clothes since I was 12 on my Mom's Singer with no bells and whistles, just forwards and back straight stitching. We always used scotch tape to hold down zippers and pieces of material.
Barb says
I"m glad you're leaving the tape idea in as it's a great idea and although there is nothing wrong with using it, I would have never thought to use it. I have heat & Bond but it's not readily available whereas I always have tape laying around. And what about those who can't afford Heat & Bond or just simply run out, tape works. Thank you.
Liane says
Please, please tell me how you were able to sew that on the sleeve without catching the other side of the sleeve? I see in the picture how you have the sleeve on the machine but I can’t imagine how on earth u were actually able to turn it to sew completely around the circle. I have refused thus far to try to do any sleeve repair on the machine without taking the sleeve off first. Lol
Damjana says
Liane hi,
that's a great question, but I am not sure this will help you: basically it's a plain pull-and-stretch approach LOL. When I start, I try to maneuver (rotate clockwise) the starting point to the upmost left point so when I slowly rotate the fabric (counter-clockwise direction) when sewing, I get to the farthest point, preferably full circle. This sleeve was super stretchy, so I got through a whole circle. With less stretchy material, I'd sew one half, then remove from the machine, bury the threads, and start again for the other half. For professional results (i.e. not just mending my own clothes to wear at home), I'd probably have to take the sleeve apart first - like you do, as a good professional and correct approach. Hope this helps 🙂
Liane says
Thank you for answering. It now makes sense. I would’ve taken the sleeve apart every time but it’s nice to have a trick to do ur own at home. Love getting new tips and tricks form you.
Thanks again
Liane
Barbara Gilbert says
You’re too hard on yourself! What makes this unprofessional? It meets your requirements, doesn’t damage your shirt in any way, is kept on hand, is very inexpensive, and does what is needed! I call that VERY professional! Professional doesn’t mean you need to runout for the latest pricy products, it means being creative (which you are, of course!) using non-traditional ways or materials to do what you need done. I like it!!!
Damjana says
Hi Barbara,
well it sounds way cooler when you put it this way - thank you 🙂
Anonymous says
The only thing about using masking or painters' tape is that you cannot see through it. In this particular project with curved edges, I would think you'd want to be able to see well what you're doing. I suppose one could use very tiny strips of the tape so there wouldn't be large areas of invisibility. Good idea!
Damjana at AppleGreen Cottage says
You're totally right, thanks!
Pakozy57 says
I have had trouble removing the matte tape. Maybe it is old. I should try the painters tape. I know we have some somewhere.
sewsandquilts says
Scotch (brand) tape in the package with the green plaid label is the right one to use, or a generic or store brand with the same matte finish. What doesn't work is the shiny kind.
Damjana at AppleGreen Cottage says
Exactly! I agree, and yes, I use the one with matte finish. Have a great day,
Val says
I've been sewing for forty years and this is the first time I heard of the tape trick! Thanks for the awesome tip!Val
Eyrir says
I also use Scotch (brand) tape when putting together tissue paper for tracing big pattern pieces, and it holds up when ironing the tissue flat. 🙂
Anonymous says
My mom taught me to use tape to hold a zipper in place to sew it in. I do agree that you must use Scotch tape. Cheep tape will just cause a lot of problems.
Damjana at AppleGreen Cottage says
Thank you for your input - that's right, zippers! A great idea!
Anonymous says
I am glad to see that someone else uses tape! I actually use blue painters tape because it holds well, but peels off easily and doesn't leave sticky residue behind. You can tape on your machine to set a temporary seam allowance guide, mark measurements on rulers, tape patterns pieces to leather or vinyl when you can't pin... you name it!
Pam @Threading My Way says
Thanks for the tip, Damjana. Very clever.
Sheila Perl says
Haha, great sewing tip!! Years ago I used to make my own underwear and I would hold the lace in place with scotch tape--I took a class at a local shop and this is how the sewing instructor told us to do it!! I have never used tape for anything else, I will now!! 😀
Damjana at AppleGreen Cottage says
Sheila, I'm glad you like the tip! I had no idea this is a tried-and-tested technique among sewing instructors (thought it's more of a rookie thing, LOL) Have a great day,