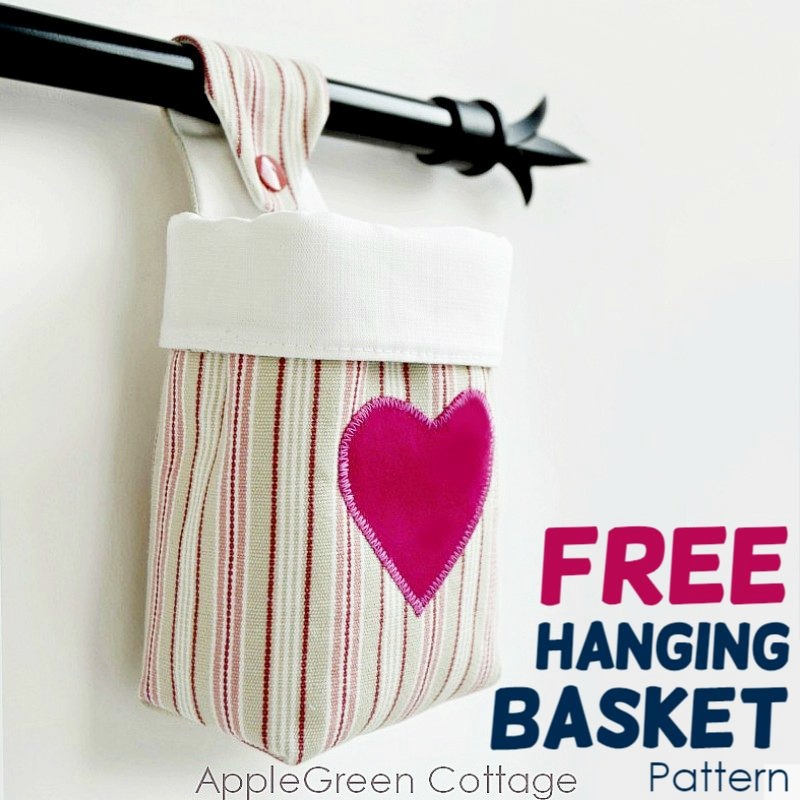
Here's how to make an adorable, small hanging storage basket. It's a handy little DIY storage basket to hang in a craft room for all your sewing supplies, in a child's room to store pencils or crayons, on a kitchen utensil rack, or wherever you need to store little items. Make sure to get the free template below and sew a beautiful set of hanging organizers - for your pretty home!
OR do you want a printable copy of the WHOLE tutorial? Scroll to the bottom of this tutorial for more details!
This post includes affiliate links. Thanks for your support. If you like sewing baskets, bins, and other useful storage stuff, check out these too:
- 7+ Clever Diy Storage Ideas - You Need Them NOW!
- Smart Expandable Bag - Free Pattern!
- Gorgeous Diy Toy Storage - For Kids Room
- Or try our new, popular SewPretty HOME series:
Join the FREE 7-part email course and make 6 beautiful items for your home! You'll love it!
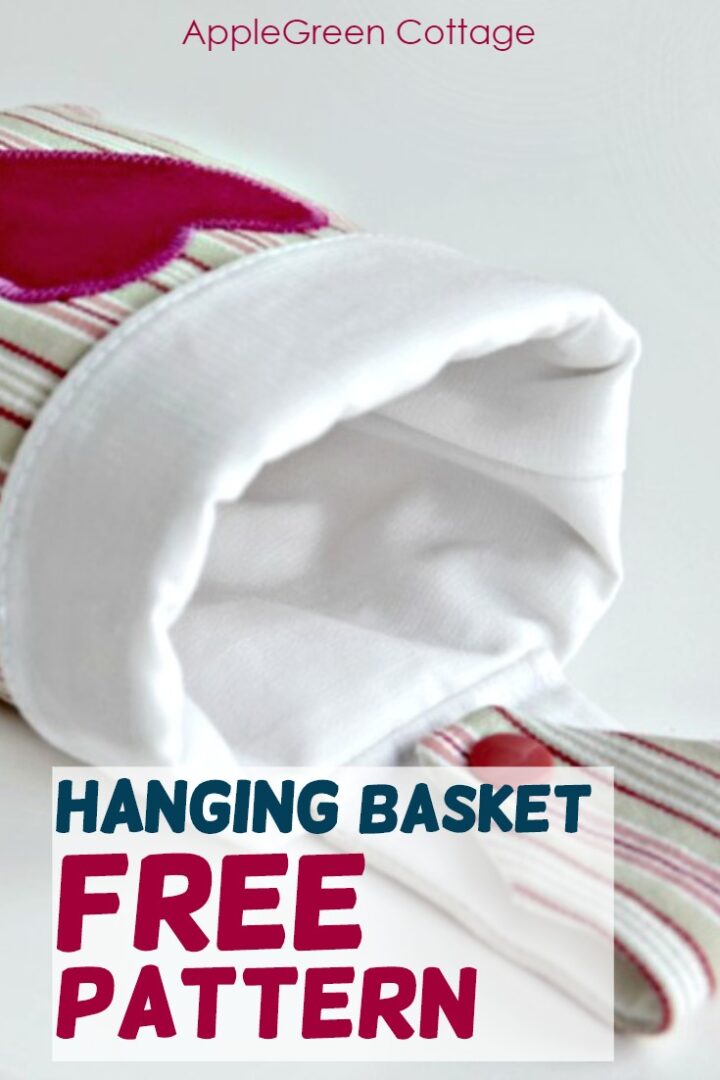
Hanging Storage Basket
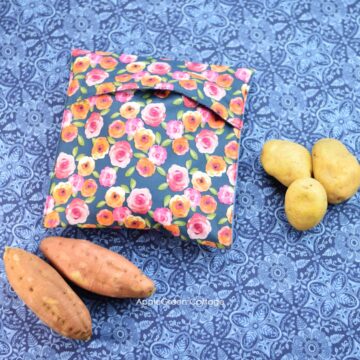
This little hanging storage basket is a real treasure when it comes to storing small items. And since the hanging strap can open, you can hang it anywhere and remove it easily.
Instead of just using a ribbon or making a wide hanging sleeve or a fixed loop, I opted for a hanging flap. It can be opened and closed using a KAM snap. Just so you can simply detach it. Easier to move, attach anywhere and remove when you don't need it anymore.

It makes a great DIY Valentines day basket gift, too!
SUPPLIES to Make a Hanging Storage Basket:
For the fabric basket alone:
- 2 pieces of 12x8 inch midweight cotton
- 12 x 8 inch of fusible fleece (or any other type of interfacing you prefer)
- coordinating sewing thread
- sewing machine, iron, scissors or rotary cutter+mat, pins, ruler
PLUS For the hanging strap:
- 1 piece of 6" x 2 ¾" (15.5 x 7cm) midweight cotton or home decor fabric (same as the basket fabric!)
- another piece of cotton for lining - same size
- 1 piece same size fusible fleece (or any other type of interfacing you prefer)
- one set of KAM snaps pieces (4 pieces: 2 caps and a socket and a stud piece)
- KAM snap pliers (best get them in a set)
- an awl

DIMENSIONS - FINISHED ITEM: The hanging basket is 3.5" wide, 2" deep, 5" tall (with the top folded). The FINAL (straightened) hanging strap size is 2 inches wide by 5 inches long (when sewn in).

2 TUTORIALS:
To clarify, I've separated the two tutorials because they each have a lot of images. And if there are too many on one page, it would take forever for the post to download. Nobody would want that and that's why I split them into two parts. Now let's get back to sewing:
1) HOW TO MAKE the HANGING STRAP

GO TO: Hanging Strap Tutorial
2) HANGING STORAGE BASKET TUTORIAL
Hanging Storage Basket Tutorial
Before starting the basket, make your hanging strap, using the hanging strap tutorial above. Done that? Great!
First, here's a video slide show for those of you who prefer video how-tos. Check it out here:
Now, on to the text:
Step 1 - Get the pattern
Join our newsletter and get the pattern emailed to you, instantly:
OR do you want a printable copy of the WHOLE tutorial? Scroll to the bottom of this tutorial for more details!
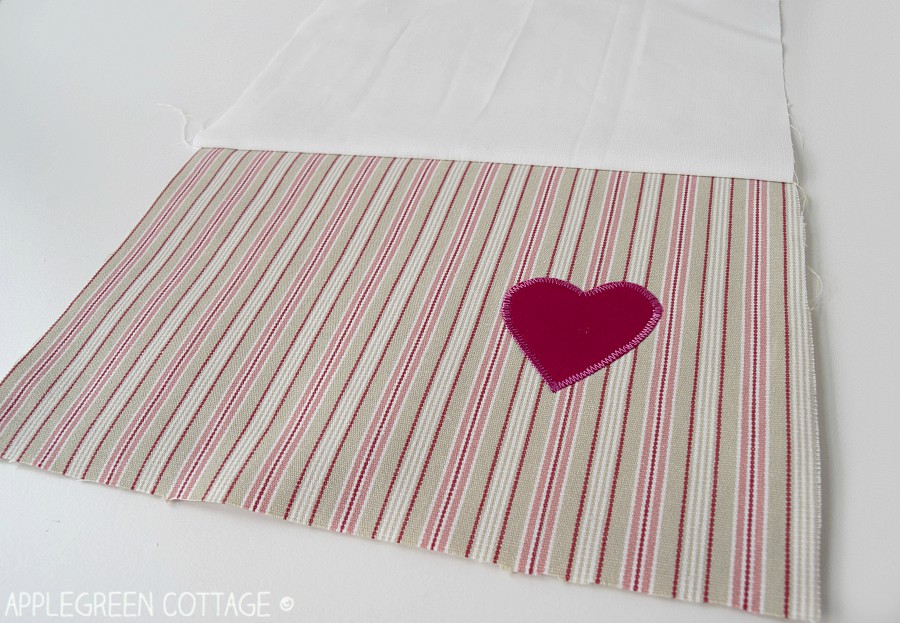
Step 2 - Print pattern and cut fabric
Print out the template, then use it to cut out 3 main pieces: 1 piece from outer fabric (here stripes), 1 from lining fabric, and 1 piece out of fusible fleece as interfacing.

If you want an applique on your basket, now's the time to do that. Click through to my tutorial if you haven't done an applique yet: Tutorial here.
Step 3 - Sew the Top
Using your iron and a protective piece of cloth, apply fusible interfacing to the wrong side of the outer fabric.
NEW TO INTERFACING? - Check out our Interfacing Guide for Beginners - all the tips in one place!

Place the lining and outer fabric right-sides-together (RST), then pin to prevent the layers from shifting. Stitch using a ⅜ sewing allowance (= 1cm) along the top line.
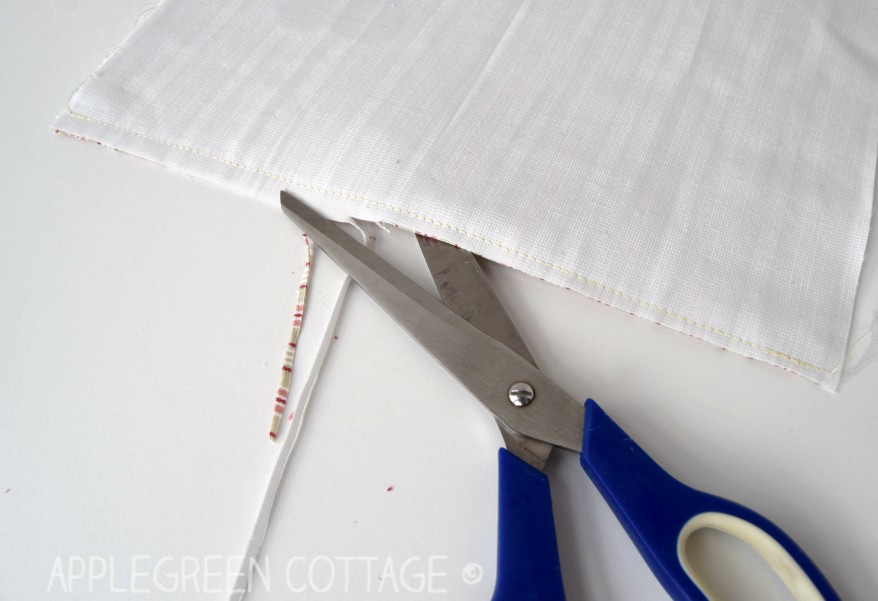
Trim the seam allowance to ⅛. It will reduce bulk and make your basket look nicer.
Step 4 - Attach The Hanging Strap
Now unfold the sewn piece and place it face-up on the sewing table. We're about to add that hanging strap! The how-to for making the strap and for attaching the KAM snaps is here at this link: Hanging Strap Tutorial
Now I believe you've made the strap, so let's continue to attach it to the basket. Here:

Place the strap 1 inch away from the upper edge of the (future) basket. Make sure to have both the basket fabric face-up AND the strap/flap should have the outer fabric (here stripes) visible, i.e. facing up.
DETAILS:
You want the KAM snap detail to show on the front, so pay attention to how the strap piece is placed. It needs to be like in the image: do you have the outer layer (here: stripes) visible? Good. Another option would be to hide the KAM snap to the back, but that would only make it look like a regular hanging loop/sleeve. However, if you prefer that, sure you can do it.

Using a ⅜" (1 cm) seam allowance, stitch the flap in place. Then trim the seam allowance to ¼" (7 mm).

Step 5 - Fold and Sew the main Piece
Flip the strap over to the other side, and topstitch at ⅜ (1cm) or less, just enough to hide the raw end of the strap. Strap attached, yey!

Place the sewn piece face-up on the sewing table. Then fold it once again, right sides together, but this time putting both outer fabric fold onto itself, and lining folding onto itself. Like this:

Pin in place and then stitch around, leaving a 2.5-inch (~ 6cm) gap for turning in the lining. Once sewn, clip the corners on the seam allowance. You'll never go back to the simple diagonal corner-cutting once you see this how-to.
Step 6 - Box the Corners

Box the corners. That's 2 straight stitches on outer fabric (see image above), and 2 more on lining.
A few quick notes that might be just what you need:
- The basket is still turned right-sides together.
- Place one bottom corner on your table, so that the side seam is in the center. So, it's folded.
- Now stitch across the triangle about an inch in. (blue dashed line in the image)
- Do the same on the remaining 3 corners.

Snip off the excess corner material.
Step 7 - turn right side out and close the gap

Turn right side out. Use a point-turning tool or a stick (not sharp!) to push out corners. Press if needed.

Stitch the opening closed.

Tuck the lining in.
Step 8 - Topstitch

Then topstitch the top edge. Press for a nicer finish. Fold the top down, done!
WANT MORE FROM LEARN TO SEW SERIES?

Did you like this interfacing guide? If yes, feel free to see more of the basic sewing tips series:
- the master guide for learning to sew
- What are the Must-Have Sewing Tools?
- Basic Machine Stitches
- How To Sew Zippers (Free Guide!)
- Sewing terms glossary
- Beginner sewing tips you'll need to know if you sew.
How To Use the Diy hanging Storage Basket
These hanging storage baskets can have tons of uses:
You can hang them on a door handle, a hook, a closet rod, or just about anywhere you can use some extra storage. They are perfect as key storage in your hall. A hanging storage basket like this one makes great storage for small items. Or hold your supplies in your craft room.
You can use one as a take-along basket: throw in your necessities like phone, keys, tissues, usb key, and grab it as you leave the house. You'll never forget anything! Or hang it in your car as a car caddy. And just an idea for the spring and those with a green thumb: they can hold a small flower pot.
Make tons of these hanging storage baskets, and hang them in sets to beautify your home. If - and when you do, post pics, I'd love to see what you make!
Want a printable copy of the whole tutorial?
Do you want an ad-free, printable copy of this online tutorial? Find it here for just $3. You won’t need to access the internet every time you want to make it. ------ Or get the BUNDLE with ALL the Printable Tutorials - current and future ones!


This tutorial is also part of Printable Tutorials BUNDLE
60+ PDF tutorials now, and growing!
Leave a Reply