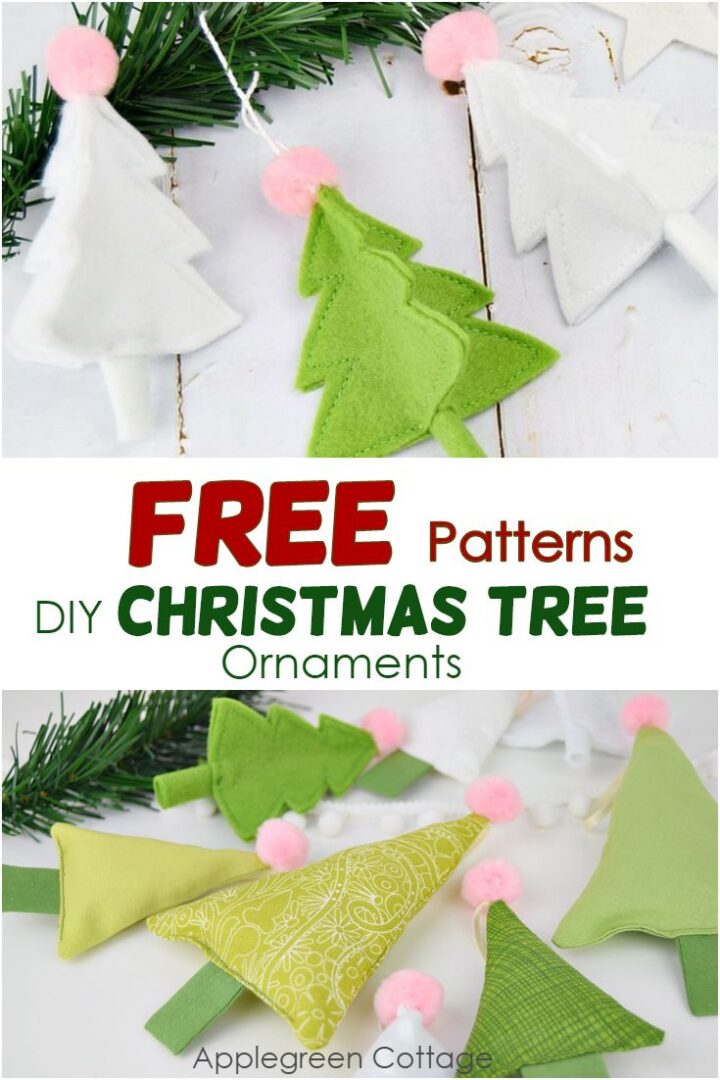
Use the free pattern and the tutorial to make this sweet diy christmas tree ornament this holiday season. It comes in three sizes and two design versions. (Spoiler alert: Plus get 12 additional free holiday sewing patterns here on the site!)

This post contains affiliate links. Thanks for your support.
UPDATE: MORE templates to be ADDED to the Homemade Holiday FREE Pattern Bundle!- Join our mailing list here, so you don't miss out on any new tutorials!

And then I also thought of those of us who love doing last-minute holiday decor. Well, that's where the second, simplified design popped up.

So here we are where I want to do a two-in-one tutorial, haha! Let's see how I do.

Diy Christmas Tree Ornament
First, check out this quick slideshow to get an overview of the project:
Supplies:
- scraps of soft felt for the '3D' tree, OR quilting-cotton weight fabric for the simplified, 'triangle' tree ornament
- a small pompom
- polyfill for the simple 'triangle' version
- 7" - 10" embroidery thread or twine for hanging
- matching thread, sewing machine, scissors, needle, (iron)
- Free template - download and print pages 8 and 9 from my new Homemade Christmas Patterns Bundle - it's FREE for all and contains more than 10 free Christmas sewing patterns. All made for you! Here:

Version 1 (3D) - Tutorial
Step 1 - Print out the template
Print out page 8 in the PDF file of the Homemade Holidays Pattern Bundle.

Step 2 - Cut the pieces
Then use the MAIN Pattern Piece to cut three pieces from green felt - all in the same size. Also, cut one piece marked as TRUNK. Also, get some twine or embroidery thread ready and a small pompom.

Step 3 - Stitch the Crown
Stitch the main part from 3 pieces. You'll do 3 seams:
First, place 2 pieces together and stitch along one side (see Seam #1). At the bottom, make sure to stop stitching just before you reach the center. You want to keep a little space at the bottom of the 'crown' for the trunk.

Then slide the third piece between the unfinished layers and align it to one edge - stitch along that one (see Seam #2). Then sew the last edge that's still open (see Seam #3), the same way as you did before, stopping just before you reach the center at the bottom.
A small opening will remain at the bottom.
Step 4 - Form the trunk
Trunk piece (1) - Fold the short ends of the piece towards the center (2) and then again fold in half (3). Make a few stitches to fix it (4). I did a simple whip stitch, a blanket stitch works beautifully too.

Step 5 - Attach the trunk
Push the trunk into the slot at the bottom of the tree crown (5) and stitch in place (6).

Step 6 - Add pompom and twine

This tree ornament has some structure, yet it's so simple; easier to make than to write about it 🙂 The smallest size is only 5 inches tall when finalized. Need to make them larger? No problem, both free templates come in 3 sizes!
Version 2 (Simplified Tree Ornament) on Pattern Page 9 - Steps
Now this one is the 'last-minute crafting' version, so it's even faster and simpler to diy. Only 3 basic things to do: print the template, stitch main piece part, and stitch the trunk. Let's see:
- Print out the template on page 9 of the PDF file.

- Main piece: Place the two main pieces right sides together and stitch around, leaving a 2-inch or 5cm opening at the bottom (see 1). Then clip corners (see 2), turn right side out (see 3) and stuff using a bit of poly-fill (see 4). Main piece done.

- Trunk: fold the trunk piece in half crosswise and right-sides-together (see 1), then stitch along the sides (see 2). turn right side out (see 3) and the trunk is ready to be 'installed': push the raw edge approximately ⅜" (1 cm) into the opening on the main piece and stitch close through all layers at once. (see 4)

- The rest is the same as above: use thin twine or embroidery thread to stitch a small pompom to the top - and make a loop for hanging. Ta-daa! This was fast!

If you're looking for more holiday patterns, these are super popular right now:
- quilted stocking pattern - free, 2 designs
- 15+ Cutest Diy Christmas Gifts For Kids
- Free Christmas Stocking Pattern
- 20+ Great holiday gift ideas to sew
Make sure to save the project so you can use all the free templates from the series when you need them:

And make sure to download the FREE Homemade Holidays - Free Pattern Bundle from the shop for FREE (no coupon required.) - you'll be able to use all the patterns in there once I've published all the free tutorials that I have planned - all in a few days' time. Make sure you don't miss out on any!
I'll be back soon with even more new tutorials, make sure to subscribe to our mailing list HERE so you don't miss out on the new stuff!
WANT MORE FREE TUTORIALS AND GOODIES?
Get email updates and never miss out on new patterns, printables, and tutorials:
Or …check out the Earwarmer Headband pattern in 8 Sizes in our shop:


Pennski
Love the 3d tree. I am going to use a cinnamon stick for the tree stump.
Damjana
Absolutely! There are so many ways you can embellish these trees, true!